BOTTOM-MOUNT BUILT-IN Refrigerator
Table of Contents/Índice/Table des matières
Table of Contents
Índice
Table DES Matières
Your safety and the safety of others are very important
Refrigerator Safety
Architect Series 36 91.4 cm Models
Models
Classic Series 36 91.4 cm Models
Overlay Series 36 91.4 cm Models
Opening Dimensions
Installation Requirements
Tools and Parts
Location Requirements
Electrical Requirements
Dimension B
Recommended Grounding Method
Model
Tipping Radius
Water Supply Requirements
Side View
Product Dimensions
Top View 36 91.4 cm Models
42 106.7 cm Models
Door Swing Dimensions
Hinge
Cabinetry
Spacer Panel
Panel
90˚ Door Stop Position Hinge
Overlay Panel
90˚ Door Stop Position Hinge
Overlay Series Custom Panels
Custom Overlay Panel Dimensions
Custom Overlay Panels 36 91.4 cm Models
Custom Backer Panels 36 91.4 cm Models
Spacer Panels All models
Piece Overlay Panel Configuration
Top View
Side View
Classic Series Custom Panels 36 91.4 cm Models
Classic and Architect Series Custom Side Panels
Refrigerator and Side Trim Dimensions
Door Panel Routing Requirements
Refrigerator
Overlay Series Custom Side Panels
Recessed Inset Installation Dimensions 36 91.4 cm Models
Side Trim 36 91.4 cm Models Inset Installation Dimensions
Refrigerator 42 106.7 cm Models
Side Trim 42 106.7 cm Models
Unpack the Refrigerator
Installation Instructions
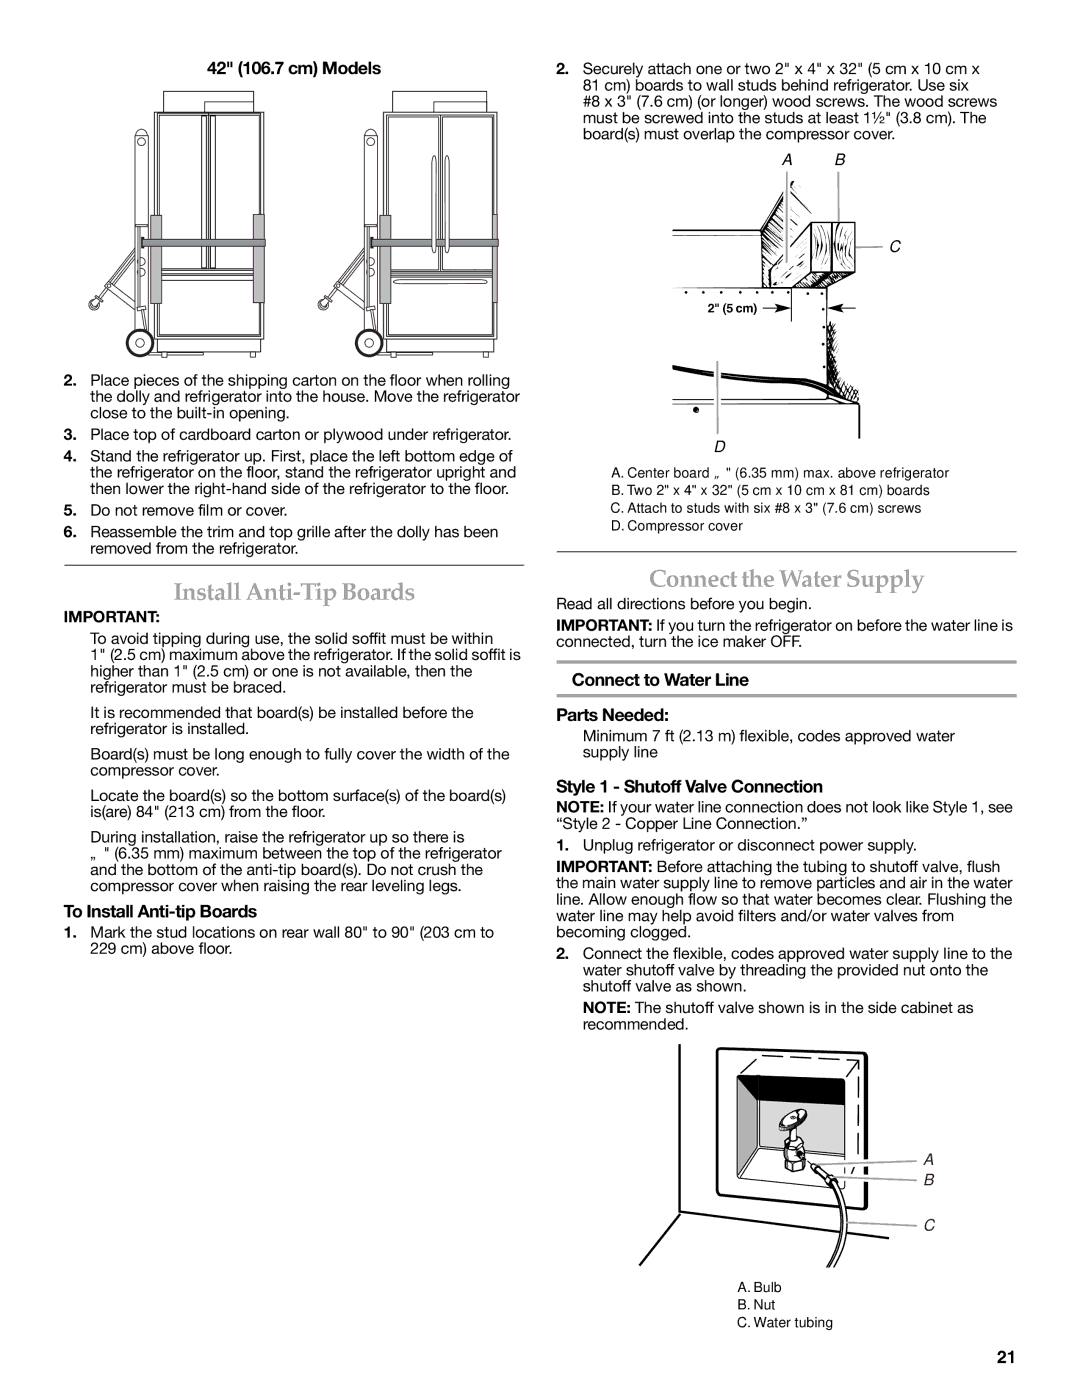
Reduce Tipping Radius
Move the Refrigerator into House
To Install Anti-tip Boards
Install Anti-Tip Boards
Connect the Water Supply
Connect to Water Line Parts Needed
Style 2 Copper Line Connection
Parts Supplied
Connect to Refrigerator
Connections including connections at the valve that leak
Plug in Refrigerator
Move Refrigerator to Final Location
Level and Align Refrigerator
Door Panel Installation
Install Overlay and Classic Series Custom Panels
Adjust Doors
Door Height Adjustment 42 106.7 cm Models
Door Alignment 36 91.4 cm Models
Door Swing Adjustment 36 91.4 cm Models
Hold the door open to a position that is less than
Door stop is located on the top hinge
110
Install Side Panel
Complete Installation
Install Base Grille
Su seguridad y la seguridad de los demás es muy importante
Seguridad DEL Refrigerador
Serie Architect modelos de 36 91,4 cm
Modelos
Serie Classic modelos de 36 91,4 cm
Serie Overlay modelos de 36 91,4 cm
Piezas y herramientas
Requisitos DE Instalación
Requisitos de ubicación
Medidas de la abertura
Requisitos eléctricos
Método de conexión a tierra recomendado
Modelo Ancho a Medida B Como se muestra Anteriormente
Arco de vuelco
Requisitos del suministro de agua
Vista lateral
Medidas del producto
Vista superior Modelos de 36 91,4 cm
Modelos de 42 106,7 cm
Medidas de oscilación de la puerta
Panel espaciador
Armarios Bisagra
Recubierto
Puerta
Posición de retención de la puerta de 90˚ Bisagra Puerta
Soporte
Recubierto Panel espaciador
Paneles a la medida de la Serie Overlay
Dimensiones del panel recubierto a la medida
Paneles espaciadores todos los modelos
Configuración del panel recubierto con puerta de 1 pieza
Vista superior
Vista lateral
Panel de la rejilla superior
Juegos de extensión de agarraderas de la puerta
Paneles del refrigerador y del congelador
Requisitos de contorneado del panel de la rejilla superior
Medidas del refrigerador y del adorno lateral
Requisitos de contorneado de los paneles de la puerta
Panel de la puerta Vista lateral
Agarradera extendida Vista superior
Paneles laterales a la medida para la Serie Overlay
Adorno lateral modelos de 42 106,7 cm
Refrigerador modelos de 42 106,7 cm
Desempaque el refrigerador
Instrucciones DE Instalación
Cómo reducir el arco de vuelco
Cómo hacer entrar el refrigerador en la casa
Conexión del suministro de agua
Cómo instalar los tableros antivuelco
Cómo instalar los tableros antivuelco
Conexión a la línea de agua Piezas necesarias
Estilo 2 Conexión de la tubería de cobre
Conexión al refrigerador
Piezas suministradas
Cómo mover el refrigerador a Su ubicación final
Cómo enchufar el refrigerador
Nivelación y alineamiento del refrigerador
Instalación del panel de la puerta
Paneles
Alineamiento de la puerta modelos de 36 91,4 cm
Cómo ajustar las puertas
Cómo ajustar la altura de la puerta modelos de 42 106,7 cm
Quite la placa de fijación, como se muestra
Cómo instalar el panel lateral
Cómo instalar la rejilla de la base
Cómo terminar la instalación
Clave el borde trasero del panel al tablero de soporte
Votre sécurité et celle des autres est très importante
Sécurité DU Réfrigérateur
Série Architect modèles de 36 91,4 cm
Modèles
Série Overlay modèles de 36 91,4 cm
Série Classic modèles de 36 91,4 cm
Exigences d’emplacement
Exigences ’INSTALLATION
Dimensions de l’ouverture
Outillage et pièces
Spécifications électriques
Méthode recommandée de mise à la terre
Rayon de basculement
Spécifications de l’alimentation en eau
Pression de leau
Alimentation en eau par osmose inverse
Vue latérale
Dimensions du produit
Vue de dessus Modèles de 36 91,4 cm
Modèles de 42 106,7 cm
Dimensions pour le pivotement des portes
Charnière Placard
Panneau
’espacement
Panneau
Séparation
De séparation
Panneaux personnalisés de la série Overlay
Panneaux personnalisés Dimensions
Panneaux de séparation Tous modèles
Configuration pour panneau Overlay monopièce
Vue de dessus
Vue latérale
Ensembles de poignées de porte prolongées
Ensembles de panneaux dorigine
Panneau de la grille supérieure
Panneaux du réfrigérateur et du congélateur
Dimensions du réfrigérateur et des garnitures latérales
Exigences dusinage des panneaux de porte
Panneau de porte Vue latérale
Panneaux latéraux personnalisés de La série Overlay
Garnitures latérales modèles de 42 106,7 cm
Réfrigérateur modèles de 42 106,7 cm
Déballage du réfrigérateur
Instructions D’INSTALLATION
Réduction du rayon de basculement
Faire entrer le réfrigérateur dans le domicile
Installation des planches antibasculement
Installation de planches antibasculement
Raccordement à lalimentation en eau
Raccordement à la canalisation deau Pièces nécessaires
Raccordement au réfrigérateur
Pièces fournies
Style 2 Raccordement de la canalisation d’eau en cuivre
Déplacement du réfrigérateur à Lemplacement final
Brancher le réfrigérateur
Réglage de laplomb et alignement Du réfrigérateur
Installation des panneaux de porte
Panneaux
Ajustement de la des portes
Alignement des portes modèles de 36 91,4 cm
Réglage de la hauteur de la porte modèles de 42 106,7 cm
Installation du panneau latéral
Achever l’installation
Installation de la grille de la base
Clouer la rive arrière du panneau sur la planche dappui
W10379132A

