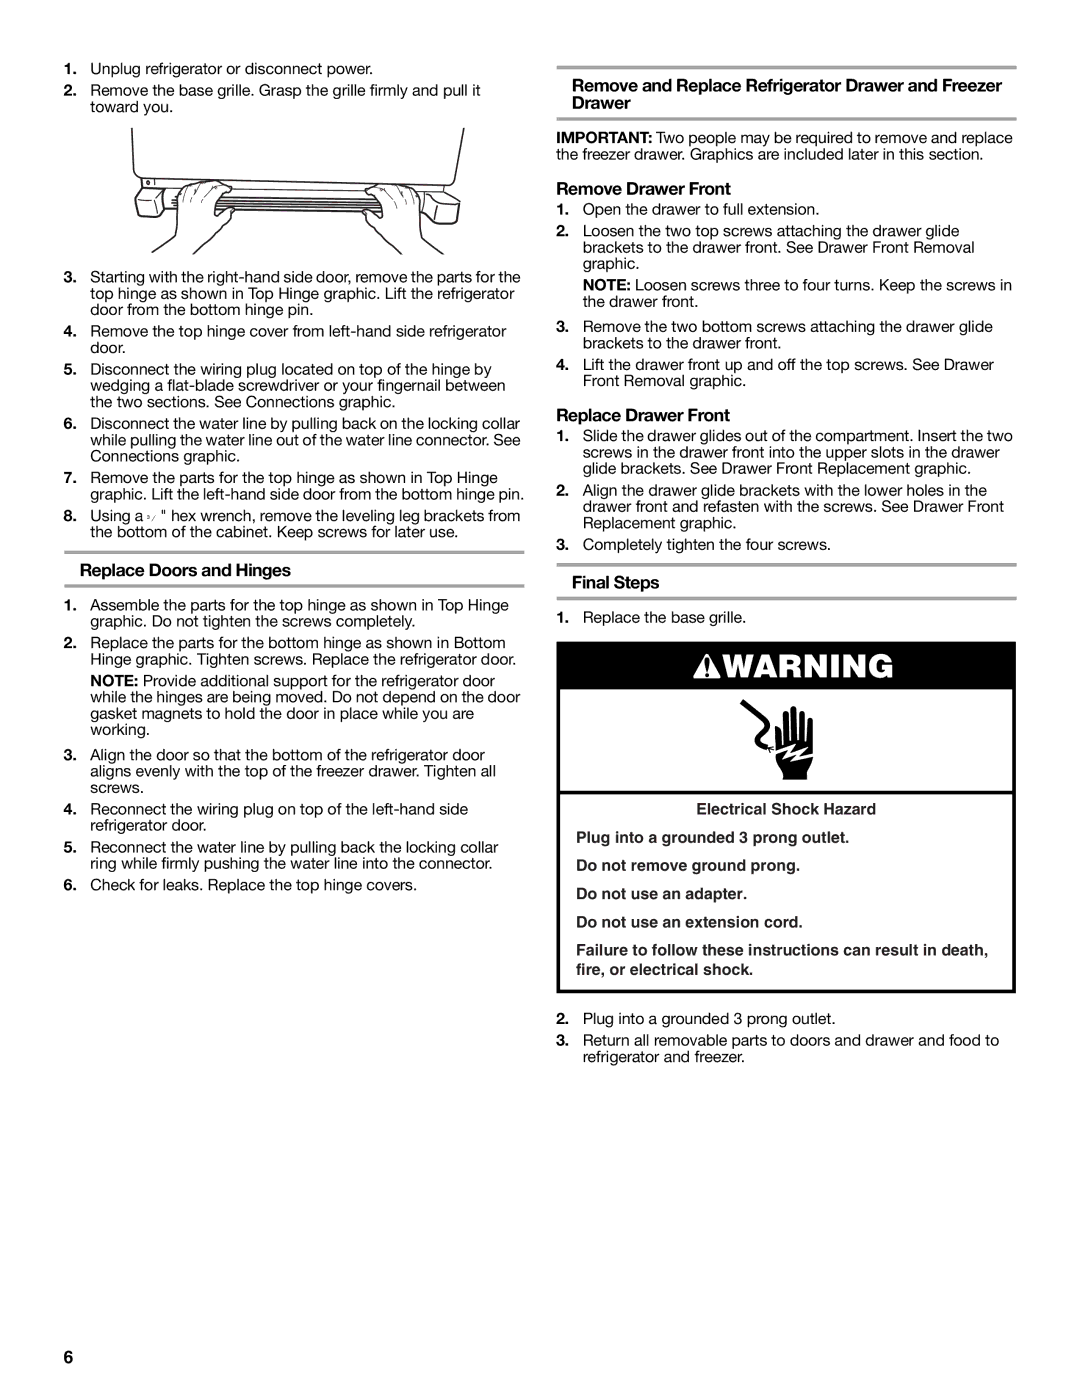
1.Unplug refrigerator or disconnect power.

2.Remove the base grille. Grasp the grille firmly and pull it toward you.

3.Starting with the right-hand side door, remove the parts for the top hinge as shown in Top Hinge graphic. Lift the refrigerator door from the bottom hinge pin.

4.Remove the top hinge cover from left-hand side refrigerator door.

5.Disconnect the wiring plug located on top of the hinge by wedging a flat-blade screwdriver or your fingernail between the two sections. See Connections graphic.

6.Disconnect the water line by pulling back on the locking collar while pulling the water line out of the water line connector. See Connections graphic.

7.Remove the parts for the top hinge as shown in Top Hinge graphic. Lift the left-hand side door from the bottom hinge pin.

8.Using a ³⁄₈" hex wrench, remove the leveling leg brackets from the bottom of the cabinet. Keep screws for later use.

Replace Doors and Hinges

1.Assemble the parts for the top hinge as shown in Top Hinge graphic. Do not tighten the screws completely.

2.Replace the parts for the bottom hinge as shown in Bottom Hinge graphic. Tighten screws. Replace the refrigerator door.

NOTE: Provide additional support for the refrigerator door while the hinges are being moved. Do not depend on the door gasket magnets to hold the door in place while you are working.

3.Align the door so that the bottom of the refrigerator door aligns evenly with the top of the freezer drawer. Tighten all screws.

4.Reconnect the wiring plug on top of the left-hand side refrigerator door.

5.Reconnect the water line by pulling back the locking collar ring while firmly pushing the water line into the connector.

6.Check for leaks. Replace the top hinge covers.

Remove and Replace Refrigerator Drawer and Freezer Drawer

IMPORTANT: Two people may be required to remove and replace the freezer drawer. Graphics are included later in this section.

Remove Drawer Front

1.Open the drawer to full extension.

2.Loosen the two top screws attaching the drawer glide brackets to the drawer front. See Drawer Front Removal graphic.

NOTE: Loosen screws three to four turns. Keep the screws in the drawer front.

3.Remove the two bottom screws attaching the drawer glide brackets to the drawer front.

4.Lift the drawer front up and off the top screws. See Drawer Front Removal graphic.

Replace Drawer Front

1.Slide the drawer glides out of the compartment. Insert the two screws in the drawer front into the upper slots in the drawer glide brackets. See Drawer Front Replacement graphic.

2.Align the drawer glide brackets with the lower holes in the drawer front and refasten with the screws. See Drawer Front Replacement graphic.

3.Completely tighten the four screws.

Final Steps

1.Replace the base grille.

WARNING

Electrical Shock Hazard

Plug into a grounded 3 prong outlet.

Do not remove ground prong.

Do not use an adapter.

Do not use an extension cord.

Failure to follow these instructions can result in death, fire, or electrical shock.

2.Plug into a grounded 3 prong outlet.

3.Return all removable parts to doors and drawer and food to refrigerator and freezer.

6

Page 6
Image 6
KitchenAid W10390410A Replace Doors and Hinges, Remove and Replace Refrigerator Drawer and Freezer Drawer, Final Steps

KFXS25RYWH, KFXS25RYMS, W10390410A specifications

The KitchenAid KFXS25RYWH is a standout refrigerator that combines style, innovative technology, and practical functionality, making it a must-have for any modern kitchen. With its sleek design and pristine white finish, this refrigerator not only complements your kitchen decor but also serves as a hub for all your refrigeration needs.

One of the main features of the KFXS25RYWH is its impressive capacity. With 25 cubic feet of storage space, it provides ample room for groceries, frozen foods, and beverages. The refrigerator is designed with adjustable shelves, allowing you to customize the interior layout to accommodate larger items, such as tall bottles or bulky platters. Additionally, it includes a gallon door bin, ensuring that your favorite beverages are easily accessible.

The refrigerator is equipped with a Dual Cooling System, which maintains optimal humidity levels in both the fresh food and freezer compartments. This technology preserves the freshness of your food items and reduces the risk of odor transfer between the two spaces. The temperature control is precise, enabling you to set the ideal conditions for various types of food.

Another remarkable feature of the KFXS25RYWH is its advanced water filtration system. The exterior water and ice dispenser offers filtered water on demand, providing you with chilled, clean drinking water without the hassle of refilling pitcher. The filtered ice maker also keeps your beverages cool and refreshing, making it a convenient addition for entertaining guests.

For those who prioritize energy efficiency, this refrigerator comes with an Energy Star certification, ensuring that it operates with lower energy consumption without compromising performance. This not only helps reduce your energy bills but also contributes positively to the environment.

In addition to its impressive functional features, the KitchenAid KFXS25RYWH boasts a sleek ergonomic design. The exterior handles are contoured for comfortable grip and ease of use, while the interior LED lighting illuminates every corner of the shelves, allowing you to easily find what you need, even in low light.

Overall, the KitchenAid KFXS25RYWH is an ideal choice for consumers seeking a refrigerator that merges aesthetic appeal with high-end technology and practicality. With its array of features designed to enhance user experience, it sets a new standard in kitchen appliances, making everyday food storage convenient and efficient.