16

Optimizing video images

Your projector has been factory optimized for very good performance no matter what the source. However, if you wish to make further changes you can optimize the image using onscreen menus. For general information on using the menus, see page 16.

Adjust the Keystone, Contrast, Brightness, Color, or Tint in the Picture menu (page 17).

Select a Sharpness setting (page 18 ).

Use the Color Control to adjust the color gain and offset (page 19).

Adjust the Color Temperature. Select a listed value (page 19).

Turn on Overscan to remove noise on the edges of the video image (page 19).

Change the Aspect ratio (page17). Aspect ratio is the ratio of the image width to image height. TV screens are usually 1.33:1, also known as 4:3. HDTV and most DVDs are 1.78:1, or 16:9 (the projector’s default). Choose the option that best fits your input source in the menus, or press the

Resize button on the remote to cycle through the options. See page15.

Select a specific Color Space. See page 19.

Select a different Video Standard. Auto tries to determine the standard of the incoming video.

Select a different standard if necessary. See page 19.

Make sure your DVD player is set for a 16:9 television. See your DVD player’s user’s guide for instructions.

Customizing the projector

You can customize the projector for your specific setup and needs. See page 19 to page 21 for details on these features.

For rear projection, turn rear mode on in the Settings>System menu.

For ceiling mounted projection, turn ceiling mode on in the Settings> System menu.

Turn the projector’s display messages on and off.

Turn on power saving features.

Specify blank screen colors and start up logos.

Specify the language viewed on the menus.

Save the settings for the active source as a preset.

Using the menus


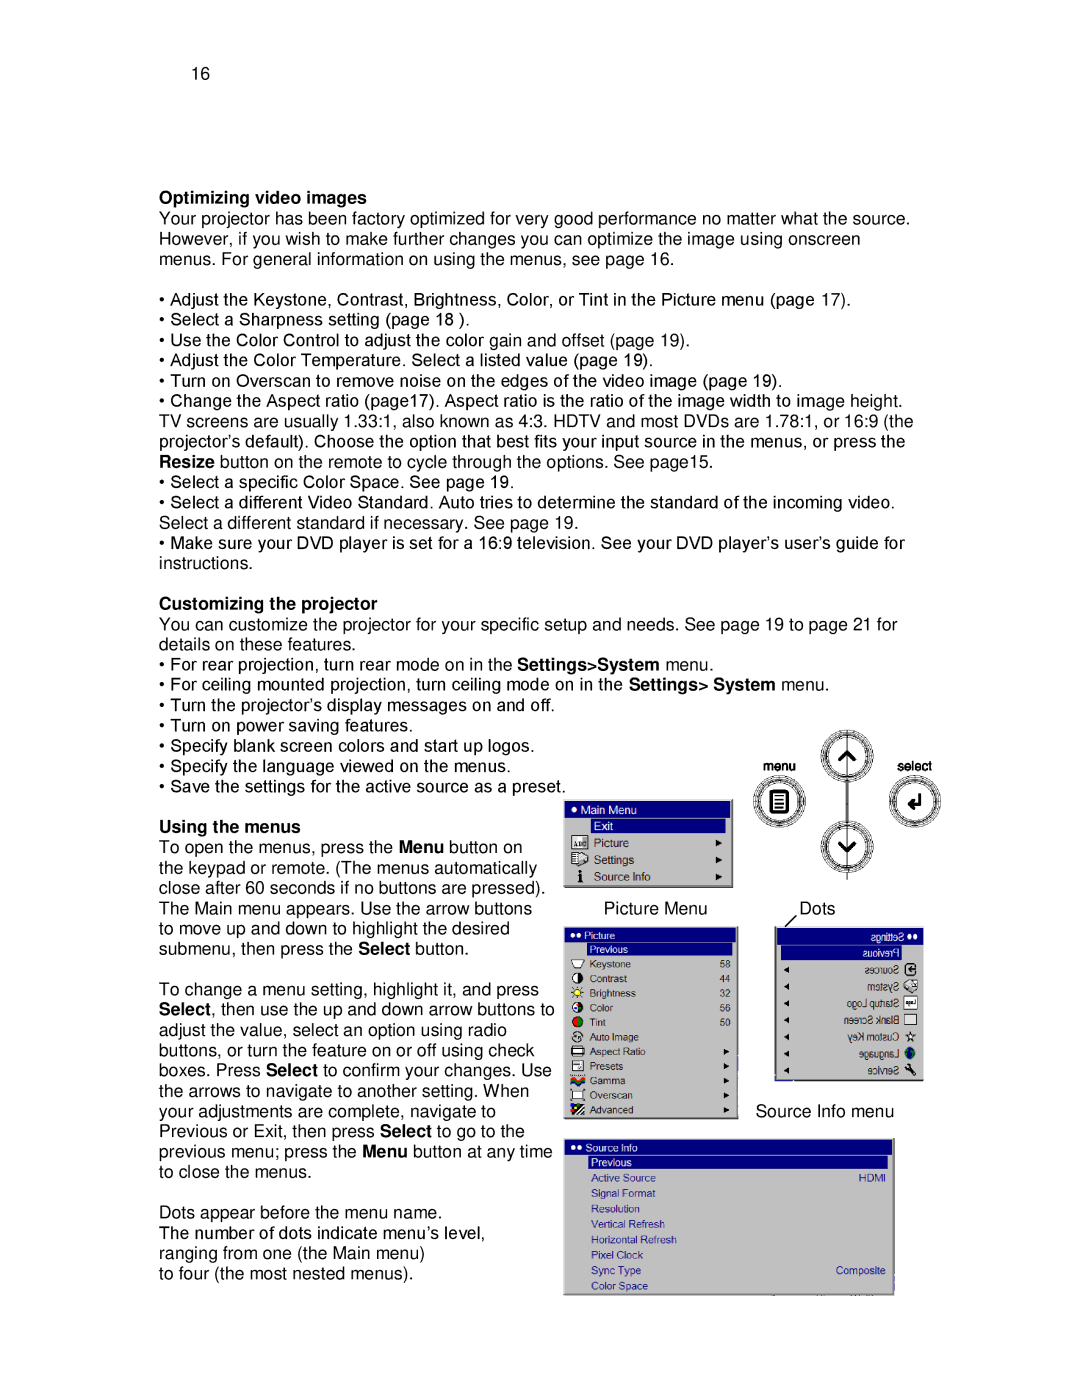
To open the menus, press the Menu button on


the keypad or remote. (The menus automatically


close after 60 seconds if no buttons are pressed).


The Main menu appears. Use the arrow buttons

Picture Menu

Dots

to move up and down to highlight the desired


submenu, then press the Select button.


To change a menu setting, highlight it, and press Select, then use the up and down arrow buttons to adjust the value, select an option using radio buttons, or turn the feature on or off using check boxes. Press Select to confirm your changes. Use the arrows to navigate to another setting. When

your adjustments are complete, navigate toSource Info menu Previous or Exit, then press Select to go to the

previous menu; press the Menu button at any time to close the menus.

Dots appear before the menu name.

The number of dots indicate menu’s level, ranging from one (the Main menu)

to four (the most nested menus).

Page 16
Image 16
Knoll Systems HD108, HD290, HD178 user manual Optimizing video images, Customizing the projector, Using the menus

HD178, HD108, HD290 specifications

Knoll Systems has made a notable impact in the realm of audio and visual solutions, particularly with its innovative HD series. Among the standout products are the HD290, HD178, and HD108 models, renowned for their cutting-edge features and advanced technologies tailored to meet the diverse needs of both consumers and professional environments.

The HD290 is one of Knoll Systems' flagship models, boasting an impressive high-definition display that offers exceptional clarity and vibrancy. With a resolution that exceeds standard HD, the HD290 provides stunning visuals, making it perfect for presentations, gaming, and home theater applications. Equipped with state-of-the-art processing capabilities, it ensures smooth playback of high-resolution content while supporting a variety of input sources, including HDMI, USB, and wireless connections. Its robust audio system further enhances the viewing experience, delivering crisp sound quality that rivals dedicated sound systems.

The HD178 model, while slightly more compact, does not compromise on performance. It features a versatile design that makes it suitable for both home use and professional presentations. The HD178 offers a balanced mix of performance and affordability, making it an ideal choice for budget-conscious consumers seeking quality. Its key features include a full HD display, multiple connectivity options, and energy-efficient technology that not only saves on power costs but also prolongs the lifespan of the device. Additionally, it comes equipped with smart technology that adjusts display settings based on the surrounding ambient light, ensuring optimal viewing conditions at all times.

The HD108 model echoes many of the excellent features found in its siblings, providing a more streamlined option for those who seek simplicity without sacrificing quality. With a focus on user-friendliness, the HD108 offers straightforward installation and operation, making it accessible for users of all experience levels. It showcases a vibrant display and rich color reproduction, ensuring that content appears lively and engaging. The compact design enables it to fit seamlessly into any space, whether it's a small office, classroom, or living room.

In summary, the Knoll Systems HD290, HD178, and HD108 each offer unique features that cater to a range of requirements, from home entertainment to professional presentations. The combination of high-definition technology, versatile connectivity options, and user-friendly design makes these models a smart choice for anyone looking to enhance their audio-visual experience. Each model embodies Knoll Systems' commitment to quality and innovation, ensuring that they remain at the forefront of the market in providing unparalleled visual solutions.