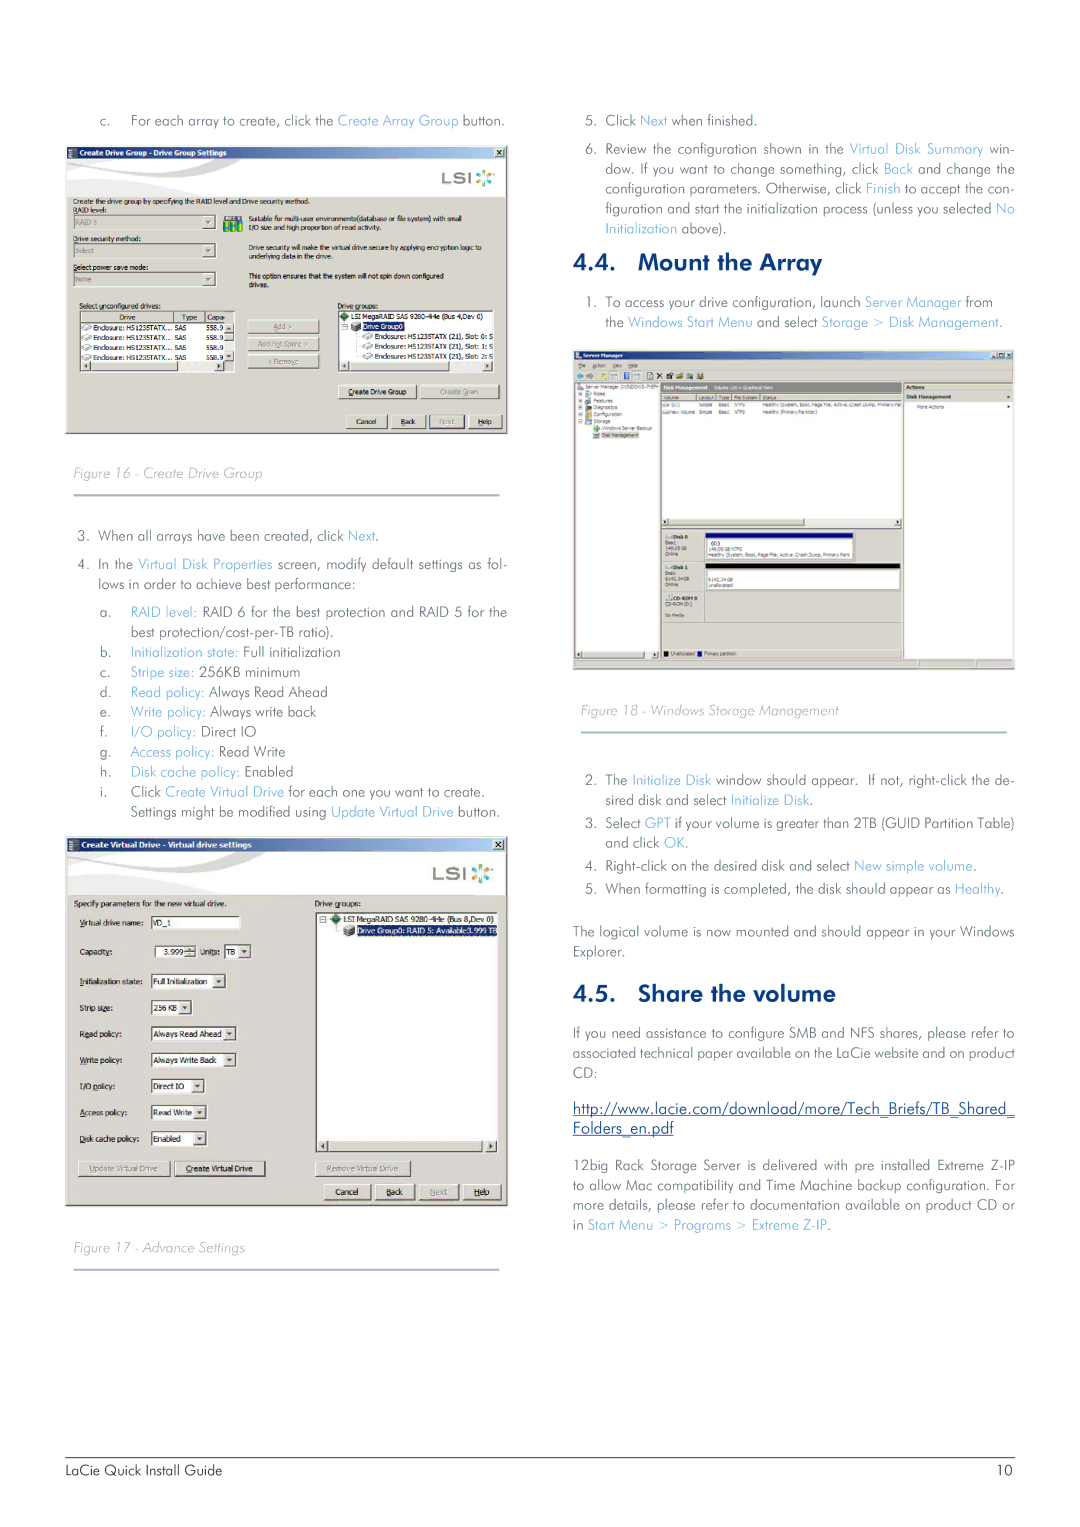
c.For each array to create, click the Create Array Group button.
5.Click Next when finished.
6.Review the configuration shown in the Virtual Disk Summary win- dow. If you want to change something, click Back and change the configuration parameters. Otherwise, click Finish to accept the con- figuration and start the initialization process (unless you selected No Initialization above).
4.4. Mount the Array
1.To access your drive configuration, launch Server Manager from the Windows Start Menu and select Storage > Disk Management.
Figure 16 - Create Drive Group
3.When all arrays have been created, click Next.
4.In the Virtual Disk Properties screen, modify default settings as fol- lows in order to achieve best performance:
a.RAID level: RAID 6 for the best protection and RAID 5 for the best
b.Initialization state: Full initialization
c.Stripe size: 256KB minimum
d.Read policy: Always Read Ahead
e.Write policy: Always write back
f.I/O policy: Direct IO
g.Access policy: Read Write
h.Disk cache policy: Enabled
i.Click Create Virtual Drive for each one you want to create. Settings might be modified using Update Virtual Drive button.
Figure 17 - Advance Settings
Figure 18 - Windows Storage Management
2.The Initialize Disk window should appear. If not,
3.Select GPT if your volume is greater than 2TB (GUID Partition Table) and click OK.
4.
5.When formatting is completed, the disk should appear as Healthy.
The logical volume is now mounted and should appear in your Windows Explorer.
4.5. Share the volume
If you need assistance to configure SMB and NFS shares, please refer to associated technical paper available on the LaCie website and on product CD:
http://www.lacie.com/download/more/Tech_Briefs/TB_Shared_ Folders_en.pdf
12big Rack Storage Server is delivered with pre installed Extreme
LaCie Quick Install Guide | 10 |