3.5. Replacing a Fan
IMPORTANT INFO: The cover must only be opened by service person- nel.
1.Release the enclosure top cover by turning the lock mechanism to the ‘Unlocked’ position and slide the cover back until it stops (see Figure 5).
Figure 5: Removing the Enclosure Cover
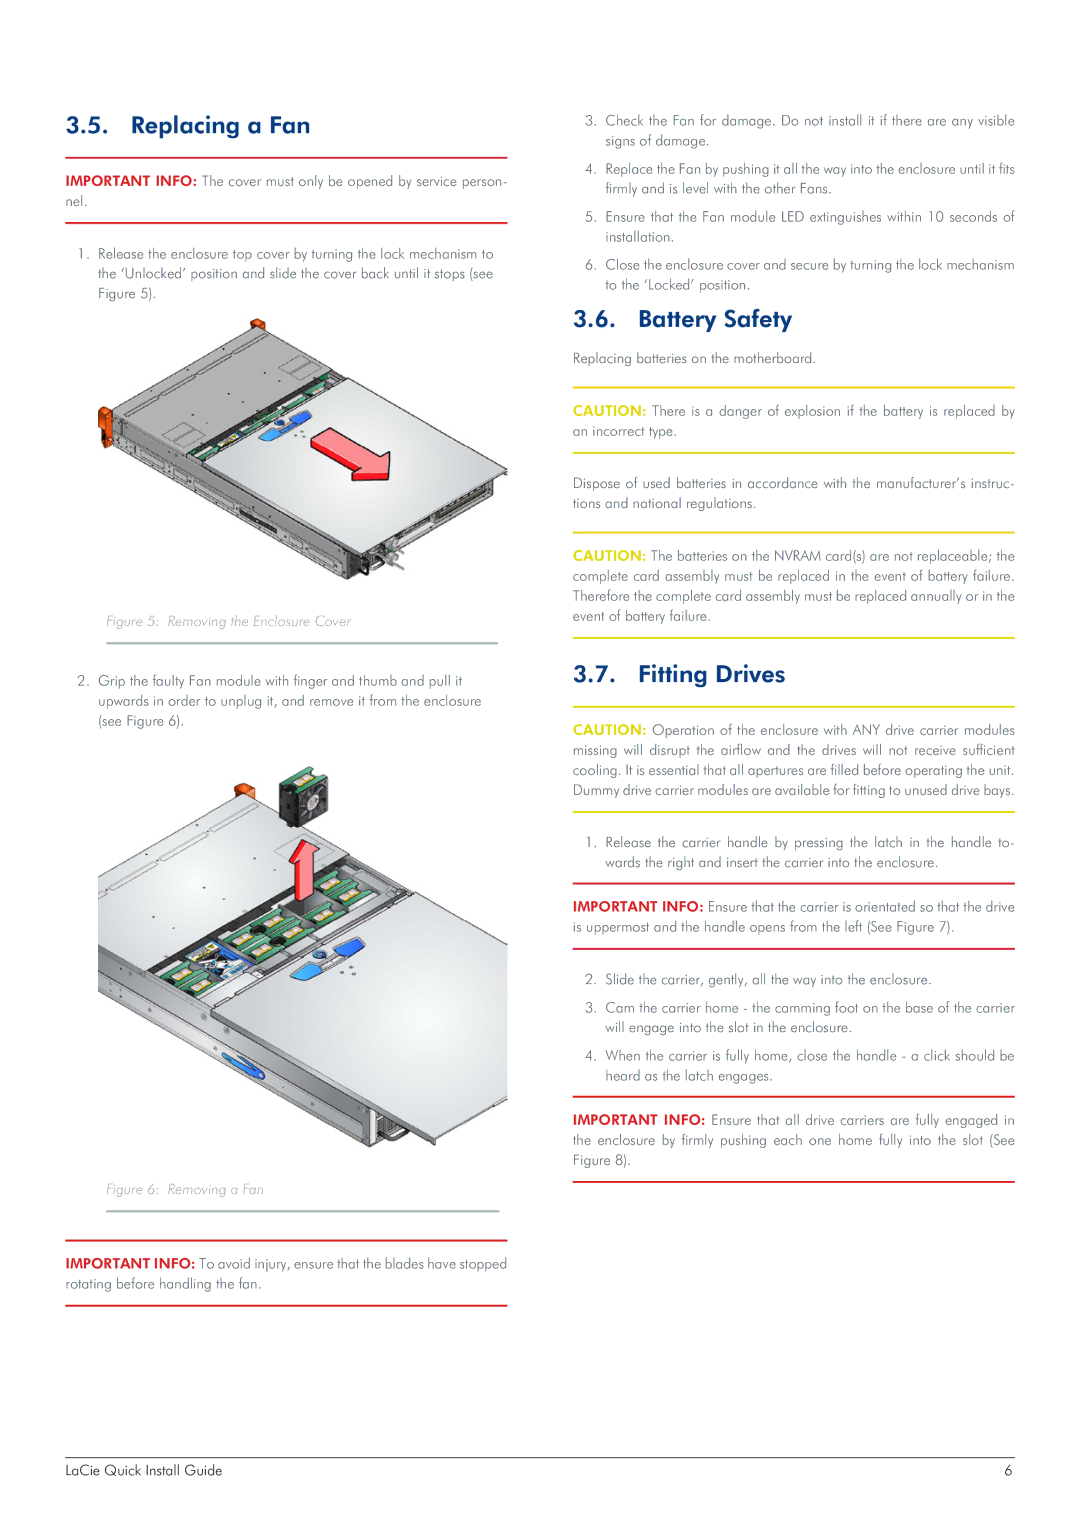
2.Grip the faulty Fan module with finger and thumb and pull it upwards in order to unplug it, and remove it from the enclosure (see Figure 6).
Figure 6: Removing a Fan
IMPORTANT INFO: To avoid injury, ensure that the blades have stopped rotating before handling the fan.
3.Check the Fan for damage. Do not install it if there are any visible signs of damage.
4.Replace the Fan by pushing it all the way into the enclosure until it fits firmly and is level with the other Fans.
5.Ensure that the Fan module LED extinguishes within 10 seconds of installation.
6.Close the enclosure cover and secure by turning the lock mechanism to the ‘Locked’ position.
3.6. Battery Safety
Replacing batteries on the motherboard.
CAUTION: There is a danger of explosion if the battery is replaced by an incorrect type.
Dispose of used batteries in accordance with the manufacturer’s instruc- tions and national regulations.
CAUTION: The batteries on the NVRAM card(s) are not replaceable; the complete card assembly must be replaced in the event of battery failure. Therefore the complete card assembly must be replaced annually or in the event of battery failure.
3.7. Fitting Drives
CAUTION: Operation of the enclosure with ANY drive carrier modules missing will disrupt the airflow and the drives will not receive sufficient cooling. It is essential that all apertures are filled before operating the unit. Dummy drive carrier modules are available for fitting to unused drive bays.
1.Release the carrier handle by pressing the latch in the handle to- wards the right and insert the carrier into the enclosure.
IMPORTANT INFO: Ensure that the carrier is orientated so that the drive is uppermost and the handle opens from the left (See Figure 7).
2.Slide the carrier, gently, all the way into the enclosure.
3.Cam the carrier home - the camming foot on the base of the carrier will engage into the slot in the enclosure.
4.When the carrier is fully home, close the handle - a click should be heard as the latch engages.
IMPORTANT INFO: Ensure that all drive carriers are fully engaged in the enclosure by firmly pushing each one home fully into the slot (See Figure 8).
LaCie Quick Install Guide | 6 |