Land PrideTable of Contents
Section 1: Assembly and
3.Raise center deck up just enough to insert gauge wheel spindles into the carrier frame spindle support tubes as shown in Figure
4.Secure gauge wheels with linch pins (#7) supplied attached to the support loop with plastic ties. Insert linch pins from the front and flip clasp shut over the spindles towards the back. Attaching linch pin in this manner will prevent vegetation from catching on the clasp and flipping it open while traveling forward.
26881 |
Center Deck Rear Gauge Wheels
Figure
Refer to Figure 1-7:
5.Lower all mower decks fully down. Decks should be supported by the gauge wheels with gauge wheels on the ground.
6.Remove bolts (#5) from the remaining gauge wheel spindles and replace with remaining linch pins (#7). Insert linch pins from the front and flip clasp shut over the spindles towards the back.
Bleeding Hydraulics
Refer to Figure 1-8:
!DANGER!
Hydraulic fluid under pressure can penetrate skin. Wear protective gloves and safety glasses or goggles when working with hydraulic systems. Use a piece of cardboard or wood rather than hands when searching for hydraulic leaks. If hydraulic fluid is injected into the skin, it must be treated by a doctor within a few hours or gangrene may result.
Hydraulic hoses and cylinders are supplied fully charged with oil from the factory and should not require bleeding. If any of the decks raise or lower in a jerking motion, then bleed the hydraulics as follows:
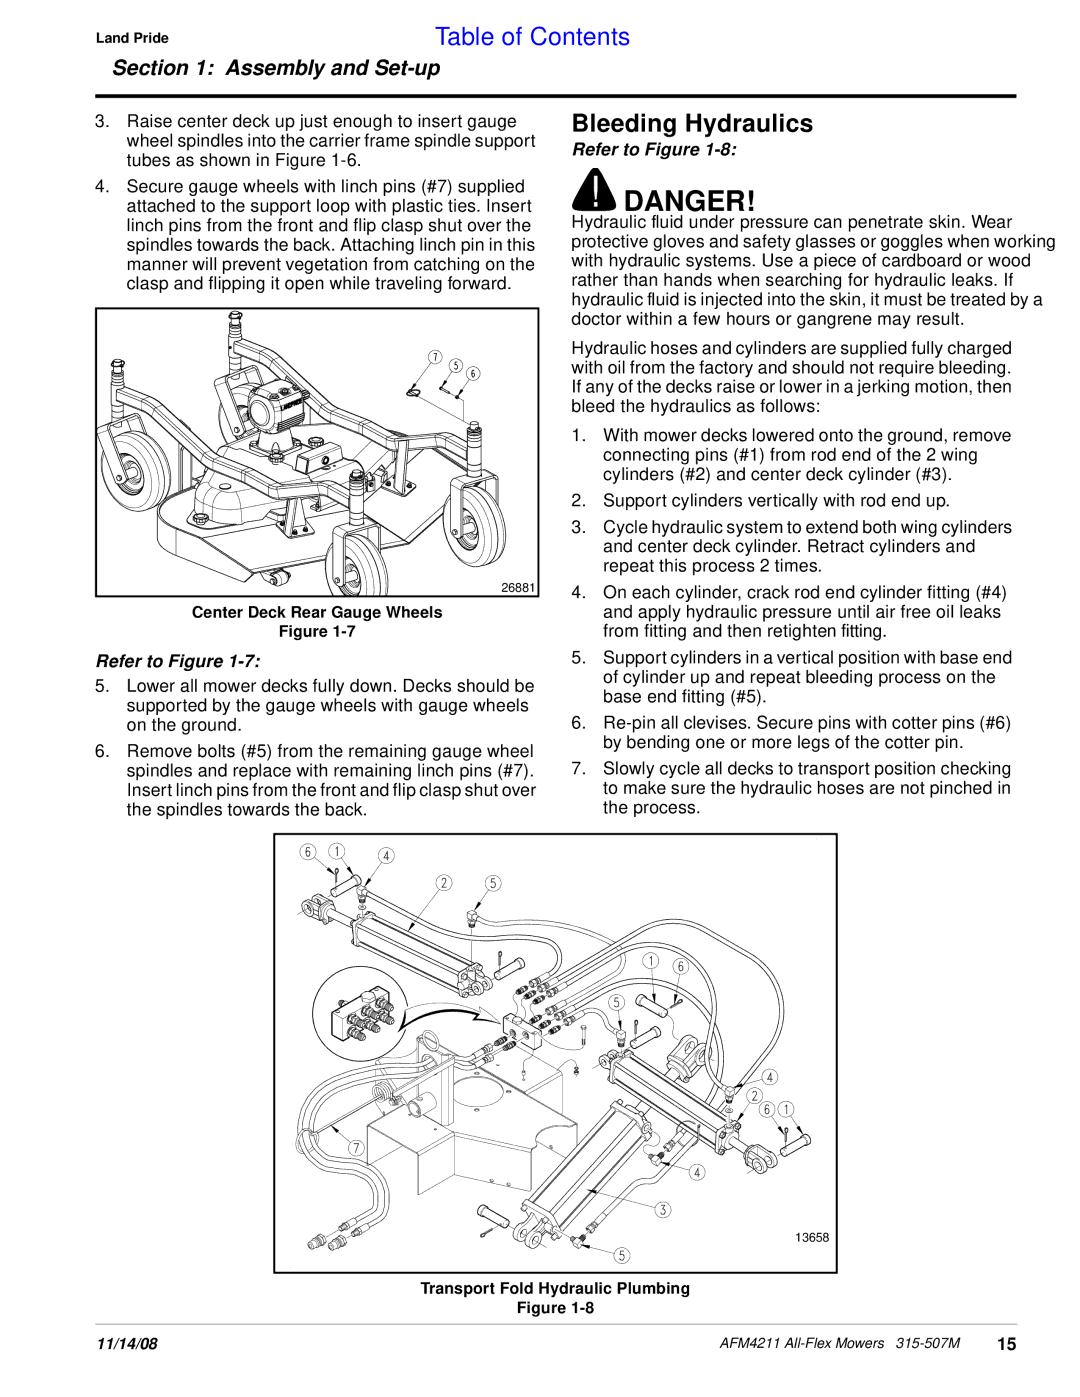
1.With mower decks lowered onto the ground, remove connecting pins (#1) from rod end of the 2 wing cylinders (#2) and center deck cylinder (#3).
2.Support cylinders vertically with rod end up.
3.Cycle hydraulic system to extend both wing cylinders and center deck cylinder. Retract cylinders and repeat this process 2 times.
4.On each cylinder, crack rod end cylinder fitting (#4) and apply hydraulic pressure until air free oil leaks from fitting and then retighten fitting.
5.Support cylinders in a vertical position with base end of cylinder up and repeat bleeding process on the base end fitting (#5).
6.
7.Slowly cycle all decks to transport position checking to make sure the hydraulic hoses are not pinched in the process.
13658 |
Transport Fold Hydraulic Plumbing
Figure
11/14/08 | AFM4211 | 15 |