Table of Contents
Section 5: Maintenance and Lubrication
Land Pride
Type B Clutch
Clutch Run-In
Refer to Figure 5-10:
1.Loosen counterclockwise all 8 hex head socket bolts uniformly 6 full turns.
2.Cycle clutch on and off 5 or 6 times (15 seconds on and 15 seconds off) with the engine operating at half throttle. Disengage driveline, shut off tractor and remove key. Wait for all components to stop before dismounting from tractor.
3.Tighten hex head socket bolts fully back. Clutch is ready for use
4.The clutch should be checked during the first hour of cutting and periodically each week.
Hex Head
Socket Bolts
21270
Type B Clutch Run-In
Figure
Disassembly and Assembly
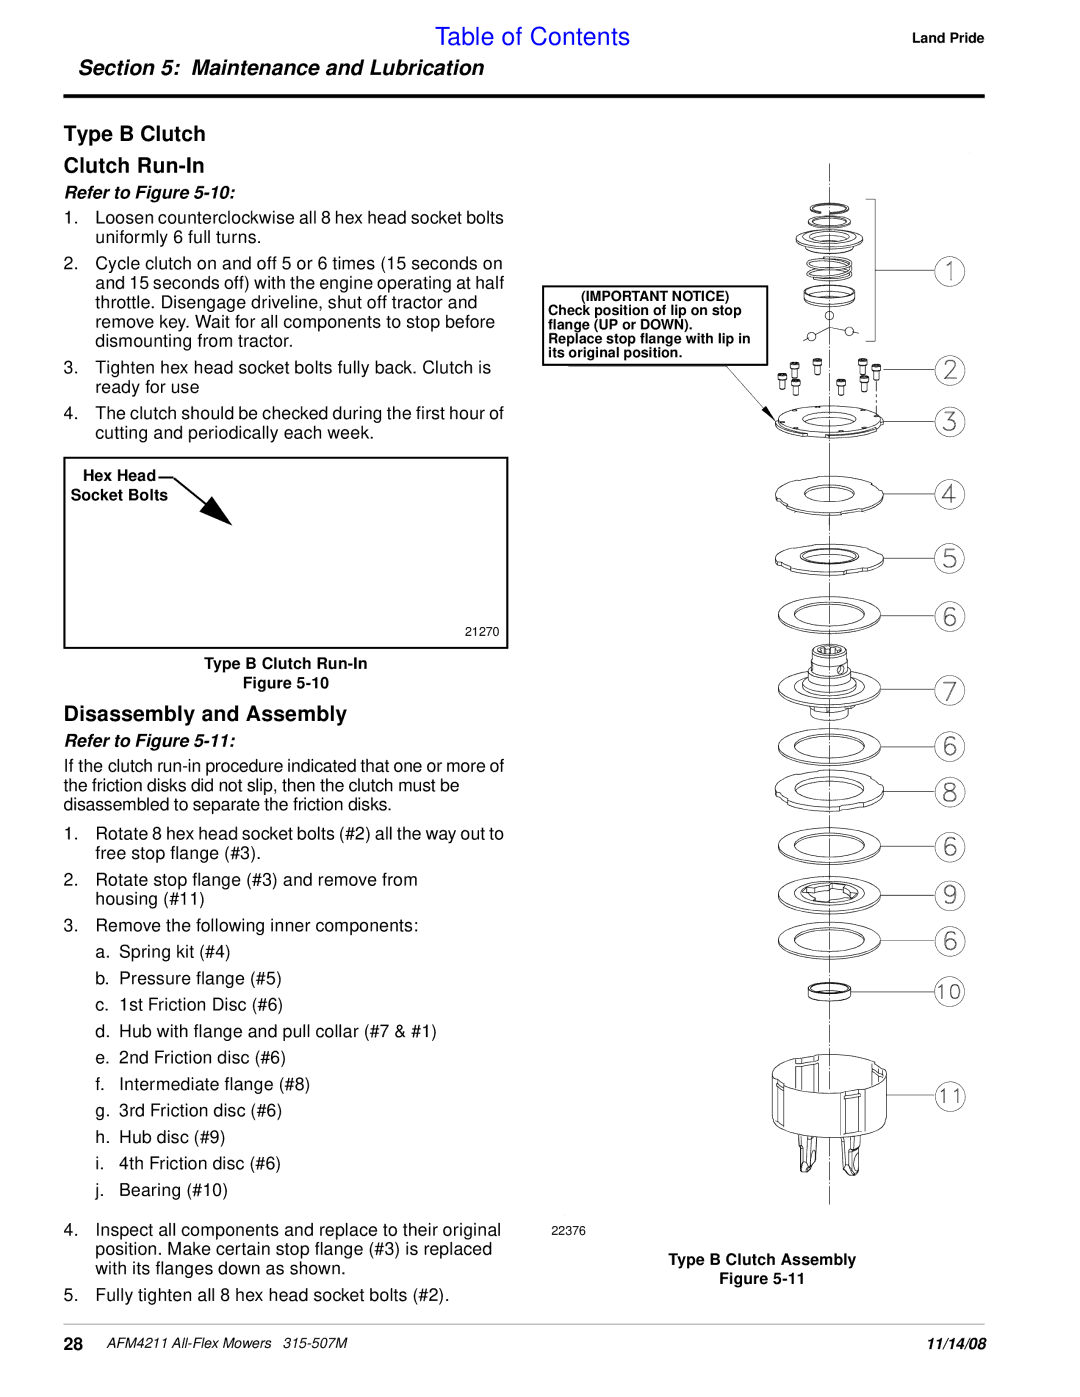
Refer to Figure 5-11:
If the clutch
1.Rotate 8 hex head socket bolts (#2) all the way out to free stop flange (#3).
2.Rotate stop flange (#3) and remove from housing (#11)
3.Remove the following inner components:
a.Spring kit (#4)
b.Pressure flange (#5)
c.1st Friction Disc (#6)
d.Hub with flange and pull collar (#7 & #1)
e.2nd Friction disc (#6)
f.Intermediate flange (#8)
g.3rd Friction disc (#6)
h.Hub disc (#9)
i.4th Friction disc (#6)
j.Bearing (#10)
4.Inspect all components and replace to their original position. Make certain stop flange (#3) is replaced with its flanges down as shown.
(IMPORTANT NOTICE) Check position of lip on stop flange (UP or DOWN). Replace stop flange with lip in its original position.
22376
Type B Clutch Assembly
Figure
5. Fully tighten all 8 hex head socket bolts (#2).
28 AFM4211 | 11/14/08 |