
Parallel Arm Rotary Cutter, RCPM2560, RCP2560 specifications
The Land Pride RCP2560 and RCPM2560 Parallel Arm Rotary Cutters represent a significant advancement in agricultural and landscaping equipment, designed to efficiently tackle a variety of mowing tasks. These rotary cutters are ideal for maintaining pastures, roadsides, and large fields while offering enhanced durability and performance.One of the main features of the RCP2560 and RCPM2560 is their robust construction. Built with a heavy-duty frame and steel components, these cutters are engineered to withstand the rigors of tough mowing conditions. They feature a fully welded deck to ensure strength and longevity, providing operators with confidence during operation.
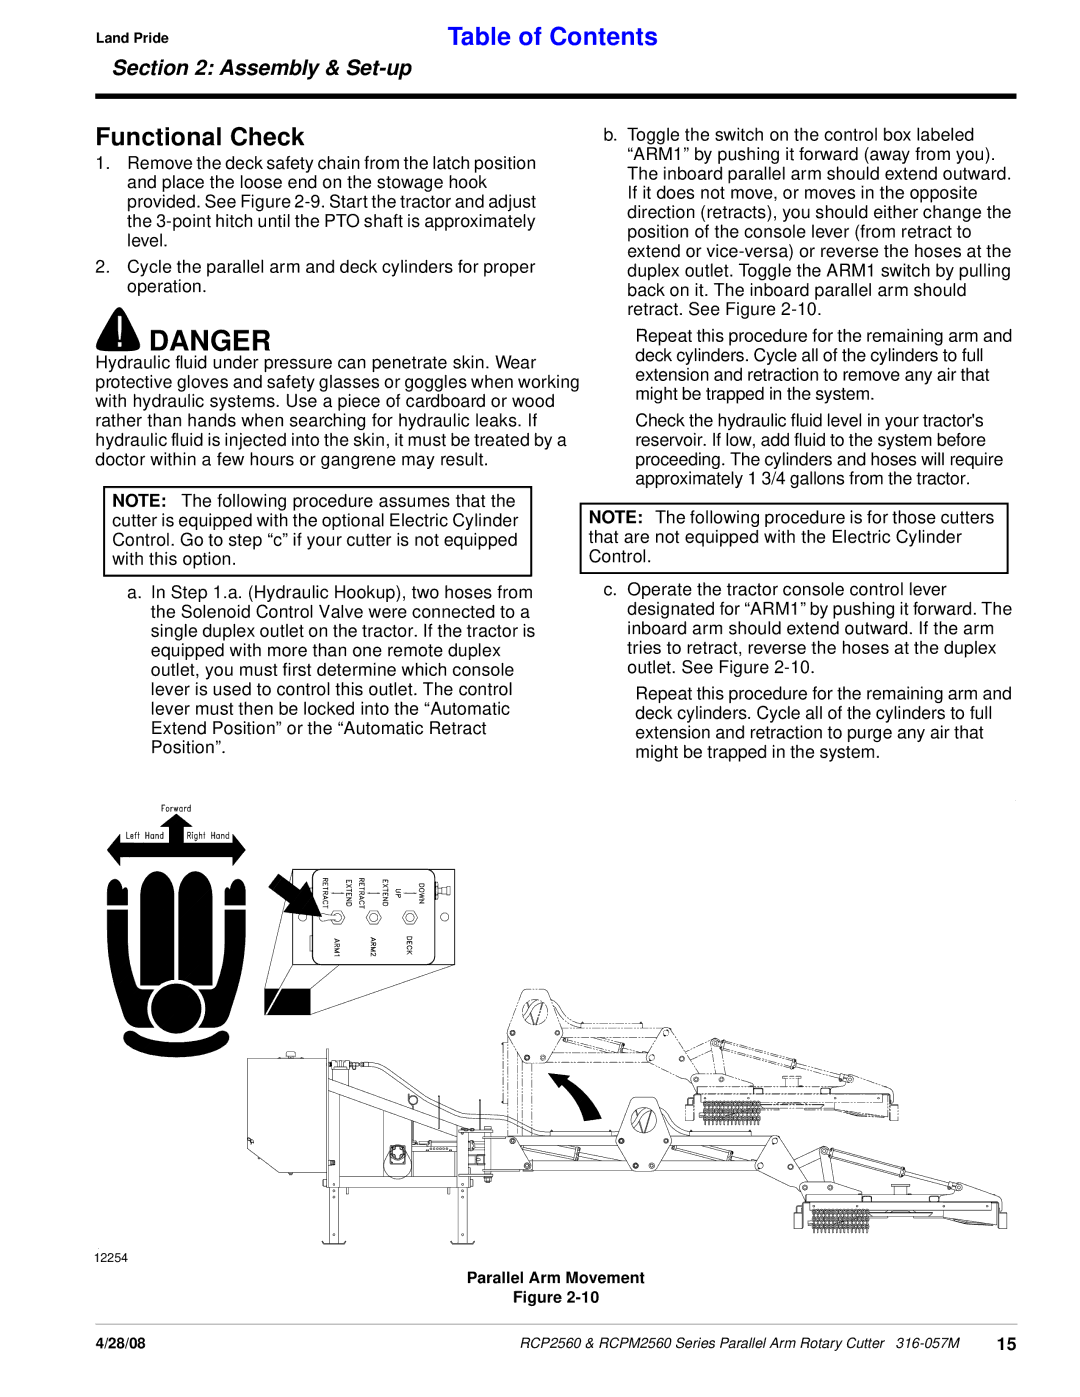
A key characteristic of the Parallel Arm design is the ability to deliver consistent cutting performance across varying terrains. This unique design allows the cutter to follow the ground contour closely, ensuring that the blades maintain an even cutting height. This is especially beneficial when navigating uneven or hilly landscapes, delivering a professional-quality finish.
The RCP2560 and RCPM2560 come equipped with high-capacity cutter blades designed for efficient grass and brush cutting. These blades are strategically angled to optimize cutting efficiency while minimizing power consumption. Users can enjoy reduced maintenance costs and longer service intervals because of the durable, replaceable blades.
The technology behind these rotary cutters includes a quick-attach mounting system, making it easier for operators to connect and disconnect the mower from their tractors. This feature saves time and enhances productivity, allowing for quicker transitions between tasks.
Additionally, the RCPM2560 model offers a medium-duty option, catering to operators looking for versatility in their cutting operations. Both models come with adjustable side skids that enable operators to modify the cutting height easily, further enhancing their adaptability for different mowing applications.
Safety is paramount with Land Pride's rotary cutters, which are designed with user-friendly controls and a stable operating design. Optional safety features, such as a chain guard, are available to protect against flying debris, underscoring the focus on operator safety.
In summary, the Land Pride RCP2560 and RCPM2560 Parallel Arm Rotary Cutters bring together durability, efficiency, and user-friendly features to transform landscaping and agricultural mowing tasks. With their advanced technologies and robust construction, these rotary cutters are a valuable investment for any operator looking to achieve superior cutting performance.