
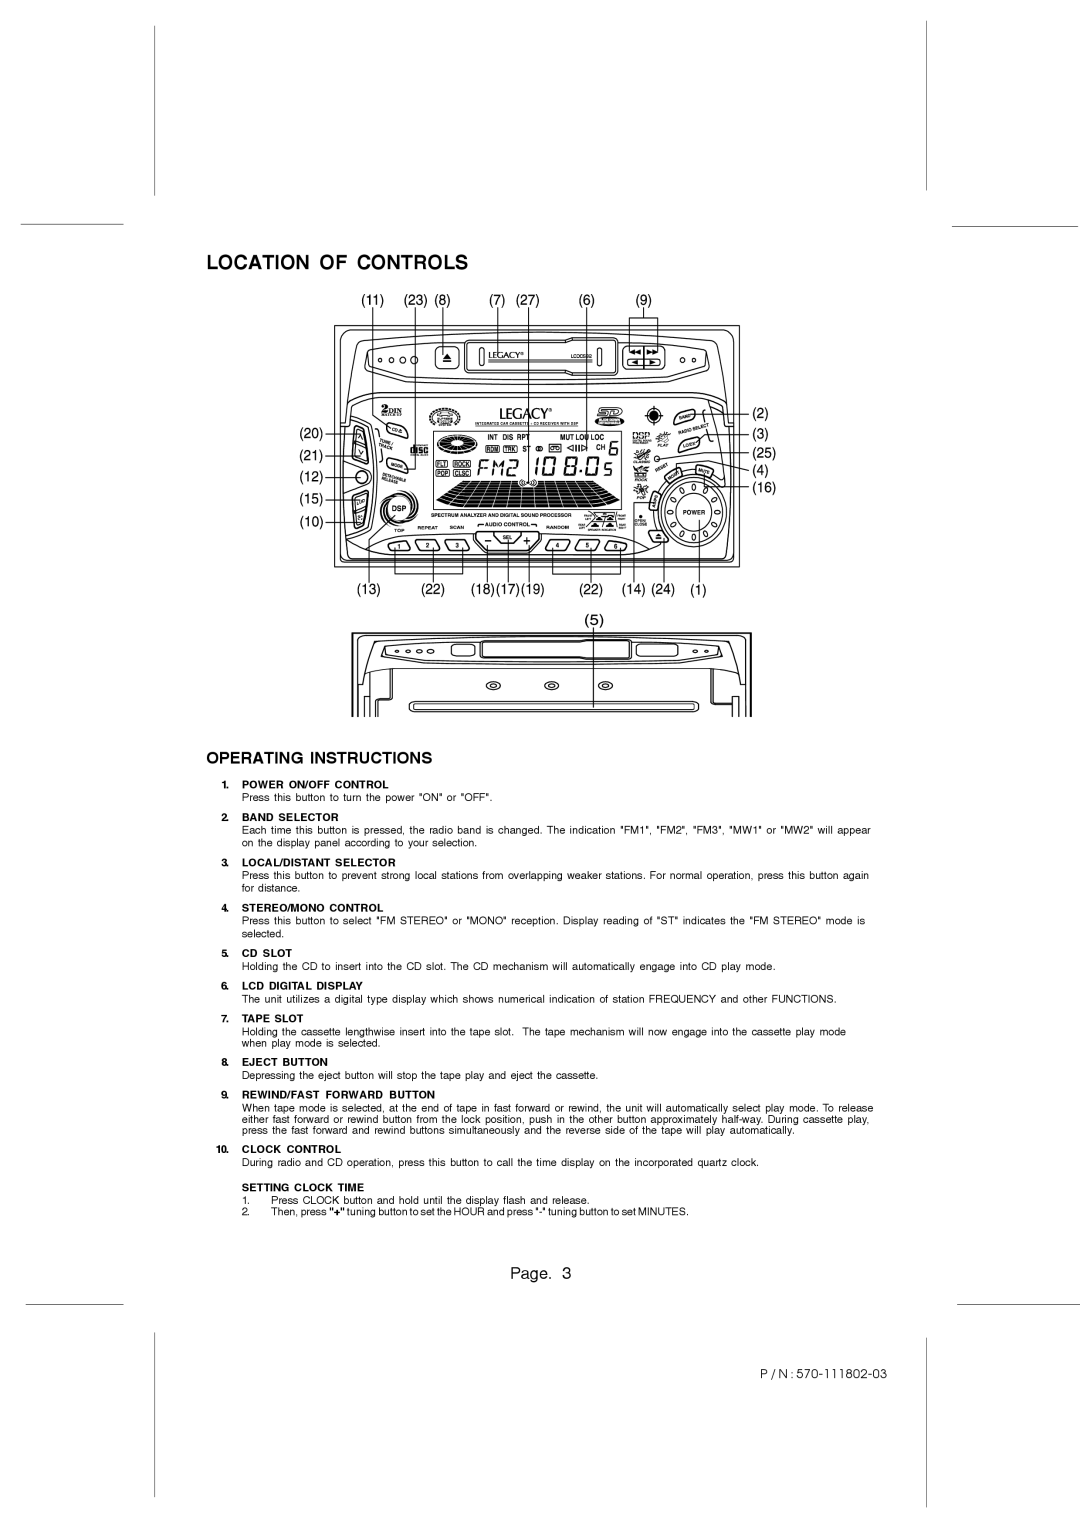
LCDCS92 specifications
The Legacy Car Audio LCDCS92 is a powerful and versatile car stereo system designed for the modern driving experience. Combining both style and functionality, this model is equipped with an array of features that enhance audio quality and convenience, making it an attractive choice for audiophiles and casual listeners alike.One of the standout features of the LCDCS92 is its clear and vibrant LCD display. This screen not only shows essential information such as song title and artist but also allows users to navigate through various settings with ease. The user interface is intuitive, making it simple for drivers to adjust their audio preferences without taking their attention off the road.
The LCDCS92 supports multiple audio formats, including MP3, WMA, and WAV, ensuring compatibility with various media sources. Additionally, the built-in USB port and auxiliary input allow users to connect their smartphones or MP3 players directly to the stereo, providing access to an expansive library of music. Bluetooth connectivity further enhances this model's capabilities, allowing for wireless streaming of audio and hands-free calling, which is essential for maintaining safety while on the move.
Sound quality is a top priority with the Legacy LCDCS92. The built-in MOSFET amplifier delivers clear and powerful sound, capable of driving speakers with depth and clarity. Furthermore, with customizable equalizer settings, users can fine-tune their audio experience to match their personal preferences and the acoustics of their vehicle.
The unit also features a built-in FM/AM radio tuner, making it easy to catch favorite stations while on long drives. The programmable presets ensure that frequently listened-to stations are only a button away. An essential characteristic of the LCDCS92 is its seamless integration with various speaker systems, ensuring that even high-performance aftermarket speakers can be utilized effectively.
For added convenience, this car stereo is equipped with a remote control, allowing users to make adjustments without reaching for the unit itself, promoting safer driving. The sleek design and modern aesthetics of the LCDCS92 also ensure that it complements any car interior stylishly.
In summary, the Legacy Car Audio LCDCS92 stands out for its impressive features, including a vibrant LCD display, versatile connectivity options, powerful sound quality, and user-friendly controls. Ideal for anyone looking to upgrade their car audio system, the LCDCS92 delivers an enhanced listening experience that caters to both functionality and style.