Leica SP1600 – Saw Microtome
3.Operation
3.1Mounting the object
The object mount (4.2) has a stage area of 6 to 30 mm. Objects with sizes within this range can be mounted directly and secured with the knurled wheel. Smaller or larger objects are first cemented to plates with 2- component adhesive.
Pick up the object holder by the knob (4.4) and insert into the corresponding guide on the object arm (5.2). For this, the object arm must be fixed in the back posi- tion (see under 2.1 ). Tighten the knurled screw (5.1).
Turn the knurled screw for the section thickness set- ting (5.4) to the right until the object holder is in its low- est position.
3.2Setting the height of the object
Loosen the knurled screw (5.1), take hold of the knob (4.4) and pull out the object holder until the surface of the object is slightly above the upper edge of the saw. Tighten the knurled screw (5.1). Clamp the section thickness setting with the lever (5.5).
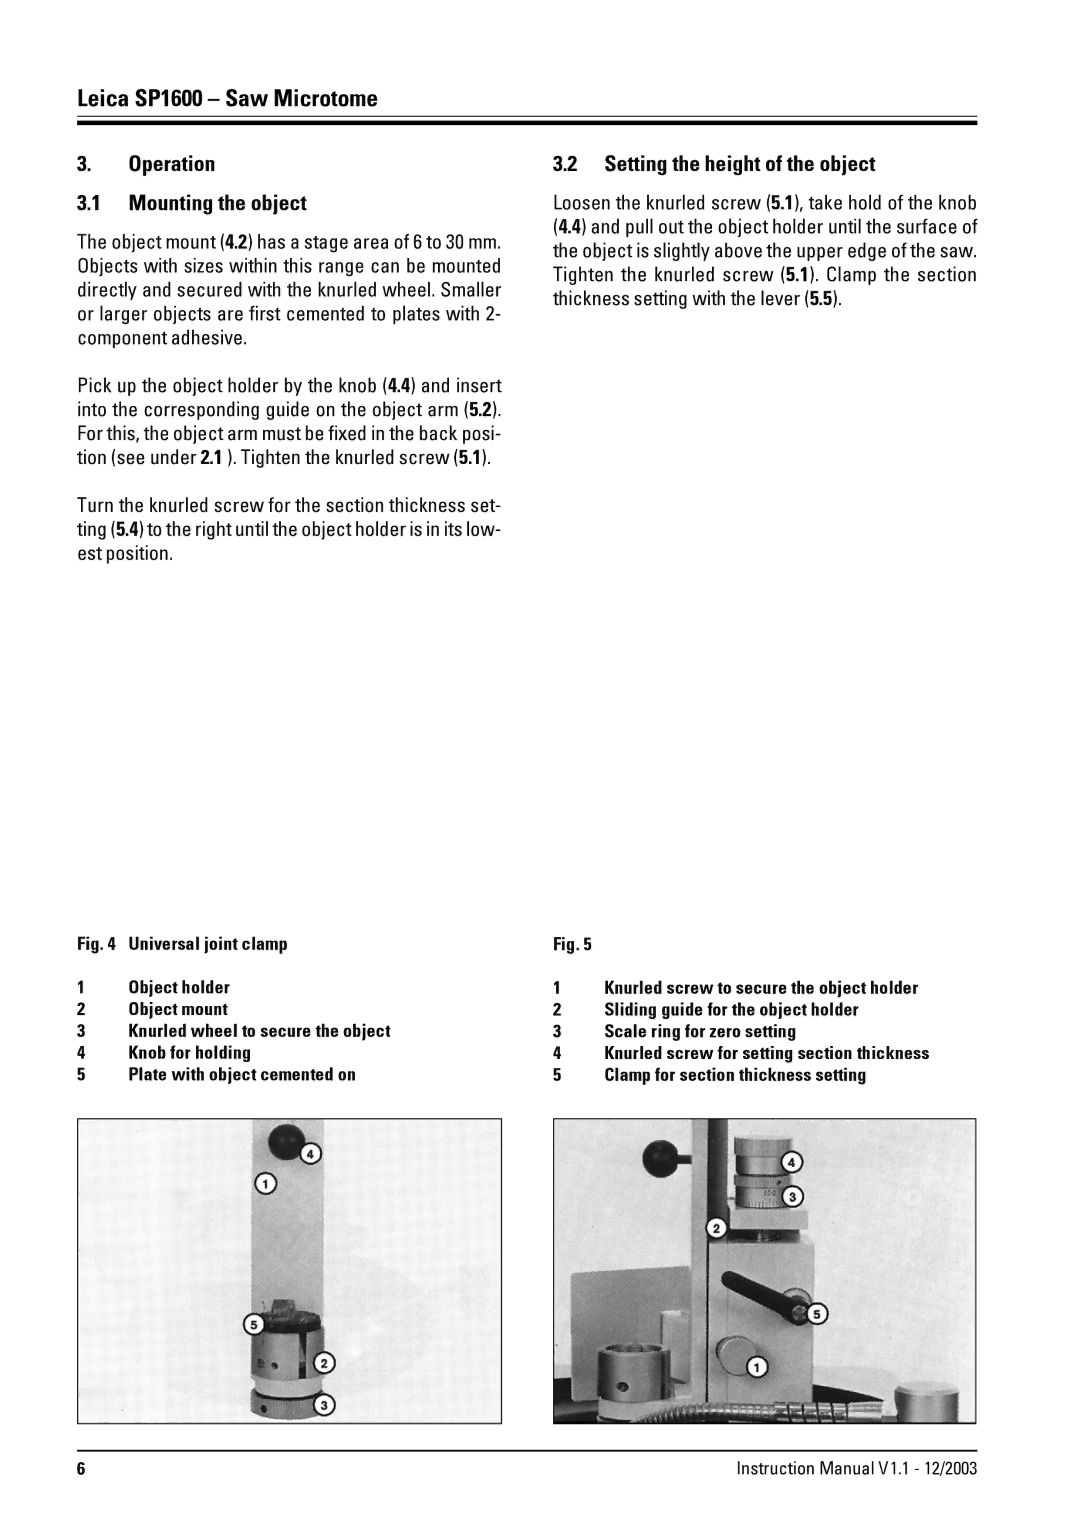
Fig. 4 Universal joint clamp | Fig. 5 |
| |
1 | Object holder | 1 | Knurled screw to secure the object holder |
2 | Object mount | 2 | Sliding guide for the object holder |
3 | Knurled wheel to secure the object | 3 | Scale ring for zero setting |
4 | Knob for holding | 4 | Knurled screw for setting section thickness |
5 | Plate with object cemented on | 5 | Clamp for section thickness setting |
6 | Instruction Manual V1.1 - 12/2003 |