IdeaPad Yoga 11 Hardware Maintenance Manual
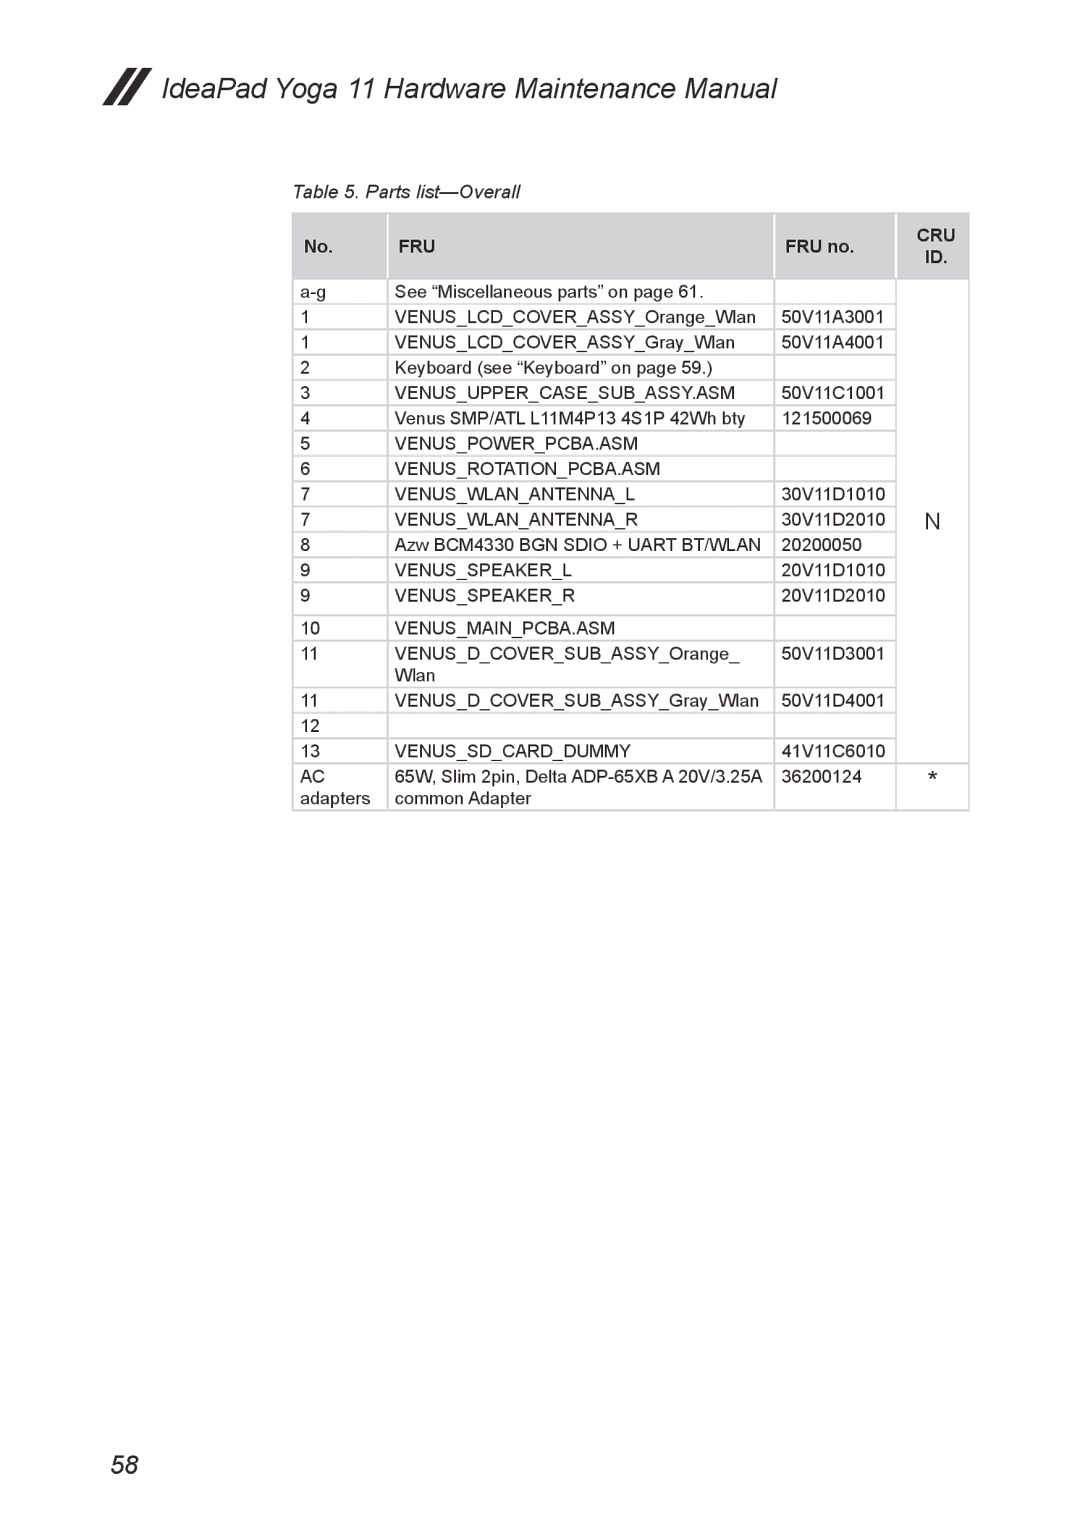
Table 5. Parts list—Overall
No.
FRU
FRU no.
CRU
ID.
See “Miscellaneous parts” on page 61. |
|
| |
1 | VENUS_LCD_COVER_ASSY_Orange_Wlan | 50V11A3001 |
|
1 | VENUS_LCD_COVER_ASSY_Gray_Wlan | 50V11A4001 |
|
2 | Keyboard (see “Keyboard” on page 59.) |
|
|
3 | VENUS_UPPER_CASE_SUB_ASSY.ASM | 50V11C1001 |
|
4 | Venus SMP/ATL L11M4P13 4S1P 42Wh bty | 121500069 |
|
5 | VENUS_POWER_PCBA.ASM |
|
|
6 | VENUS_ROTATION_PCBA.ASM |
|
|
7 | VENUS_WLAN_ANTENNA_L | 30V11D1010 |
|
7 | VENUS_WLAN_ANTENNA_R | 30V11D2010 | N |
8 | Azw BCM4330 BGN SDIO + UART BT/WLAN | 20200050 |
|
9 | VENUS_SPEAKER_L | 20V11D1010 |
|
9 | VENUS_SPEAKER_R | 20V11D2010 |
|
|
|
|
|
10 | VENUS_MAIN_PCBA.ASM |
|
|
11 | VENUS_D_COVER_SUB_ASSY_Orange_ | 50V11D3001 |
|
| Wlan |
|
|
11 | VENUS_D_COVER_SUB_ASSY_Gray_Wlan | 50V11D4001 |
|
12 |
|
|
|
13 | VENUS_SD_CARD_DUMMY | 41V11C6010 |
|
AC | 65W, Slim 2pin, Delta | 36200124 | * |
adapters | common Adapter |
|
|
58