Hardware Maintenance Manual
Lenovo IdeaPad Yoga
First Edition Oct Copyright Lenovo 2012. All rights reserved
Contents
Important service information
Related service information
Safety information
About this manual
Lenovo IdeaPad Yoga
Safety information
Safety information
IdeaPad Yoga 11 Hardware Maintenance Manual
General safety
Electrical safety
Safety information
IdeaPad Yoga 11 Hardware Maintenance Manual
Power supply units Pumps Blowers and fans Motor generators
Safety inspection guide
Safety information
Handling devices that are sensitive to electrostatic discharge
Grounding requirements
IdeaPad Yoga 11 Hardware Maintenance Manual
Safety notices multilingual translations
Safety notice
Safety information
Safety notice DANGER
IdeaPad Yoga 11 Hardware Maintenance Manual
Safety information
Safety notice DANGER
The battery pack contains small amounts of nickel. Do not disassemble it, throw it into fire or water, or short-circuit it. Dispose of the battery pack as required by local ordinances or regulations. Use only the battery in the appropriate parts listing when replacing the battery pack. Use of an incorrect battery can result in ignition or explosion of the battery
IdeaPad Yoga 11 Hardware Maintenance Manual
Safety notice DANGER
The lithium battery can cause a fire, an explosion, or a severe burn. Do not recharge it, remove its polarized connector, disassemble it, heat it above 100C 212F, incinerate it, or expose its cell contents to water. Dispose of the battery as required by local ordinances or regulations. Use only the battery in the appropriate parts listing. Use of an incorrect battery can result in ignition or explosion of the battery
Safety information
Safety notice
If the LCD breaks and the fluid from inside the LCD gets into your eyes or on your hands, immediately wash the affected areas with water at least for 15 minutes. Seek medical care if any symptoms caused by the fluid are present after washing
IdeaPad Yoga 11 Hardware Maintenance Manual
Safety notice DANGER
To avoid shock, do not remove the plastic cover that protects the lower part of the inverter card
Safety information
Safety notice DANGER
Before removing any FRU, turn off the computer, unplug all power cords from electrical outlets, remove the battery pack, and then disconnect any interconnecting cables
Laser compliance statement
IdeaPad Yoga 11 Hardware Maintenance Manual
DANGER
Safety information
Important service information
Before replacing parts
Strategy for replacing FRUs
IdeaPad Yoga 11 Hardware Maintenance Manual
Important service information
Important notice for replacing a system board
Important information about replacing RoHS compliant FRUs
IdeaPad Yoga 11 Hardware Maintenance Manual
Replacement FRU
General checkout
General checkout
Important notes
The following are not covered under warranty
What to do first
IdeaPad Yoga 11 Hardware Maintenance Manual
Power system checkout
Checking the AC adapter
Checking operational charging
General checkout
IdeaPad Yoga 11 Hardware Maintenance Manual
Perform operational charging. If the battery status indicator or icon does not light on, remove the battery pack and let it return to room temperature. Reinstall the battery pack. If the charge indicator or icon is still off, replace the battery pack
Related service information
Restoring the factory contents by using OneKey Recovery
Restore of factory default
Related service information
Passwords
Power-on password
Supervisor password
IdeaPad Yoga 11 Hardware Maintenance Manual
Power management
Screen blank mode
Sleep standby mode
Related service information
Specifications
Lenovo IdeaPad Yoga
IdeaPad Yoga 11 Hardware Maintenance Manual
Table 1. Specifications continued
Lenovo IdeaPad Yoga
Feature
Description
Status indicators
Table 2. Status indicators
IdeaPad Yoga 11 Hardware Maintenance Manual
Symbol
Function key combinations
Table 3. Function keys
Lenovo IdeaPad Yoga
FRU replacement notices
Screw notices
Plastic to plastic
Logic card to plastic
Removing and replacing an FRU
Lenovo IdeaPad Yoga
DANGER
1010 Dummy card
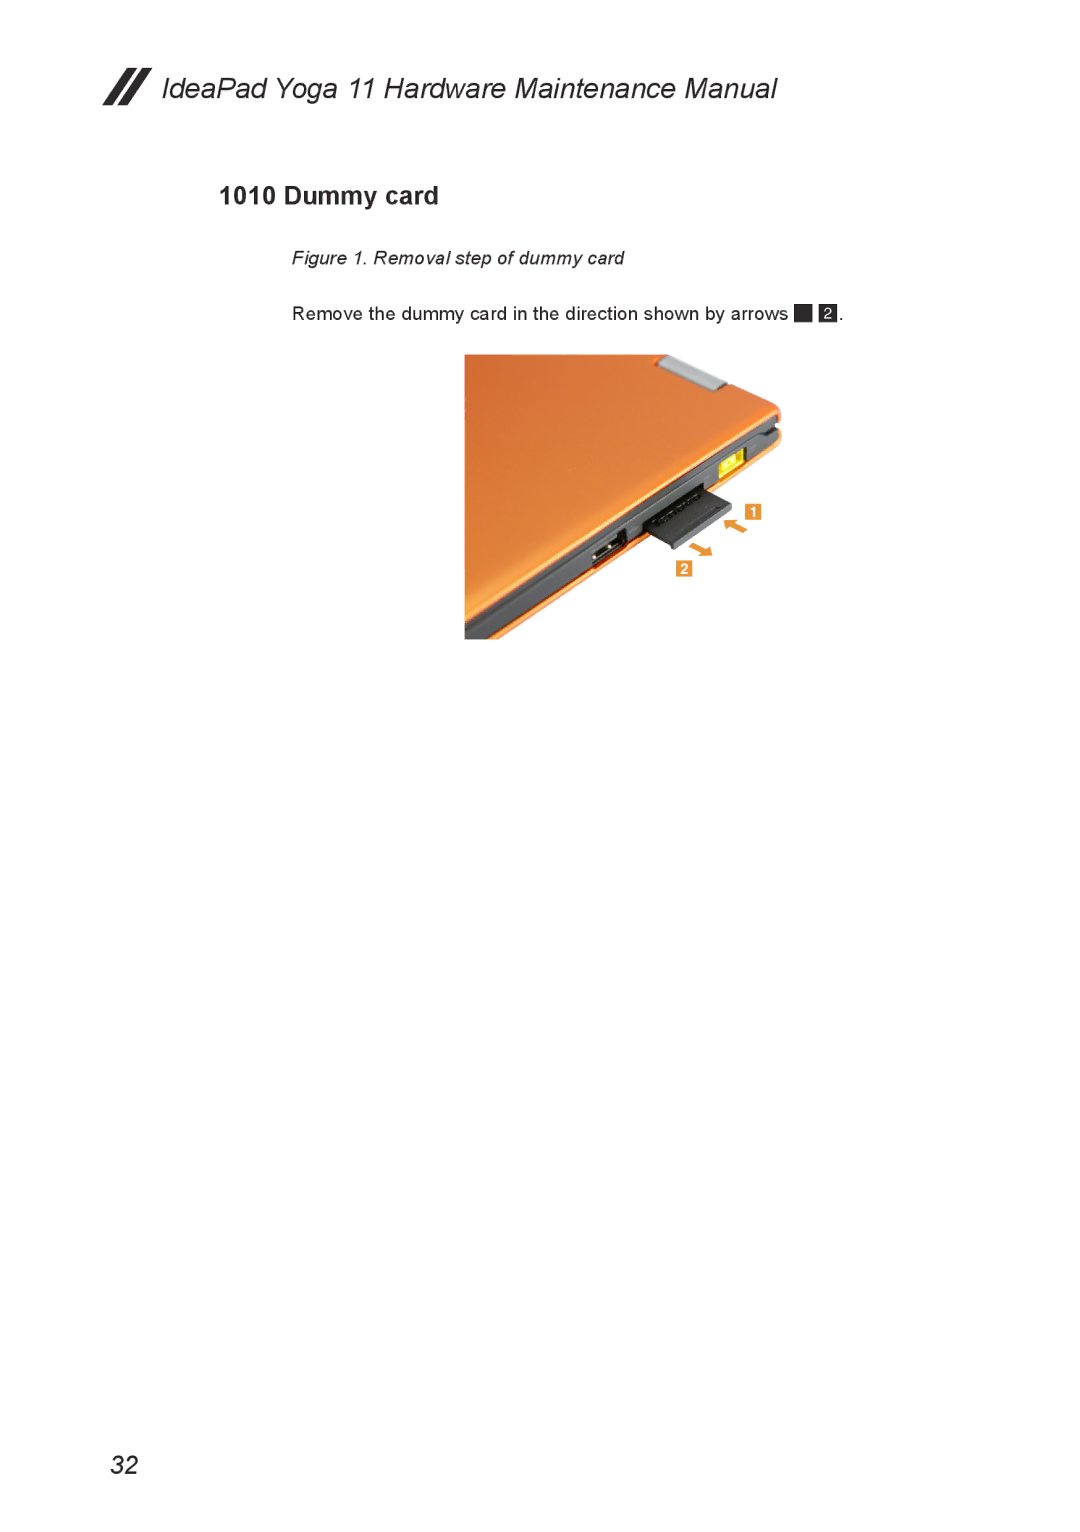
Figure 1. Removal step of dummy card
IdeaPad Yoga 11 Hardware Maintenance Manual
Remove the dummy card in the direction shown by arrows 1
1020 Keyboard
Figure 2. Removal steps of keyboard
Lenovo IdeaPad Yoga
Step
Figure 2. Removal steps of keyboard continued
IdeaPad Yoga 11 Hardware Maintenance Manual
When installing Make sure that the FPC connector is attached firmly
1030 Keyboard bezel
Figure 3. Removal steps of keyboard bezel
Lenovo IdeaPad Yoga
Step
Figure 3. Removal steps of keyboard bezel continued
IdeaPad Yoga 11 Hardware Maintenance Manual
Step
Screw quantity
1040 Screen rotation lock button board
Figure 4. Removal steps of screen rotation lock button board
Lenovo IdeaPad Yoga
IdeaPad Yoga 11 Hardware Maintenance Manual
Remove the battery pack in the direction shown by arrow
1050 Battery pack
Figure 5. Removal steps of battery pack
Lenovo IdeaPad Yoga
DANGER
Figure 5. Removal steps of battery pack continued
IdeaPad Yoga 11 Hardware Maintenance Manual
1060 Volume button board
Figure 6. Removal steps of hard disk drive
Lenovo IdeaPad Yoga
Figure 6. Removal steps of hard disk drive continued
IdeaPad Yoga 11 Hardware Maintenance Manual
When installing Make sure that the HDD connector is attached firmly
1070 PCI Express Mini Card for wireless LAN
Figure 7. Removal steps of PCI Express Mini Card for wireless LAN
Lenovo IdeaPad Yoga
When installing
IdeaPad Yoga 11 Hardware Maintenance Manual
1080 Speakers
Figure 8. Removal steps of DIMM
Lenovo IdeaPad Yoga
Figure 8. Removal steps of DIMM continued
IdeaPad Yoga 11 Hardware Maintenance Manual
Remove the speakers in the direction shown by arrows
1090 System board
Important notices for handling the system board
Figure 9. Removal steps of system board
Lenovo IdeaPad Yoga
Figure 9. Removal steps of system board continued
IdeaPad Yoga 11 Hardware Maintenance Manual
Remove the button cell connector in the direction shown by arrows
Unplug the three connectors in the direction shown by arrows 3 4
Lenovo IdeaPad Yoga
Figure 9. Removal steps of system board continued
Step
Screw quantity
1100 LCD unit
Figure 10. Removal steps of LCD unit
IdeaPad Yoga 11 Hardware Maintenance Manual
Figure 10. Removal steps of LCD unit continued
Lenovo IdeaPad Yoga
Remove the LCD unit in the direction shown by arrow
1110 Base cover
Figure 11. Removal step of base cover
IdeaPad Yoga 11 Hardware Maintenance Manual
Note Applying labels to the base cover
Lenovo IdeaPad Yoga
Locations
Front view and right-side view
IdeaPad Yoga 11 Hardware Maintenance Manual
Bottom and Left-side view
1 Power button 2 Battery status indicator
3 Volume button 4 Speaker 5 Built-in microphone 6 HDMI port
Lenovo IdeaPad Yoga
Parts list
IdeaPad Yoga 11 Hardware Maintenance Manual
This section presents the following service parts “Overall” on page
“Power cords” on page
Overall
Lenovo IdeaPad Yoga
Table 5. Parts list-Overall
IdeaPad Yoga 11 Hardware Maintenance Manual
FRU no
CRU ID
Table 7. Parts list-Keyboard
Keyboard
Lenovo IdeaPad Yoga
Language
Table 7. Parts list-Keyboard continued
IdeaPad Yoga 11 Hardware Maintenance Manual
Language
CRU ID
Table 8. Parts list-Miscellaneous parts
Miscellaneous parts
Lenovo IdeaPad Yoga
CRU ID
Power cords
Table 10. Parts list-2-pin power cords
IdeaPad Yoga 11 Hardware Maintenance Manual
Region
Notices
Notices
Trademarks
IdeaPad Yoga 11 Hardware Maintenance Manual