Lenovo IdeaPad Yoga 11
Miscellaneous parts
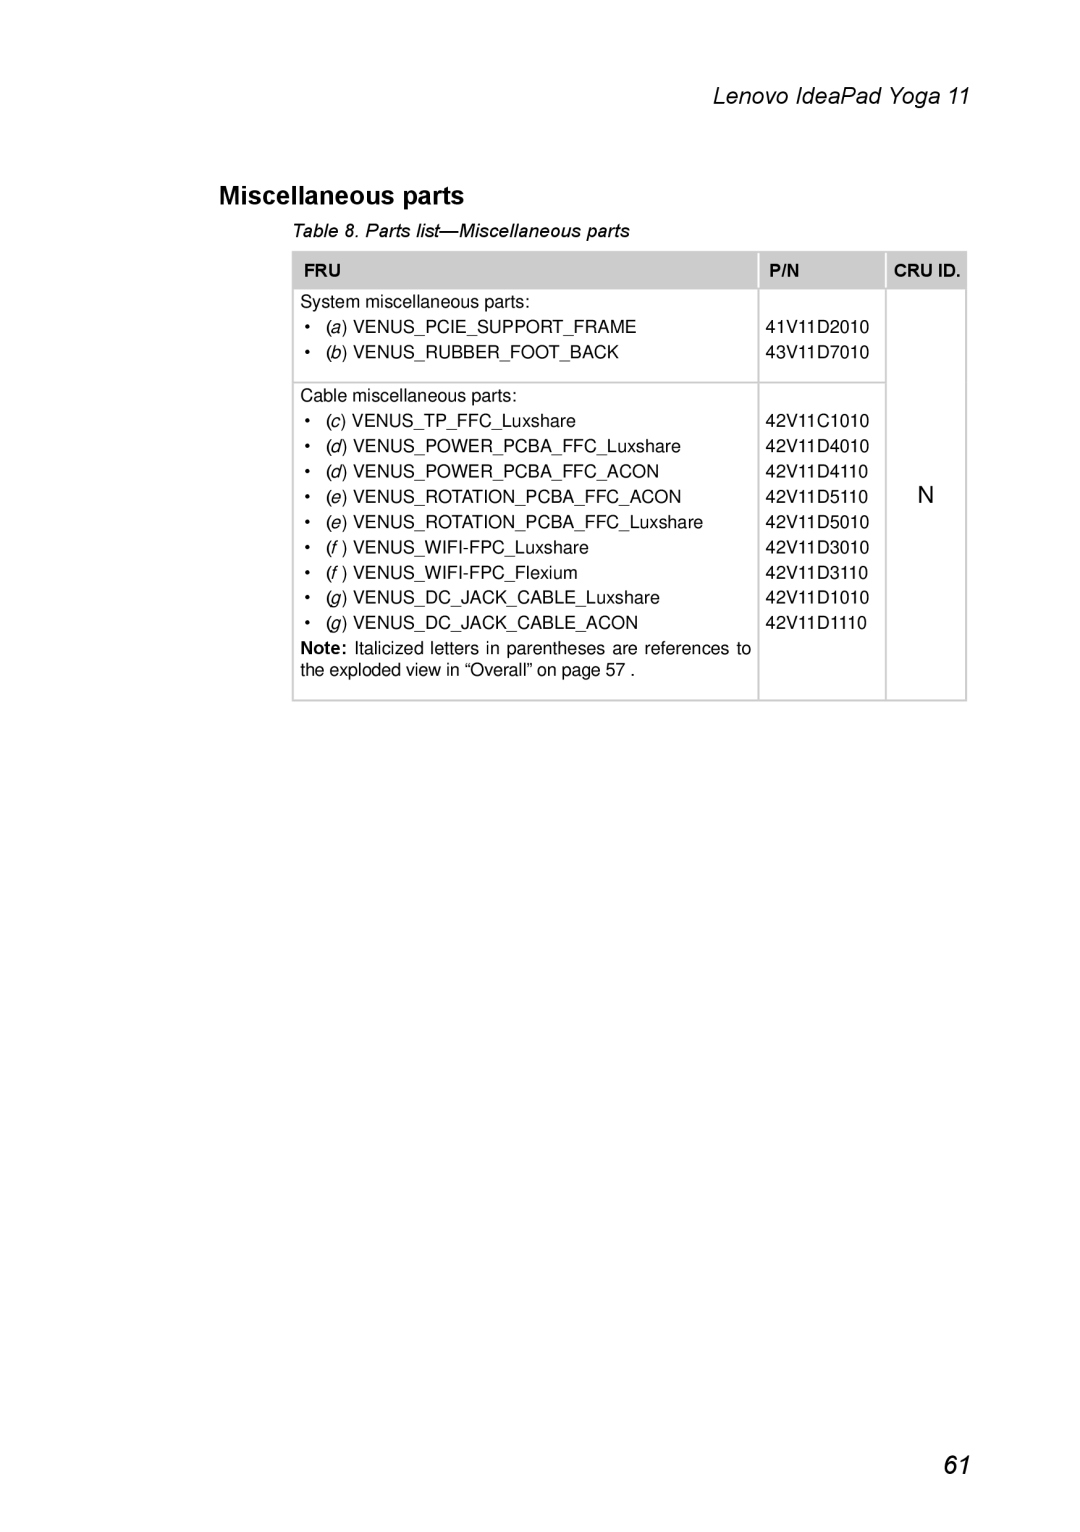
Table 8. Parts list—Miscellaneous parts
FRU
P/N
CRU ID.
System miscellaneous parts: |
|
• (a) VENUS_PCIE_SUPPORT_FRAME | 41V11D2010 |
• (b) VENUS_RUBBER_FOOT_BACK | 43V11D7010 |
|
|
Cable miscellaneous parts: |
|
• (c) VENUS_TP_FFC_Luxshare | 42V11C1010 |
• (d) VENUS_POWER_PCBA_FFC_Luxshare | 42V11D4010 |
• (d) VENUS_POWER_PCBA_FFC_ACON | 42V11D4110 |
• (e) VENUS_ROTATION_PCBA_FFC_ACON | 42V11D5110 |
• (e) VENUS_ROTATION_PCBA_FFC_Luxshare | 42V11D5010 |
• (f ) | 42V11D3010 |
• (f ) | 42V11D3110 |
• (g) VENUS_DC_JACK_CABLE_Luxshare | 42V11D1010 |
• (g) VENUS_DC_JACK_CABLE_ACON | 42V11D1110 |
Note: Italicized letters in parentheses are references to |
|
the exploded view in “Overall” on page 57 . |
|
|
|
N
61