8.Pivot the adapter latch to the closed position to secure the adapters.
9.Reinstall the PCI riser and adapters.
10.Go to “Completing the CRU replacement” on page 28.
Replacing a hard disk drive
Attention
Do not open your computer or attempt any repair before reading the “Important safety information” in the Quick Reference that was included with your computer or in the Hardware Maintenance Manual (HMM) for the computer. To obtain copies of the Quick Reference or the HMM, go to the Support Web site at http://www.lenovo.com/think/support.
Important
When you receive a new hard disk drive, you also receive a set of Product Recovery CDs. The set of Product Recovery CDs will enable you to restore the contents of the hard disk to the same state as when your computer was originally shipped from the factory. For more information on recovering
To replace the hard disk drive:
1.Open the computer cover. See “Opening the cover” on page 5.
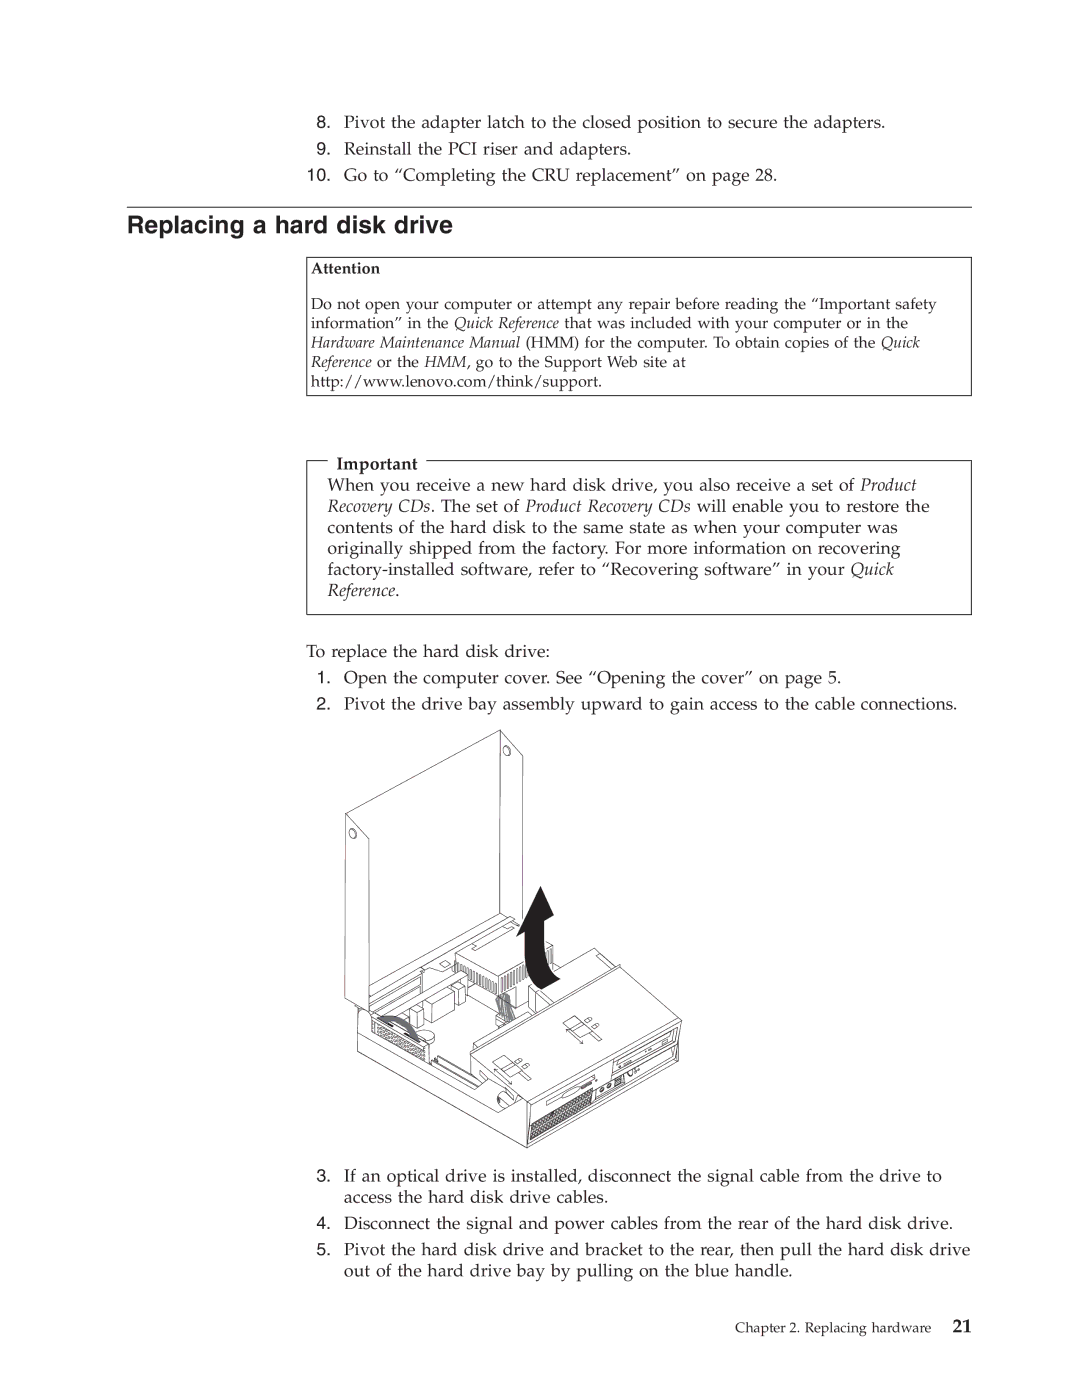
2.Pivot the drive bay assembly upward to gain access to the cable connections.
3.If an optical drive is installed, disconnect the signal cable from the drive to access the hard disk drive cables.
4.Disconnect the signal and power cables from the rear of the hard disk drive.
5.Pivot the hard disk drive and bracket to the rear, then pull the hard disk drive out of the hard drive bay by pulling on the blue handle.