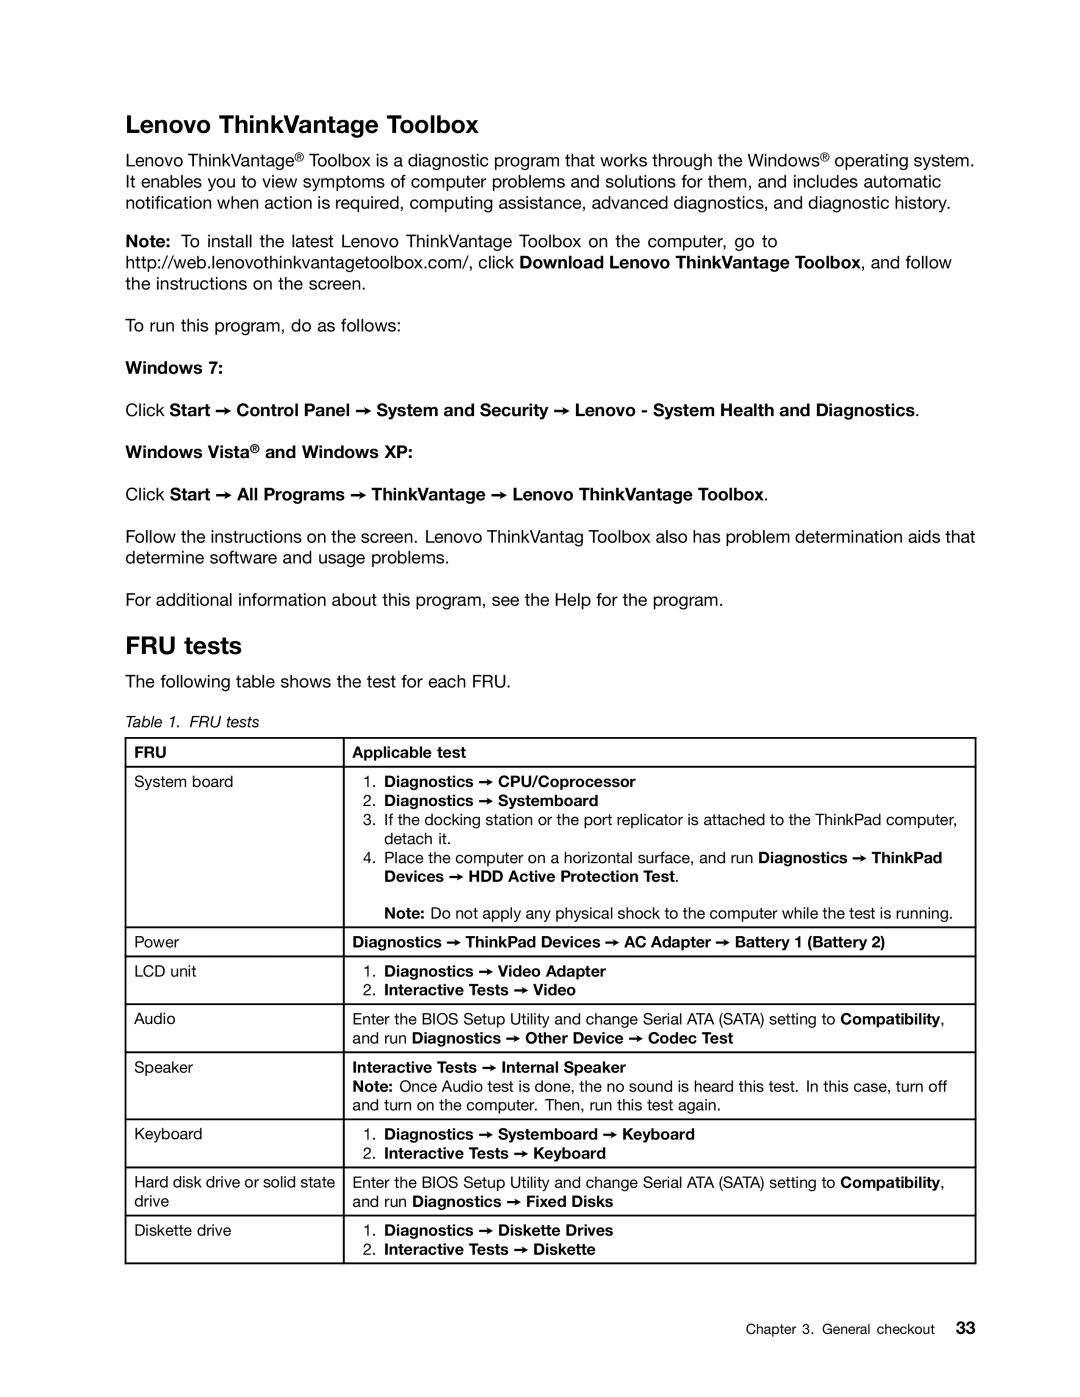
L420, L520, L421 specifications
The Lenovo L421, L520, and L420 are part of Lenovo's ThinkPad series, which is known for its reliability, durability, and performance. These models are designed primarily for business professionals and students, providing a blend of functionality and portability tailored for everyday computing.The Lenovo L421 is equipped with the second-generation Intel Core processors, which enhance its performance and efficiency. It features a 14-inch LED backlit display, offering sharp visuals and sufficient screen real estate for multitasking. The L421 also sports a spill-resistant keyboard, ensuring that accidental spills do not affect the device's functionality. This model supports up to 8GB of RAM and incorporates various connectivity options, including USB 3.0 ports, HDMI, and an SD card reader, which makes it versatile for various peripherals.
The L520 is another solid offering from Lenovo, featuring a slightly larger 15.6-inch display for increased productivity. It shares many characteristics with the L421, such as the use of Intel’s second-generation processors. The L520 also emphasizes security with features like a fingerprint reader and a Trusted Platform Module (TPM) for data encryption, appealing to businesses that require stringent security measures. Its ExpressCard and docking station compatibility add flexibility, allowing users to tailor their setups according to their needs.
The L420, like its siblings, comes with an emphasis on performance and utility. With a 14-inch HD display, it offers vibrant visuals. The L420 also benefits from Lenovo's legendary keyboard design, which ensures a comfortable typing experience. This model is geared for users who require a balance between performance and portability without compromising on essential features. The same Intel Core processors and security features are incorporated, ensuring a reliable experience for professional applications.
All three models feature Lenovo's innovative Power Management technology, which optimizes battery life, allowing users to work longer hours without needing to recharge. Additionally, they are built with robust materials that ensure longevity, making them suitable for both office and on-the-go environments.
Overall, the Lenovo L421, L420, and L520 exemplify the ThinkPad series' commitment to performance, security, and durability, making them excellent choices for anyone looking for reliable laptops for professional use.