5Slide the width guides until they rest lightly against the edges of the paper stack.
Loading Tray 2 and Tray 3
The printer has two trays to select from: the standard tray (Tray 2), also known as the
Load the standard tray or optional tray in the same way.
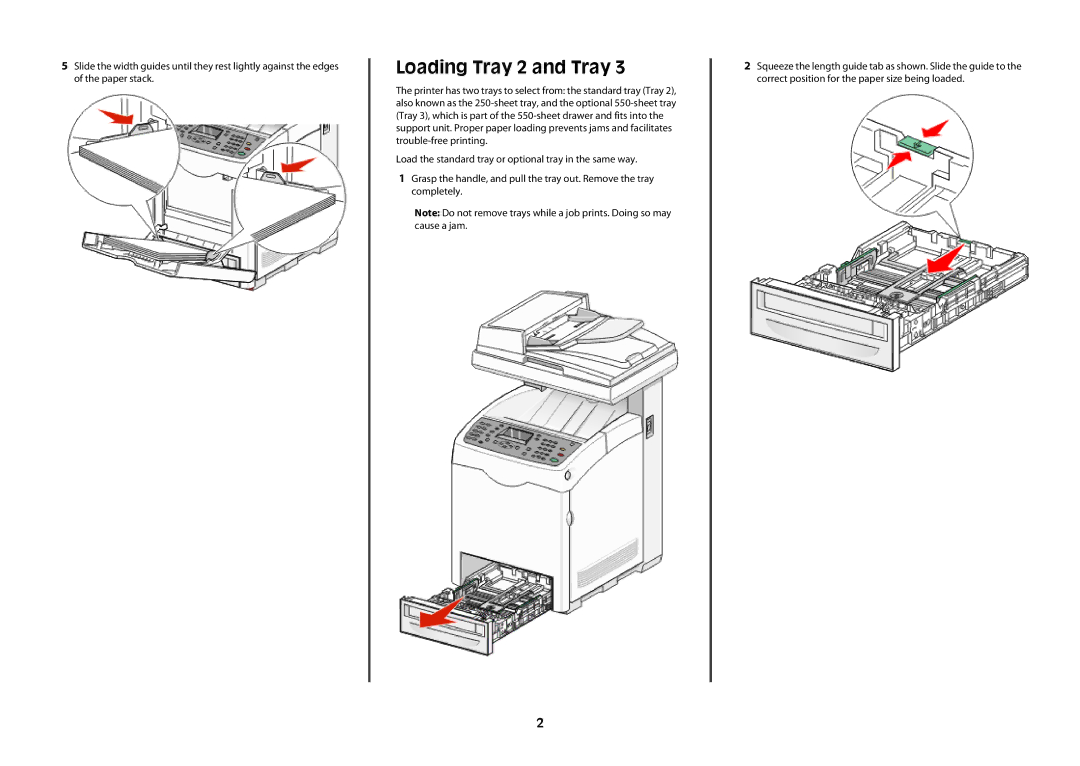
1Grasp the handle, and pull the tray out. Remove the tray completely.
Note: Do not remove trays while a job prints. Doing so may cause a jam.
2Squeeze the length guide tab as shown. Slide the guide to the correct position for the paper size being loaded.
2