Lexmark x560 manual 3Align the tray, and insert it

Models: x560

1 12
Download 12 pages 28.93 Kb
Page 4
Image 4
3Align the tray, and insert it.

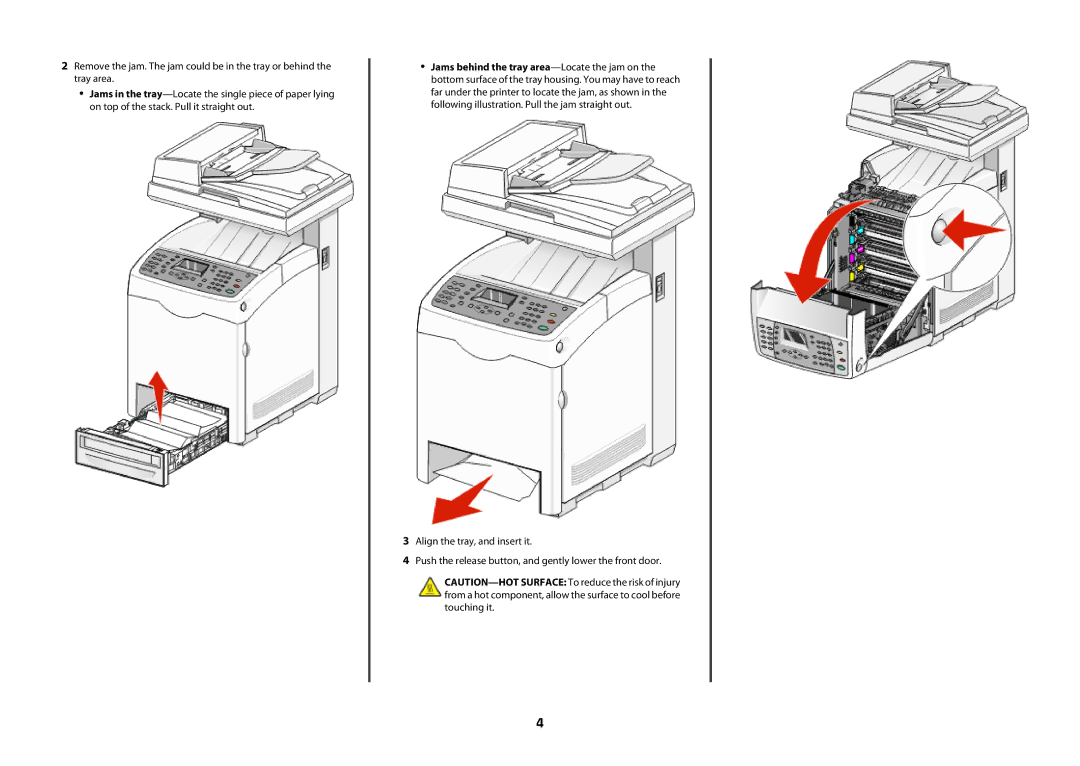
2Remove the jam. The jam could be in the tray or behind the tray area.

Jams in the tray—Locate the single piece of paper lying on top of the stack. Pull it straight out.

Jams behind the tray area—Locate the jam on the bottom surface of the tray housing. You may have to reach far under the printer to locate the jam, as shown in the following illustration. Pull the jam straight out.

3Align the tray, and insert it.

4Push the release button, and gently lower the front door.

CAUTION—HOT SURFACE: To reduce the risk of injury from a hot component, allow the surface to cool before touching it.

4

Page 4
Image 4
Lexmark x560 manual 3Align the tray, and insert it