
BD630C specifications
The LG Electronics BD630C is a versatile and feature-rich Blu-ray Disc player that caters to home entertainment enthusiasts seeking both quality and convenience. This model is renowned for its ability to deliver stunning high-definition video and exceptional audio performance, making it an ideal choice for movie lovers.One of the standout features of the BD630C is its Full HD 1080p video playback capability. With this technology, users can enjoy their favorite films and shows in crystal-clear detail, which enhances the overall viewing experience. The player also supports a wide range of disc formats, including Blu-ray, DVDs, and CDs, ensuring compatibility with various media types. This versatility allows users to create a personalized movie library without worrying about format limitations.
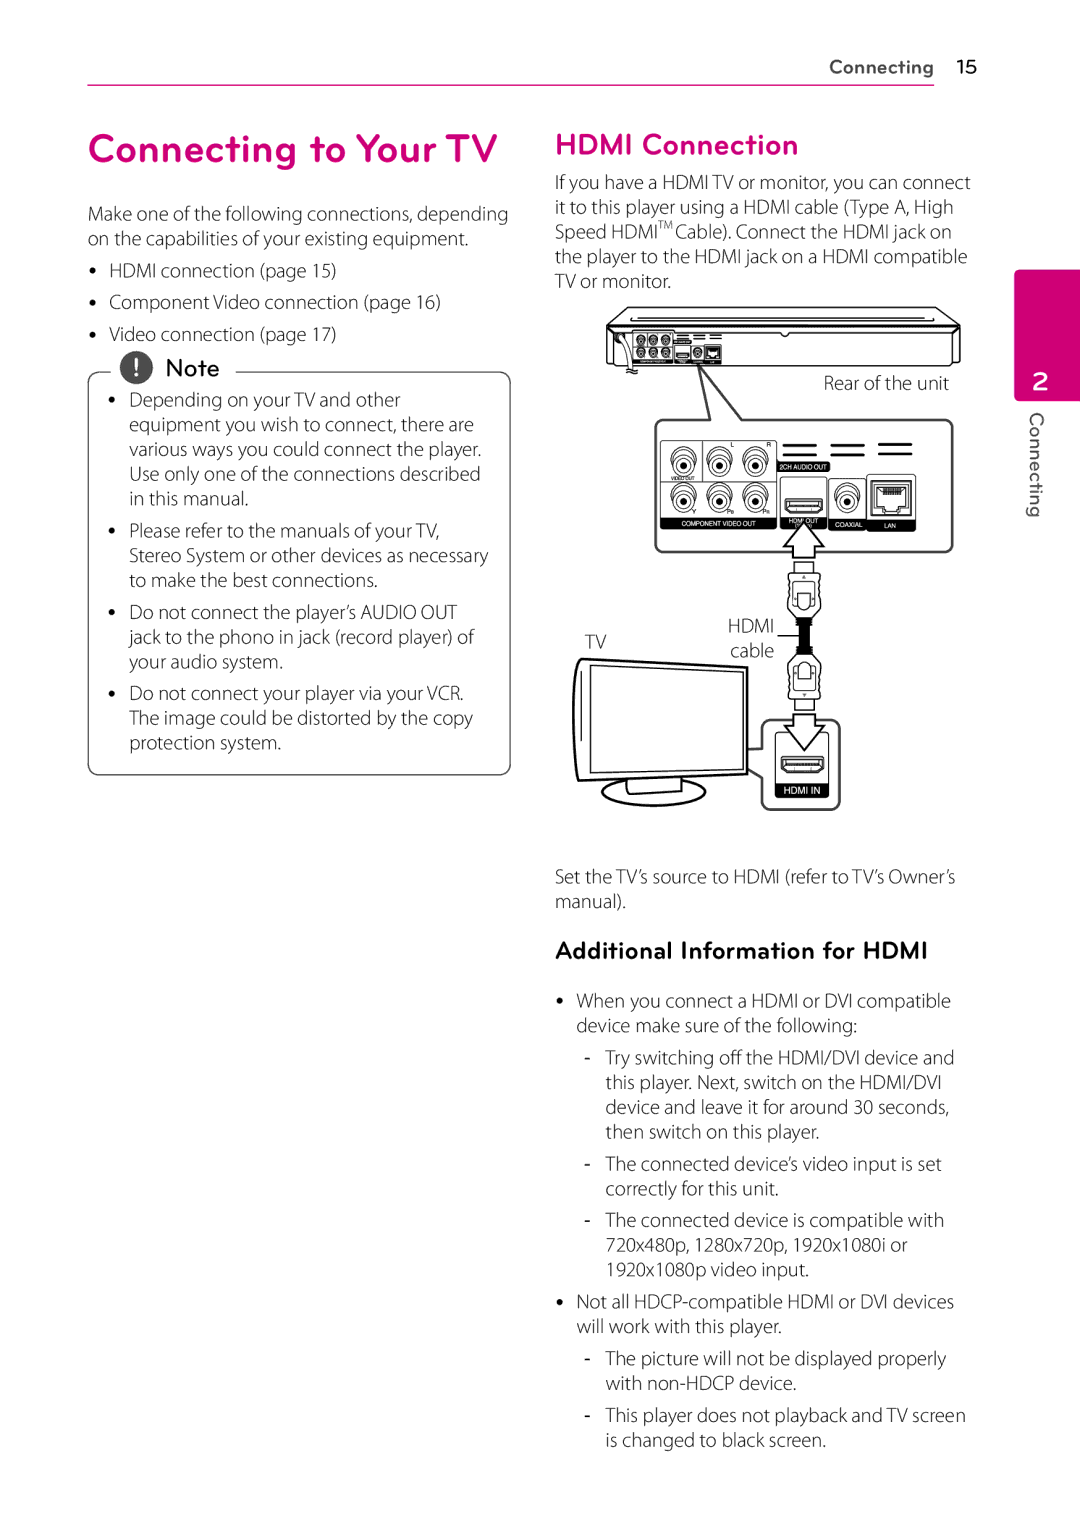
In terms of connectivity, the BD630C is equipped with an array of options. It includes built-in Wi-Fi, enabling seamless streaming of online content from popular platforms such as Netflix, Hulu, YouTube, and more. This feature eliminates the need for additional devices, allowing users to access a wide range of content with ease. Additionally, the player has HDMI output for high-quality video and audio transmission to HDTVs and home theater systems.
Another significant characteristic of the LG BD630C is its Smart TV capabilities. The player provides access to various apps and services, transforming it into a comprehensive home entertainment hub. With its intuitive interface, navigating through your favorite streaming services and apps is effortless, making it easy for users to discover new content.
The BD630C also includes LG's proprietary technology for enhanced sound quality. With support for various audio formats, including DTS and Dolby Digital, the player ensures that viewers experience immersive soundscapes that complement the stunning visuals. Whether it’s dialogue, music, or sound effects, the audio performance is designed to elevate the cinematic experience.
Moreover, the BD630C features a USB port that allows users to play media files from external storage devices. This capability enables playback of videos, music, and photos, adding to the player’s versatility. File formats supported include JPEG, MP3, and several video formats, further expanding entertainment options.
In summary, the LG Electronics BD630C Blu-ray player combines cutting-edge technology, versatile media playback, and smart connectivity, making it an excellent addition to any home entertainment system. Its features, including Full HD playback, built-in Wi-Fi, and support for various formats, cater to the demands of modern viewers, providing an exceptional multimedia experience. Whether for movie nights or binge-watching sessions, the BD630C delivers quality and convenience to enhance any viewing experience.