Connecting the Display
Using the Computer
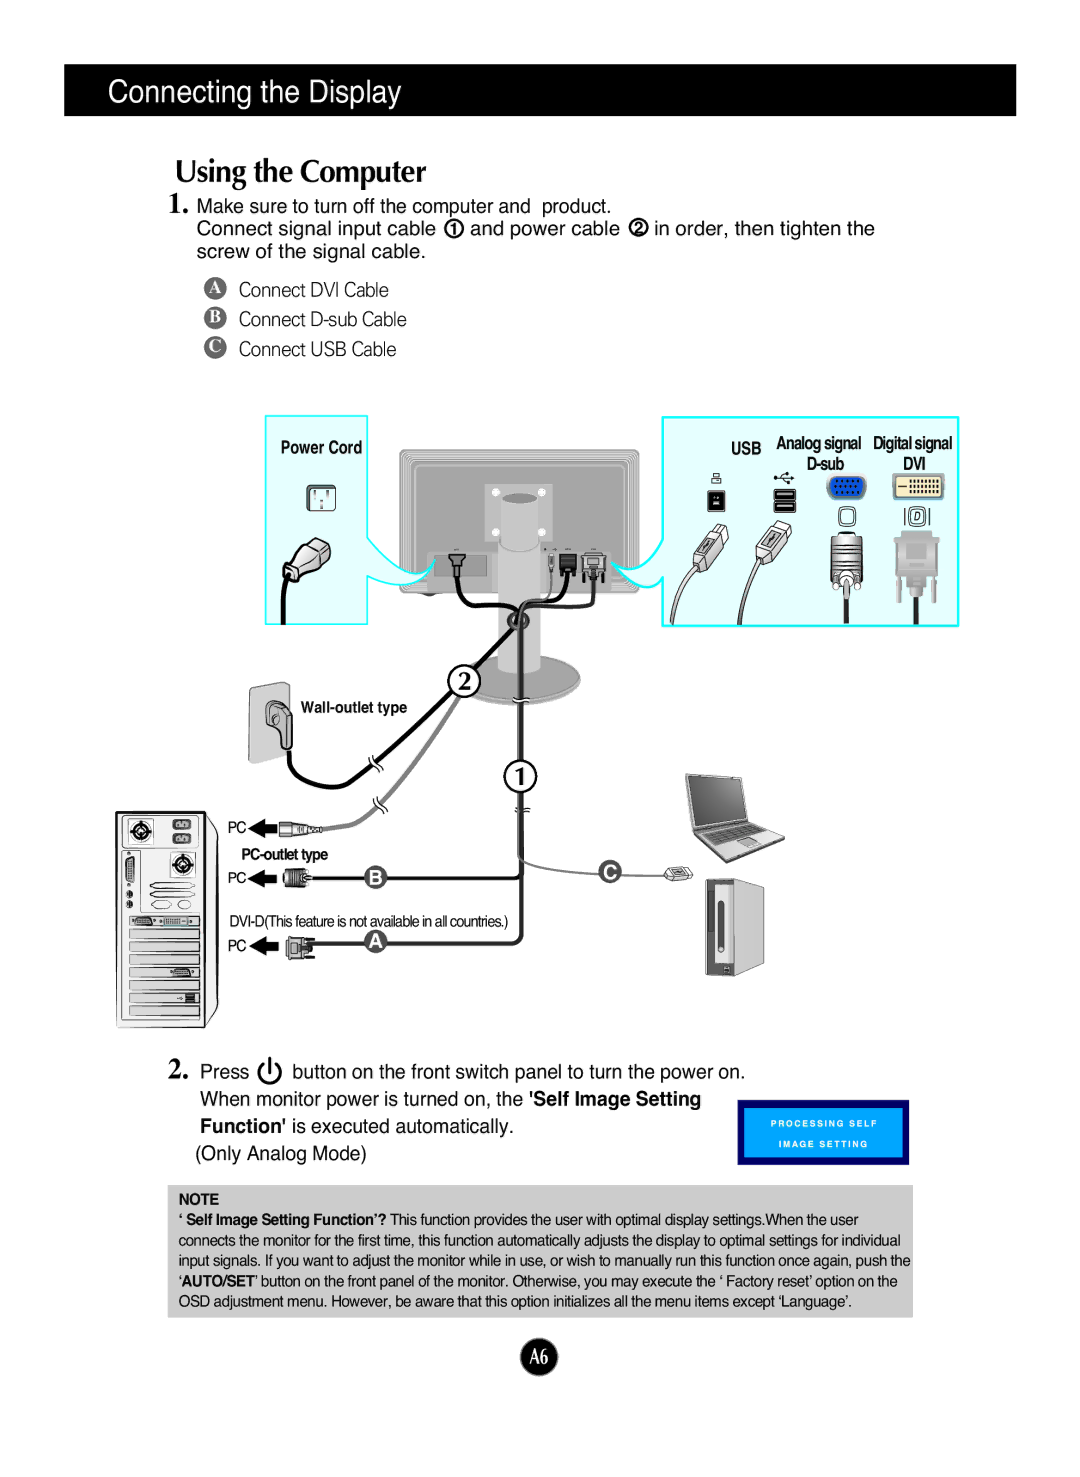
1. Make sure to turn off the computer and product.
Connect signal input cable 1 and power cable 2 in order, then tighten the screw of the signal cable.
AConnect DVI Cable
BConnect
CConnect USB Cable
Power Cord |
|
|
|
|
|
|
|
| USB Analog signal | Digital signal | ||||||||||
|
|
|
|
|
|
|
|
|
|
|
| DVI | ||||||||
|
|
|
|
|
|
|
|
|
|
|
|
|
|
|
|
|
|
|
|
|
|
|
|
|
|
|
|
|
|
|
|
|
|
|
|
|
|
|
|
|
|
|
|
|
|
|
|
|
|
|
|
|
|
|
|
|
|
|
|
|
|
|
|
|
|
|
|
|
|
|
|
|
|
|
|
|
|
|
|
|
|
|
|
|
|
|
|
|
|
|
|
|
|
|
|
|
|
|
|
|
|
|
|
|
|
|
|
|
|
|
|
|
|
|
|
|
|
|
|
|
|
|
|
|
|
|
|
|
|
|
|
|
|
|
|
|
|
|
|
|
|
|
|
|
|
|
|
|
|
|
|
|
|
|
|
|
|
|
|
|
|
|
|
|
|
|
|
|
|
|
|
|
|
|
|
|
|
|
|
|
|
|
|
|
|
|
|
|
|
|
|
|
|
|
|
|
|
|
|
|
|
|
|
|
|
|
|
|
|
![]()
BC
A
2. Press ![]() button on the front switch panel to turn the power on. When monitor power is turned on, the 'Self Image Setting Function' is executed automatically.
button on the front switch panel to turn the power on. When monitor power is turned on, the 'Self Image Setting Function' is executed automatically.
(Only Analog Mode)
NOTE
‘Self Image Setting Function’? This function provides the user with optimal display settings.When the user connects the monitor for the first time, this function automatically adjusts the display to optimal settings for individual input signals. If you want to adjust the monitor while in use, or wish to manually run this function once again, push the ‘AUTO/SET’ button on the front panel of the monitor. Otherwise, you may execute the ‘ Factory reset’ option on the OSD adjustment menu. However, be aware that this option initializes all the menu items except ‘Language’.
A6