![]() WARNING
WARNING
•When attaching the
For installing HCS5610
For installing
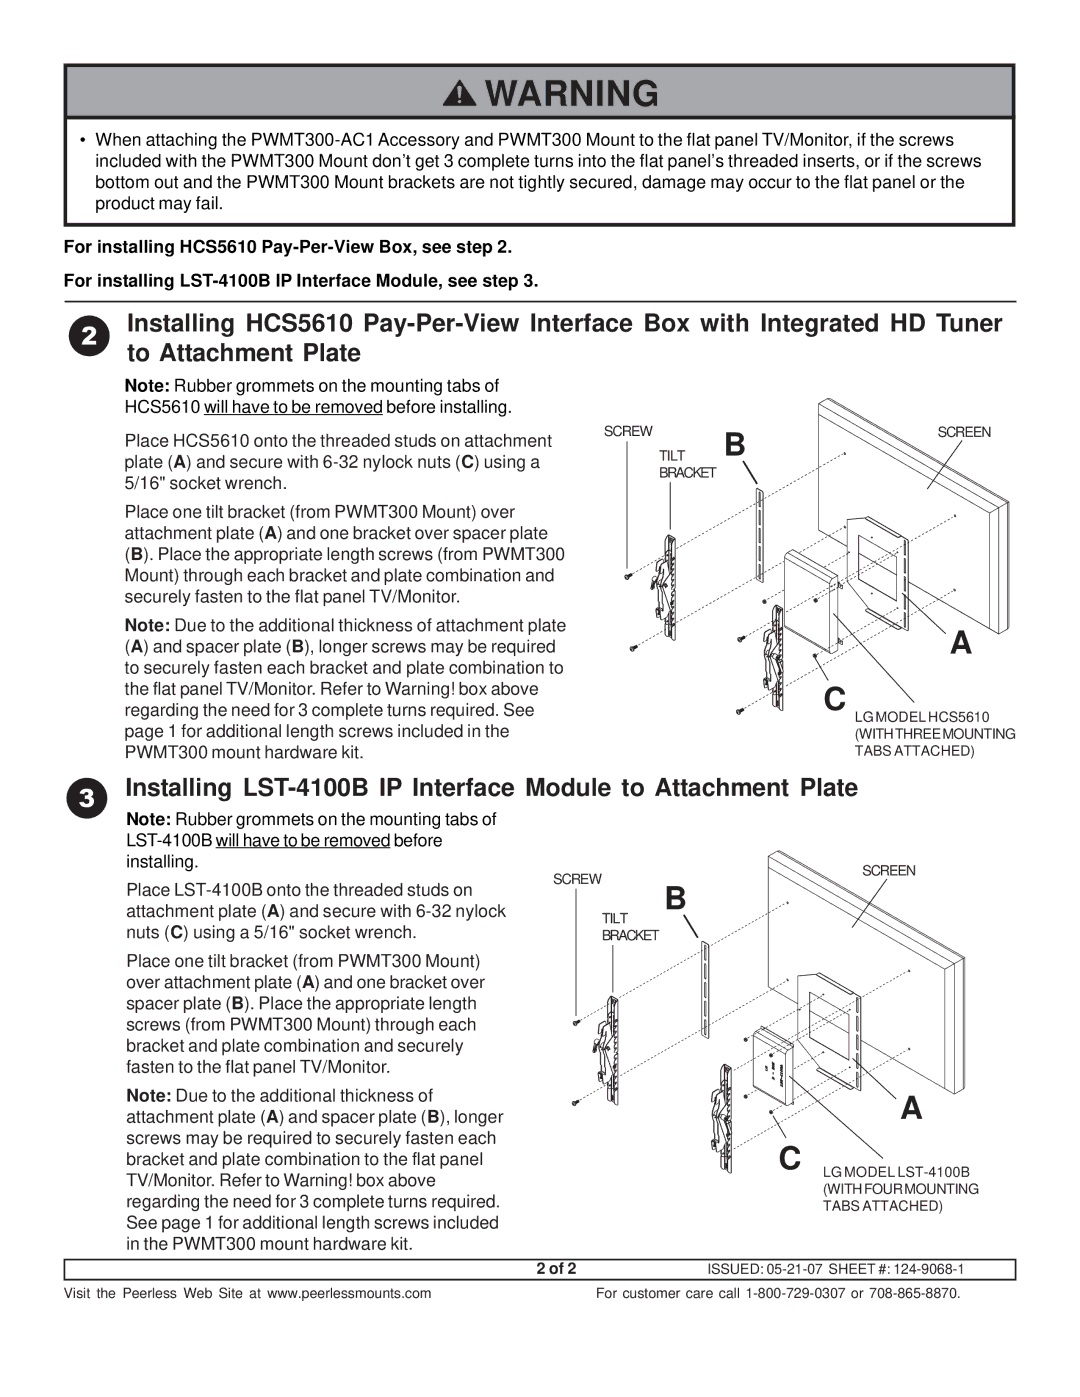
2Installing HCS5610
Note: Rubber grommets on the mounting tabs of HCS5610 will have to be removed before installing.
Place HCS5610 onto the threaded studs on attachment plate (A) and secure with
Place one tilt bracket (from PWMT300 Mount) over attachment plate (A) and one bracket over spacer plate (B). Place the appropriate length screws (from PWMT300 Mount) through each bracket and plate combination and securely fasten to the flat panel TV/Monitor.
Note: Due to the additional thickness of attachment plate (A) and spacer plate (B), longer screws may be required to securely fasten each bracket and plate combination to the flat panel TV/Monitor. Refer to Warning! box above regarding the need for 3 complete turns required. See page 1 for additional length screws included in the PWMT300 mount hardware kit.
SCREW | B | SCREEN |
TILT |
| |
BRACKET |
|
|
A
C
LG MODEL HCS5610
(WITHTHREEMOUNTING TABS ATTACHED)
3 Installing LST-4100B IP Interface Module to Attachment Plate
Note: Rubber grommets on the mounting tabs of
SCREW
SCREEN
Place
Place one tilt bracket (from PWMT300 Mount) over attachment plate (A) and one bracket over spacer plate (B). Place the appropriate length screws (from PWMT300 Mount) through each bracket and plate combination and securely fasten to the flat panel TV/Monitor.
Note: Due to the additional thickness of attachment plate (A) and spacer plate (B), longer screws may be required to securely fasten each bracket and plate combination to the flat panel TV/Monitor. Refer to Warning! box above regarding the need for 3 complete turns required. See page 1 for additional length screws included in the PWMT300 mount hardware kit.
B
TILT
BRACKET
C
A
LG MODEL
(WITH FOUR MOUNTING TABS ATTACHED)
2 of 2 | ISSUED: |
Visit the Peerless Web Site at www.peerlessmounts.com | For customer care call |