Installation and Setup
TV Connection
Make one of the following connections, depending on the capabilities of your existing equipment.
Tips:
Depending on your TV and other equipment you wish to connect, there are various ways you could connect the DVD/CD Receiver. Use one of the connections described below.
Please refer to the manuals of your TV, VCR, Stereo System or other devices as necessary to make the best connections.
Caution:
Make sure the DVD/CD Receiver is connected directly to the TV. Select the correct AV input on your TV.
Do not connect your DVD/CD Receiver to the TV via your VCR. The DVD image could be distorted by the copy protection system.
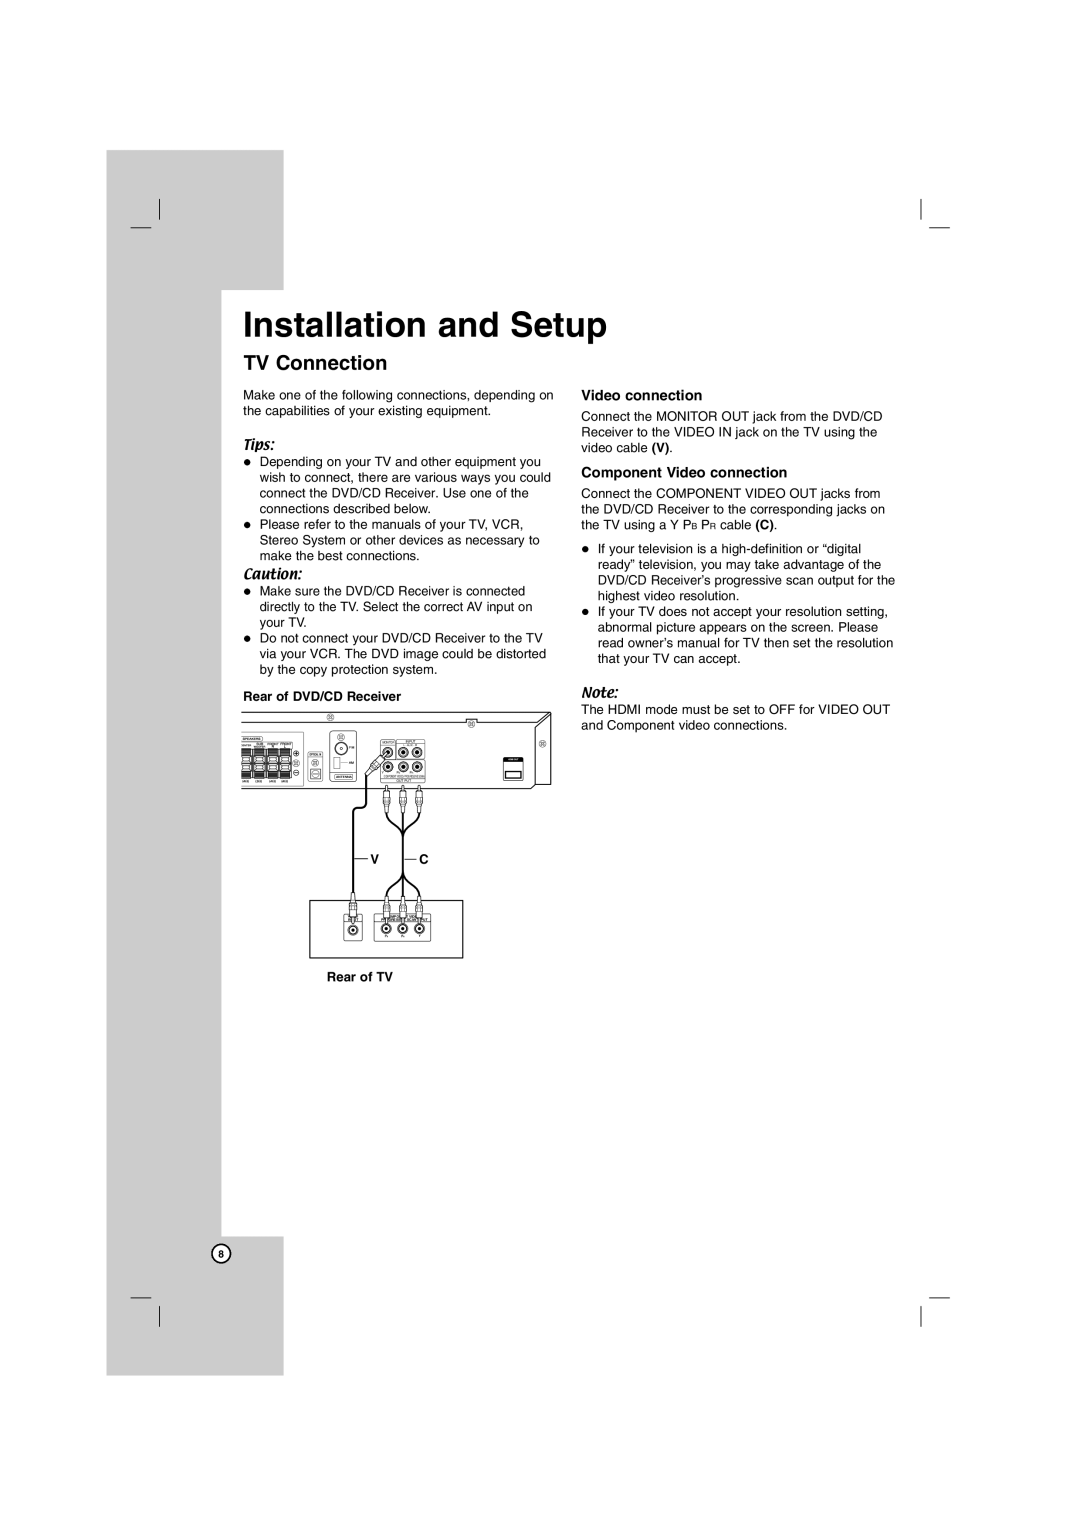
Rear of DVD/CD Receiver
MONITOR |
| INPUT |
|
| L - AUX - R |
|
| HDMI OUT |
Y | PB | PR |
COMPONENT VIDEO (PROGRESSIVE SCAN) | ||
| OUT PUT | |
Video connection
Connect the MONITOR OUT jack from the DVD/CD Receiver to the VIDEO IN jack on the TV using the video cable (V).
Component Video connection
Connect the COMPONENT VIDEO OUT jacks from the DVD/CD Receiver to the corresponding jacks on the TV using a Y PB PR cable (C).
If your television is a
If your TV does not accept your resolution setting, abnormal picture appears on the screen. Please read owner’s manual for TV then set the resolution that your TV can accept.
Note:
The HDMI mode must be set to OFF for VIDEO OUT and Component video connections.
V | C |
VIDEO | COMPONENT VIDEO / |
INPUT | PROGRESSIVE SCAN INPUT |
L | Y |
|
Rear of TV
8