Refrigerator compartment
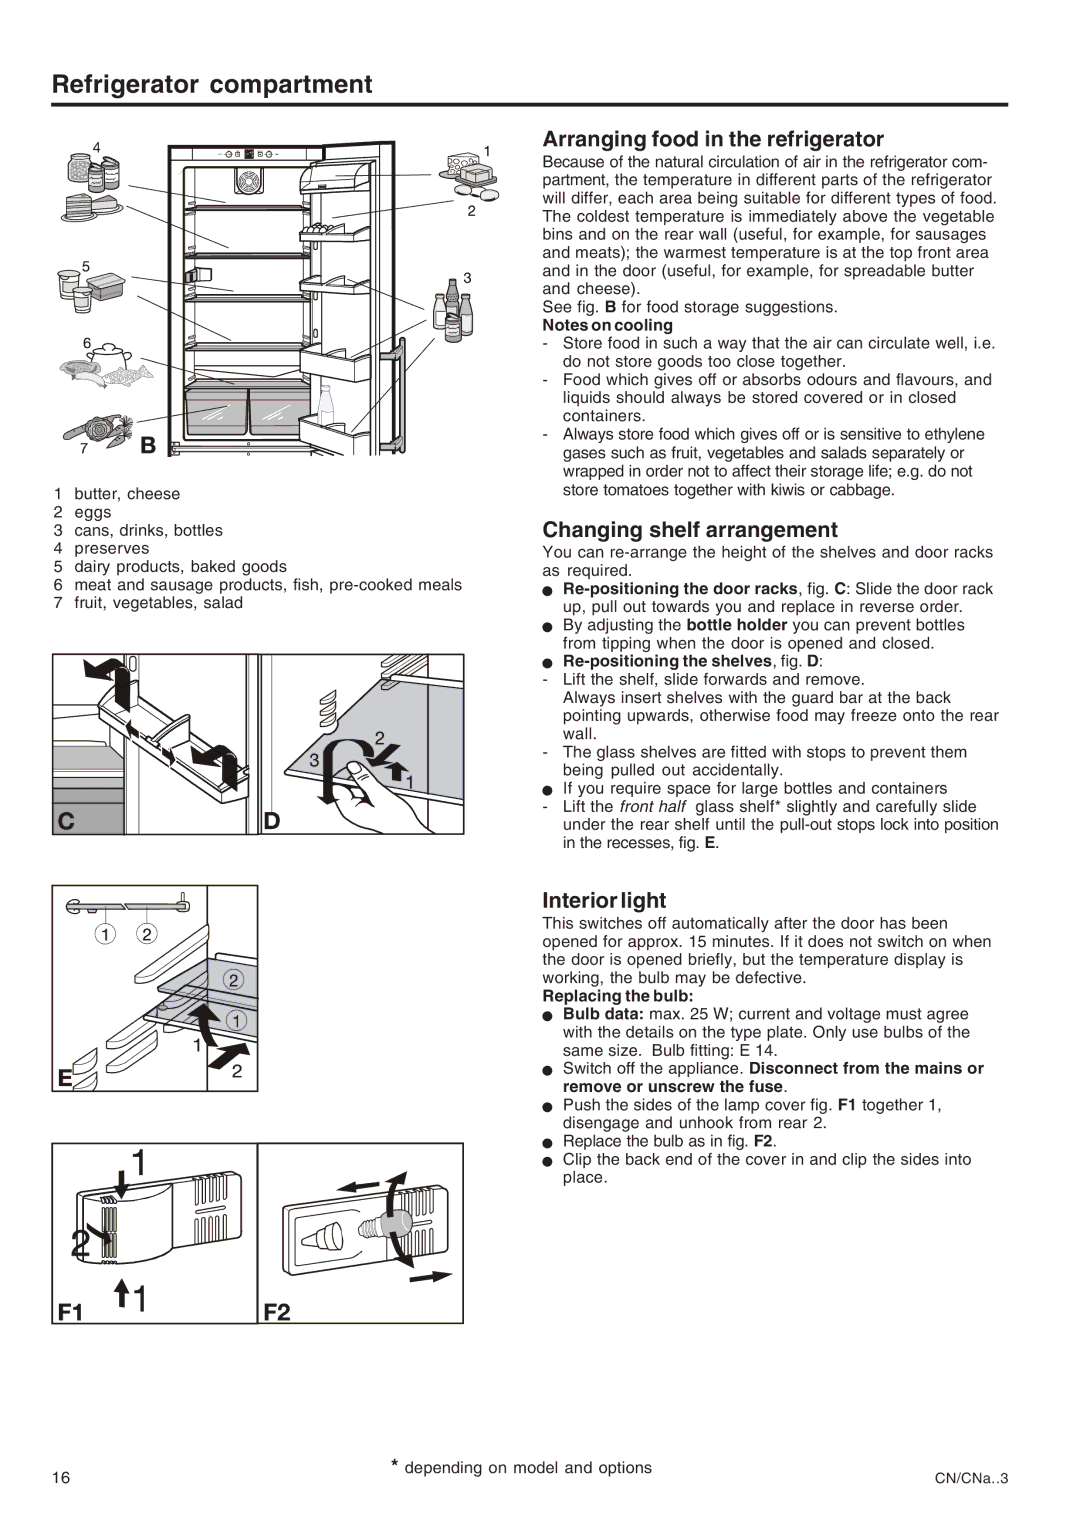
1butter, cheese
2eggs
3cans, drinks, bottles
4preserves
5dairy products, baked goods
6meat and sausage products, fish,
7fruit, vegetables, salad
Arranging food in the refrigerator
Because of the natural circulation of air in the refrigerator com- partment, the temperature in different parts of the refrigerator will differ, each area being suitable for different types of food. The coldest temperature is immediately above the vegetable bins and on the rear wall (useful, for example, for sausages and meats); the warmest temperature is at the top front area and in the door (useful, for example, for spreadable butter and cheese).
See fig. B for food storage suggestions.
Notes on cooling
-Store food in such a way that the air can circulate well, i.e. do not store goods too close together.
-Food which gives off or absorbs odours and flavours, and liquids should always be stored covered or in closed containers.
-Always store food which gives off or is sensitive to ethylene gases such as fruit, vegetables and salads separately or wrapped in order not to affect their storage life; e.g. do not store tomatoes together with kiwis or cabbage.
Changing shelf arrangement
You can
W
WBy adjusting the bottle holder you can prevent bottles from tipping when the door is opened and closed.
WRe-positioning the shelves, fig. D:
-Lift the shelf, slide forwards and remove.
Always insert shelves with the guard bar at the back pointing upwards, otherwise food may freeze onto the rear wall.
-The glass shelves are fitted with stops to prevent them being pulled out accidentally.
WIf you require space for large bottles and containers
-Lift the front half glass shelf* slightly and carefully slide under the rear shelf until the
Interior light
This switches off automatically after the door has been opened for approx. 15 minutes. If it does not switch on when the door is opened briefly, but the temperature display is working, the bulb may be defective.
Replacing the bulb:
WBulb data: max. 25 W; current and voltage must agree with the details on the type plate. Only use bulbs of the same size. Bulb fitting: E 14.
WSwitch off the appliance. Disconnect from the mains or remove or unscrew the fuse.
WPush the sides of the lamp cover fig. F1 together 1, disengage and unhook from rear 2.
WReplace the bulb as in fig. F2.
WClip the back end of the cover in and clip the sides into place.
16 | * depending on model and options |
CN/CNa..3 |
