Life Fitness Models 4000 and 4500HR Treadmills
How To… Install the Monocolumn Pad Kit
Tools required: Phillips screwdriver, Socket set
Step 1
Turn the power OFF at the ON/OFF switch and then unplug the unit from the electrical outlet.
Step 2
Using a Phillips screwdriver, remove the two SCREWS securing the sides of the VENT COVER to the MOTOR COVER.
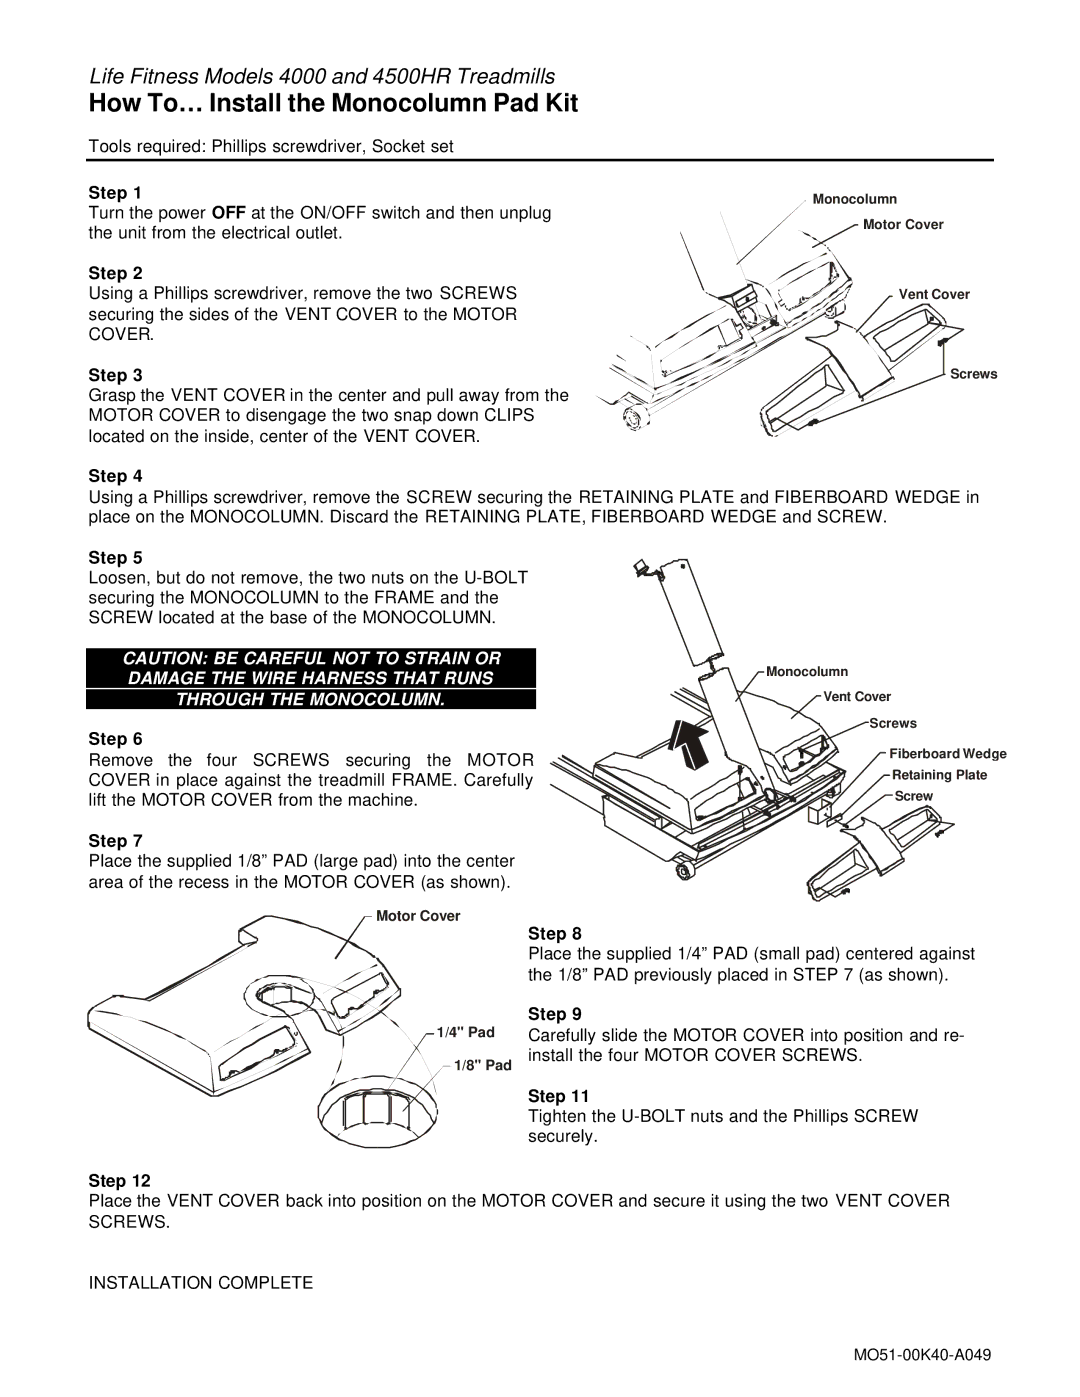
Step 3
Grasp the VENT COVER in the center and pull away from the MOTOR COVER to disengage the two snap down CLIPS located on the inside, center of the VENT COVER.
Monocolumn
Motor Cover
Vent Cover
Screws
Step 4
Using a Phillips screwdriver, remove the SCREW securing the RETAINING PLATE and FIBERBOARD WEDGE in place on the MONOCOLUMN. Discard the RETAINING PLATE, FIBERBOARD WEDGE and SCREW.
Step 5
Loosen, but do not remove, the two nuts on the
CAUTION: BE CAREFUL NOT TO STRAIN OR DAMAGE THE WIRE HARNESS THAT RUNS
THROUGH THE MONOCOLUMN.
Step 6
Remove the four SCREWS securing the MOTOR COVER in place against the treadmill FRAME. Carefully lift the MOTOR COVER from the machine.
Step 7
Place the supplied 1/8” PAD (large pad) into the center area of the recess in the MOTOR COVER (as shown).
Monocolumn
Vent Cover
Screws
Fiberboard Wedge
Retaining Plate
Screw
Motor Cover
![]() 1/4" Pad
1/4" Pad
1/8" Pad
Step 8
Place the supplied 1/4” PAD (small pad) centered against the 1/8” PAD previously placed in STEP 7 (as shown).
Step 9
Carefully slide the MOTOR COVER into position and re- install the four MOTOR COVER SCREWS.
Step 11
Tighten the
Step 12
Place the VENT COVER back into position on the MOTOR COVER and secure it using the two VENT COVER SCREWS.
INSTALLATION COMPLETE