HEAD PLATE
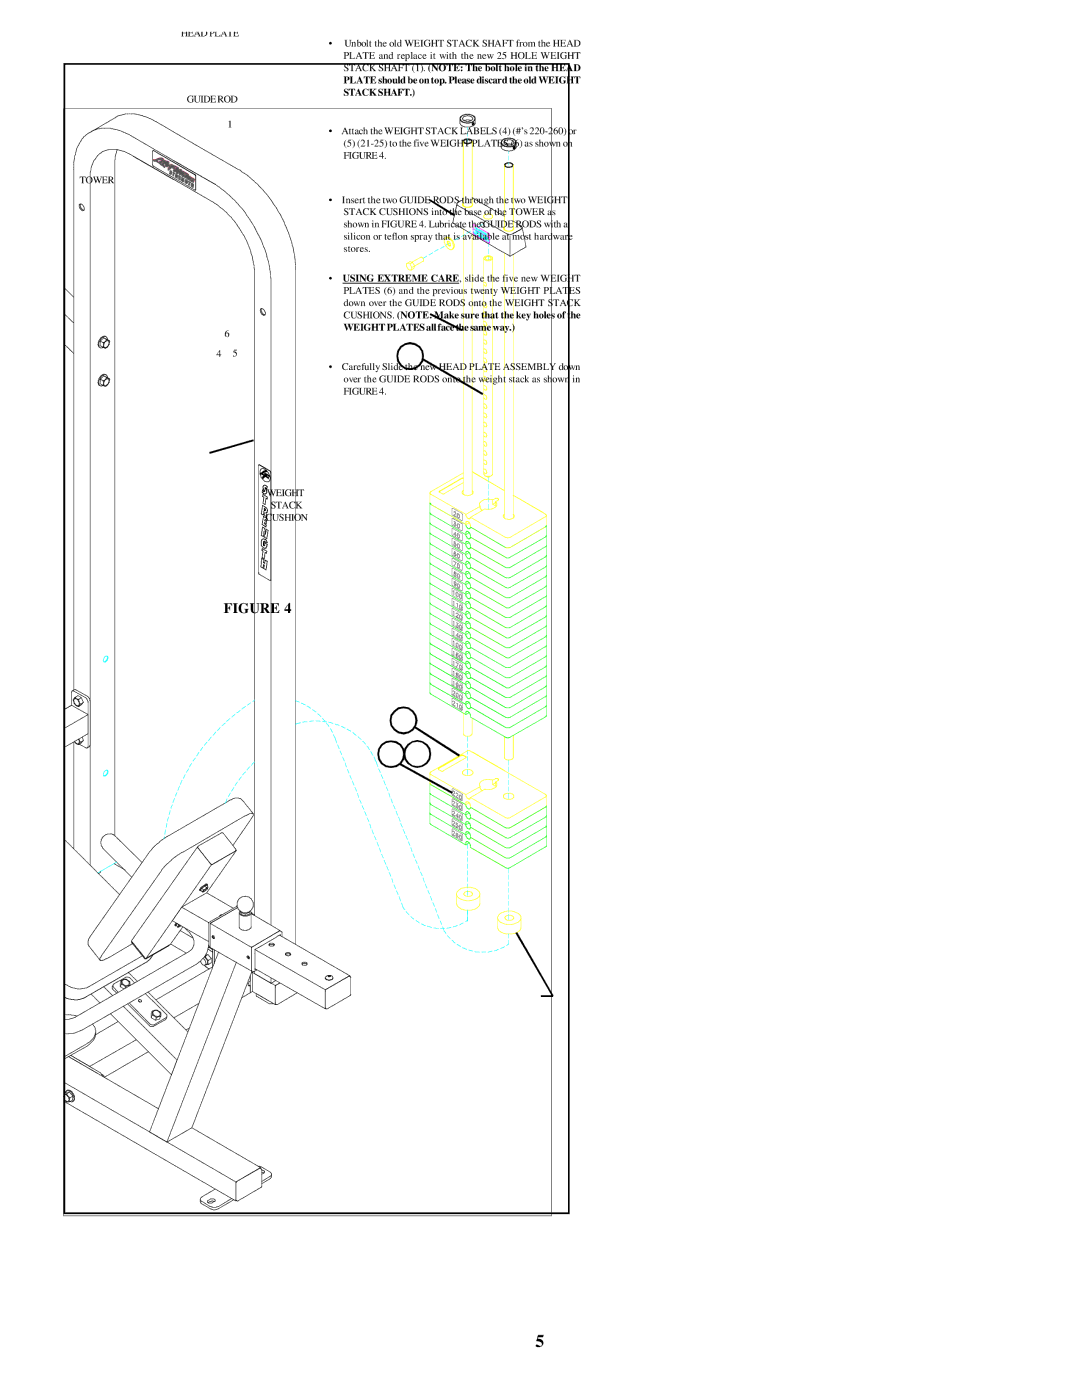
• Unbolt the old WEIGHT STACK SHAFT from the HEAD PLATE and replace it with the new 25 HOLE WEIGHT
|
| STACK SHAFT (1). (NOTE: The bolt hole in the |
| |
|
| PLATE should be on top. Please discard the old |
| |
GUIDE ROD | STACK SHAFT.) |
|
| |
|
|
| ||
| 1 | • Attach the WEIGHT STACK LABELS (4) (#’s | ||
|
| |||
|
| (5) |
| |
|
| FIGURE 4. |
|
|
TOWER |
|
|
|
|
|
| • Insert the two GUIDE RODS through the two WEIGHT |
| |
|
| STACK CUSHIONS into the base of the TOWER as |
| |
|
| shown in FIGURE 4. Lubricate the GUIDE RODS with a |
| |
|
| silicon or teflon spray that is available at most |
| |
|
| stores. |
|
|
|
| • USING EXTREME CARE, slide the five new |
| |
|
| PLATES (6) and the previous twenty WEIGHT |
| |
|
| down over the GUIDE RODS onto the WEIGHT |
| |
|
| CUSHIONS. (NOTE: | sure that the key holes of the | |
| 6 | WEIGHT PLATES all | same way.) |
|
|
|
|
| |
4 | 5 |
|
|
|
|
| • Carefully Slide new HEAD PLATE ASSEMBLY |
| |
|
| over the GUIDE RODS onto the weight stack as | in | |
|
| FIGURE 4. |
|
|
![]()
![]()
![]() WEIGHT
WEIGHT
STACK
![]()
![]()
![]() CUSHION
CUSHION
FIGURE 4
5
