1.Before proceeding, familiarize yourself with the parts of the Stairclimber and make sure that you have received all the items described in the Parts List.
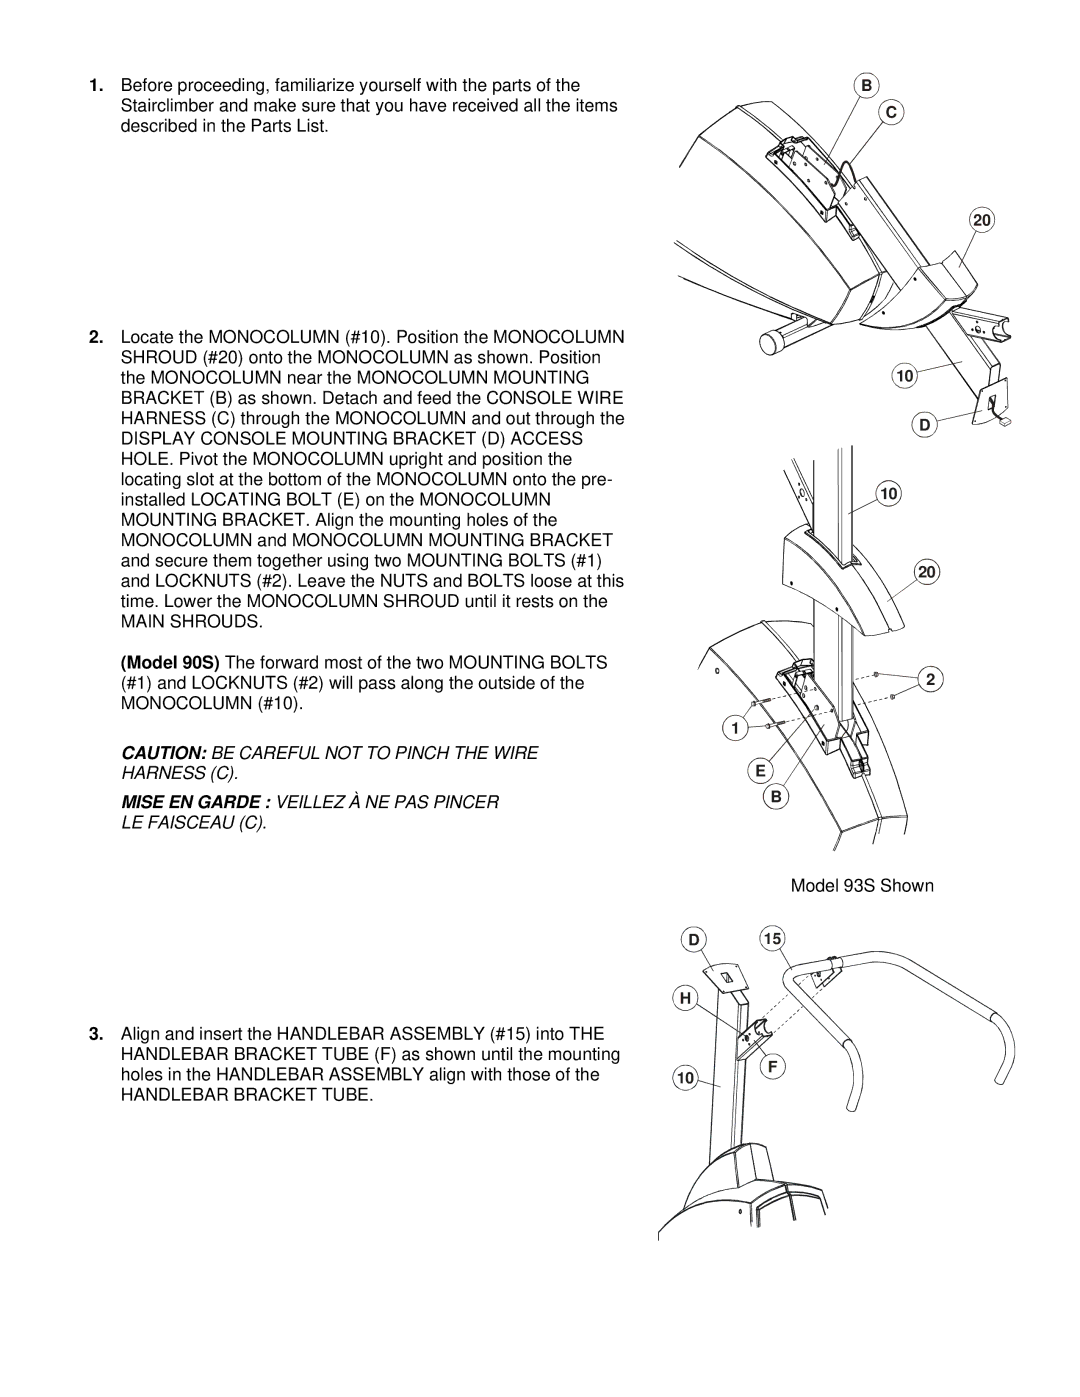
2.Locate the MONOCOLUMN (#10). Position the MONOCOLUMN SHROUD (#20) onto the MONOCOLUMN as shown. Position the MONOCOLUMN near the MONOCOLUMN MOUNTING BRACKET (B) as shown. Detach and feed the CONSOLE WIRE HARNESS (C) through the MONOCOLUMN and out through the
DISPLAY CONSOLE MOUNTING BRACKET (D) ACCESS HOLE. Pivot the MONOCOLUMN upright and position the locating slot at the bottom of the MONOCOLUMN onto the pre- installed LOCATING BOLT (E) on the MONOCOLUMN MOUNTING BRACKET. Align the mounting holes of the MONOCOLUMN and MONOCOLUMN MOUNTING BRACKET and secure them together using two MOUNTING BOLTS (#1) and LOCKNUTS (#2). Leave the NUTS and BOLTS loose at this time. Lower the MONOCOLUMN SHROUD until it rests on the
MAIN SHROUDS.
(Model 90S) The forward most of the two MOUNTING BOLTS (#1) and LOCKNUTS (#2) will pass along the outside of the MONOCOLUMN (#10).
CAUTION: BE CAREFUL NOT TO PINCH THE WIRE HARNESS (C).
MISE EN GARDE : VEILLEZ À NE PAS PINCER LE FAISCEAU (C).
B
C
20
10
D
10
20
2
1
E
B
Model 93S Shown
D 15
3.Align and insert the HANDLEBAR ASSEMBLY (#15) into THE HANDLEBAR BRACKET TUBE (F) as shown until the mounting holes in the HANDLEBAR ASSEMBLY align with those of the
HANDLEBAR BRACKET TUBE.
H
10
F