Life Fitness
How To… Install the Clevis Preventive Kit
Service Tools Require: Phillips Screwdriver, Wire Brush & Two 9/16” Wrenches
Service Kit:
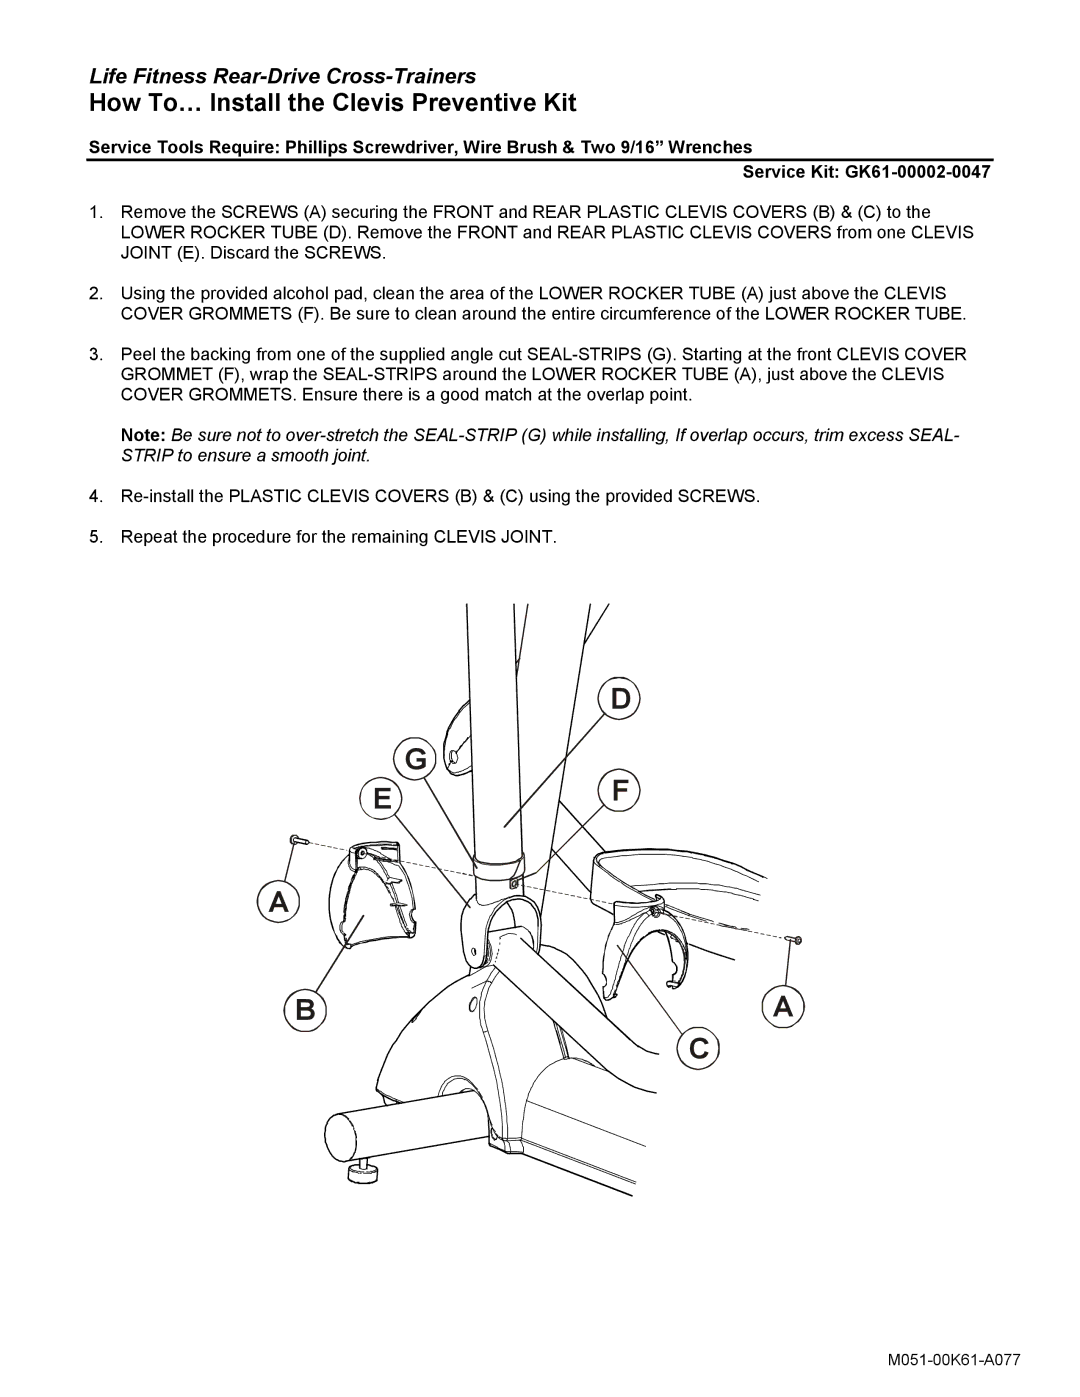
1.Remove the SCREWS (A) securing the FRONT and REAR PLASTIC CLEVIS COVERS (B) & (C) to the LOWER ROCKER TUBE (D). Remove the FRONT and REAR PLASTIC CLEVIS COVERS from one CLEVIS JOINT (E). Discard the SCREWS.
2.Using the provided alcohol pad, clean the area of the LOWER ROCKER TUBE (A) just above the CLEVIS COVER GROMMETS (F). Be sure to clean around the entire circumference of the LOWER ROCKER TUBE.
3.Peel the backing from one of the supplied angle cut
Note: Be sure not to
4.
5.Repeat the procedure for the remaining CLEVIS JOINT.
| D |
| G |
E | F |
A
B A
A
C
