FIGURE 8 |
|
|
|
| 9 |
|
|
10 | 10 |
|
|
|
|
| |
|
|
| 1 |
|
|
| 12 |
| 4 |
|
|
| 21 | 24 | 3 |
| 3/8 X |
| 10 |
|
| 3 | 4 |
4 |
|
| |
9 |
| 13 | |
|
|
| |
|
|
| 2 |
| 3 |
| 4 |
|
|
| |
|
|
| DETAIL 8 |
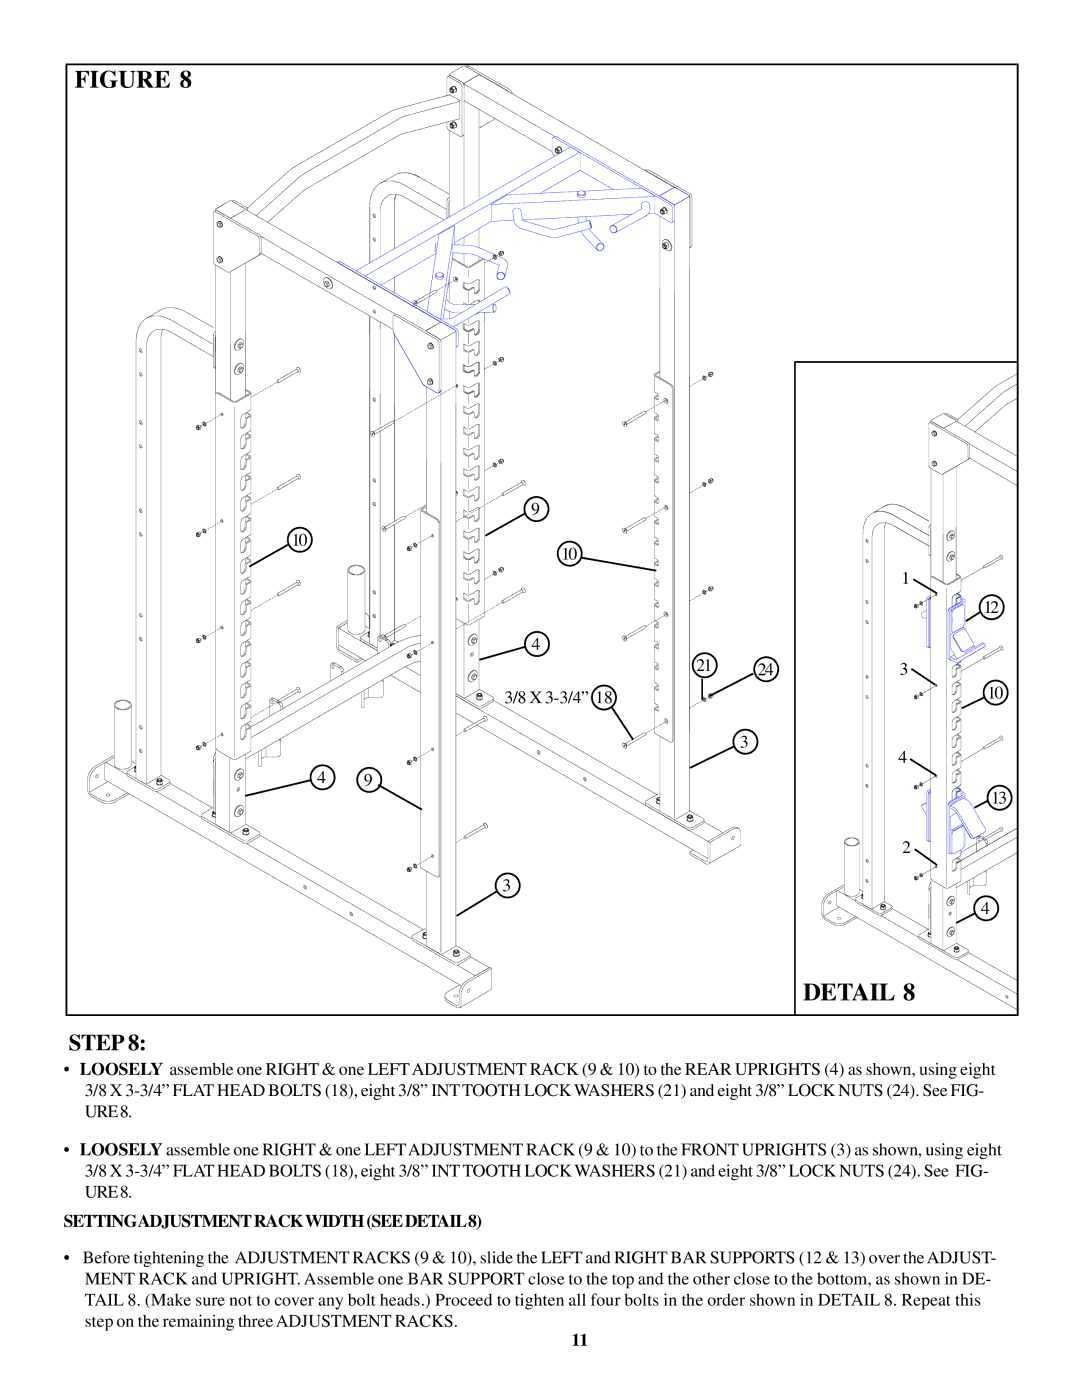
STEP 8:
•LOOSELY assemble one RIGHT & one LEFT ADJUSTMENT RACK (9 & 10) to the REAR UPRIGHTS (4) as shown, using eight 3/8 X
•LOOSELY assemble one RIGHT & one LEFTADJUSTMENT RACK (9 & 10) to the FRONT UPRIGHTS (3) as shown, using eight 3/8 X
SETTINGADJUSTMENTRACKWIDTH(SEEDETAIL8)
•Before tightening the ADJUSTMENT RACKS (9 & 10), slide the LEFT and RIGHT BAR SUPPORTS (12 & 13) over the ADJUST- MENT RACK and UPRIGHT. Assemble one BAR SUPPORT close to the top and the other close to the bottom, as shown in DE- TAIL 8. (Make sure not to cover any bolt heads.) Proceed to tighten all four bolts in the order shown in DETAIL 8. Repeat this step on the remaining three ADJUSTMENT RACKS.
11