Console Assembly
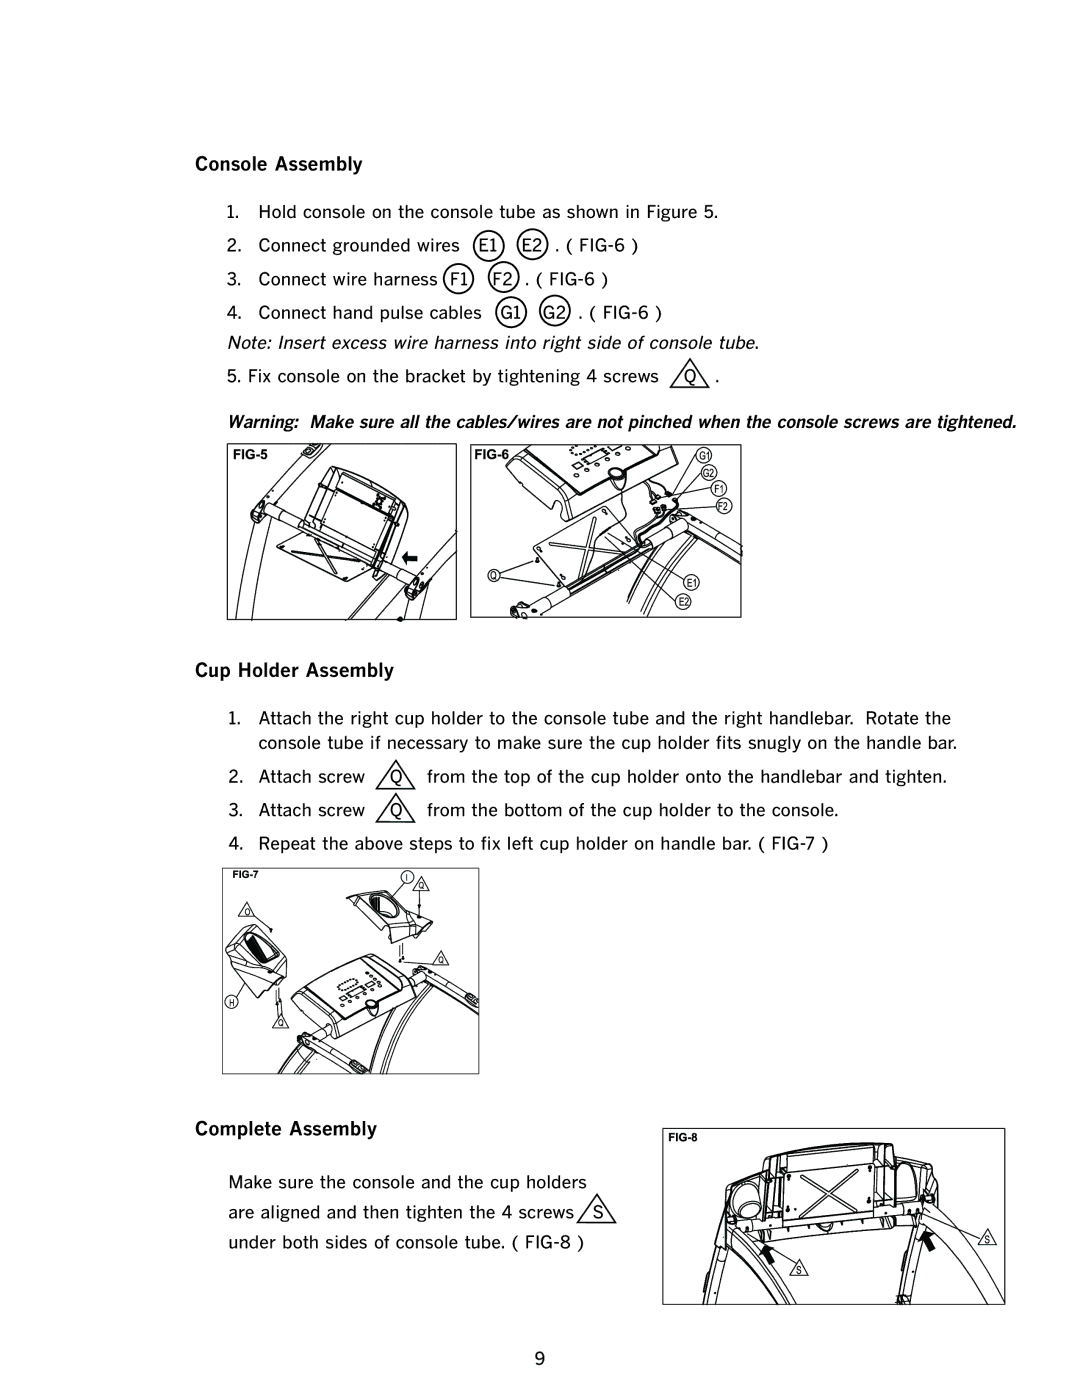
1.Hold console on the console tube as shown in Figure 5.
2. | Connect grounded wires E1 | E2 . ( | |
3. | Connect wire harness F1 | F2 | . ( |
4. | Connect hand pulse cables | G1 | G2 . ( |
Note: Insert excess wire harness into right side of console tube. 5. Fix console on the bracket by tightening 4 screws Q .
Warning: Make sure all the cables/wires are not pinched when the console screws are tightened.
Cup Holder Assembly
1.Attach the right cup holder to the console tube and the right handlebar. Rotate the console tube if necessary to make sure the cup holder fits snugly on the handle bar.
2. | Attach screw | Q |
| from the top of the cup holder onto the handlebar and tighten. | |||||
3. | Attach screw | Q |
| from the bottom of the cup holder to the console. | |||||
4. | Repeat the above steps to fix left cup holder on handle bar. ( | ||||||||
|
|
|
|
|
|
|
|
|
|
|
|
|
|
|
|
|
|
|
|
|
|
|
|
|
|
|
|
|
|
|
|
|
|
|
|
|
|
|
|
|
|
|
|
|
|
|
|
|
|
|
|
|
|
|
|
|
|
|
|
Complete Assembly
Make sure the console and the cup holders are aligned and then tighten the 4 screws S under both sides of console tube. (
9
