1004ICVN specifications
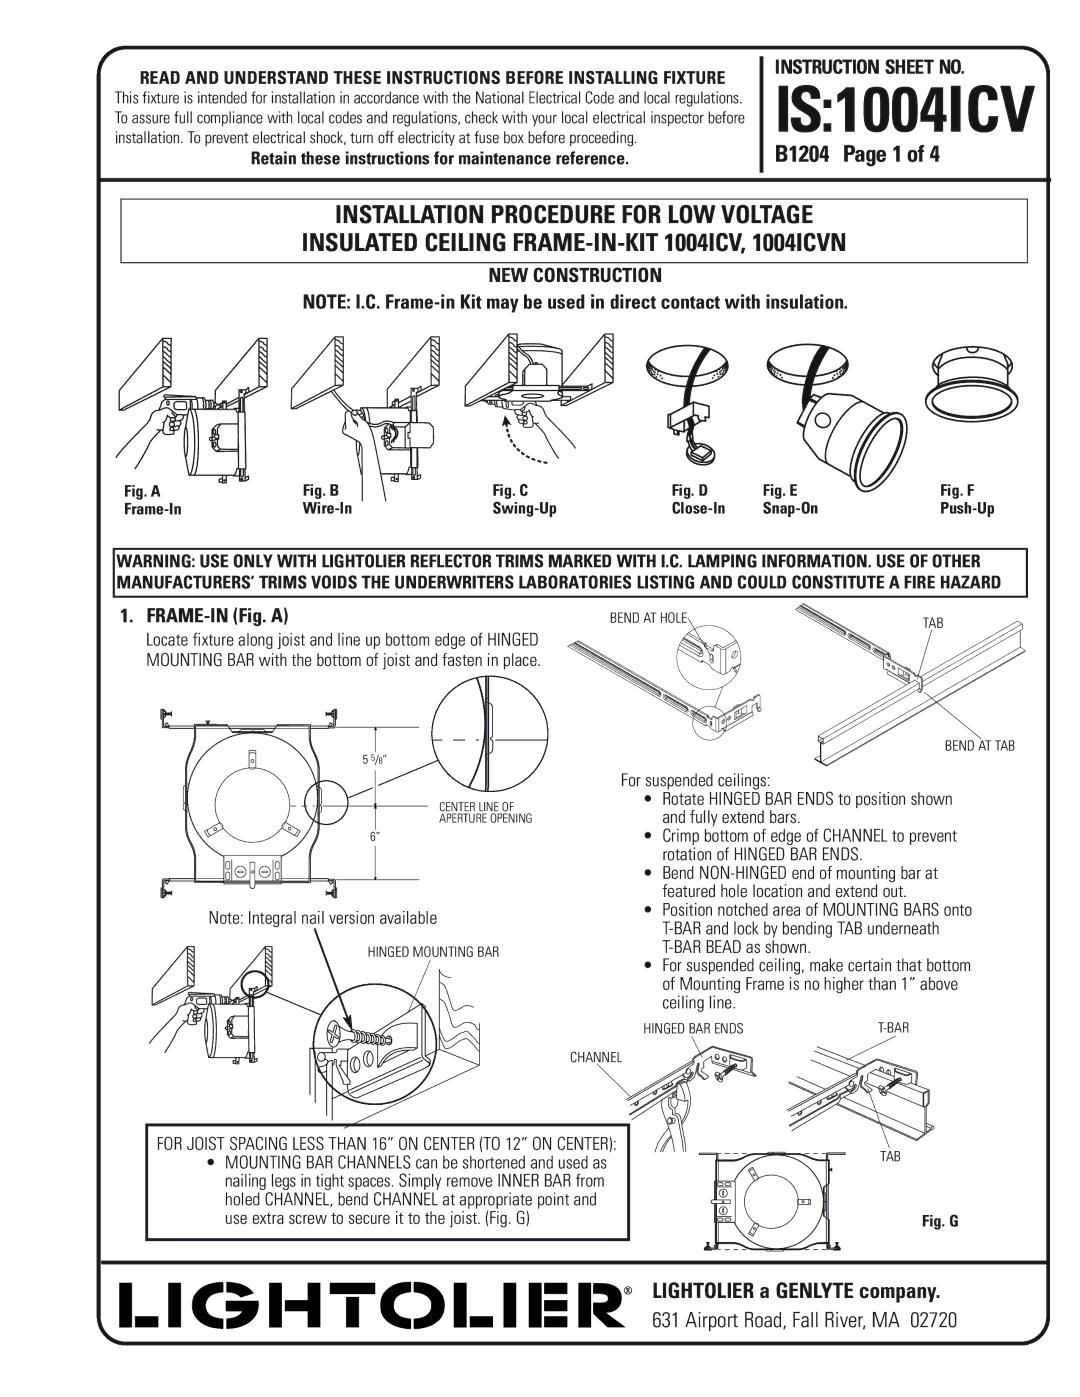
Lightolier 1004ICVN is a highly versatile and efficient recessed lighting fixture designed to meet a variety of residential and commercial needs. Known for its compact design and innovative features, this product stands out in the world of illumination solutions.One of the main features of the Lightolier 1004ICVN is its insulation contact rating. The fixture is designed to be installed in ceilings with direct contact with insulation, allowing for greater flexibility in your lighting layout. This makes it an ideal choice for new construction or remodels where a clean, flush look is desired while maintaining compliance with energy efficiency codes.
The fixture is equipped with a robust, high-efficiency reflector that enhances the quality of light output and minimizes glare. This reflector uses advanced lighting technologies to produce an even light distribution, making it ideal for various settings, from living rooms to commercial spaces. The smooth finish of the reflector also aids in maintaining a contemporary aesthetic, blending seamlessly into modern architectural designs.
Another important characteristic of the Lightolier 1004ICVN is its compatibility with a range of light sources, including LED, incandescent, and compact fluorescent bulbs. This flexibility means that users can choose the best lighting solution that meets their specific requirements for brightness and color temperature. The fixture's design also allows for easy bulb replacement, a feature that enhances its practicality and convenience.
The Lightolier 1004ICVN is designed with user-friendly installation features. It includes adjustable hanger bars that facilitate mounting in various ceiling types and ensure a secure fit. This makes the installation process straightforward, even for those who are not lighting professionals.
Moreover, the fixture supports dimming capabilities, allowing users to create the desired ambiance in any space. This is increasingly important as homeowners and businesses look to enhance their environments through controllable lighting solutions.
In summary, the Lightolier 1004ICVN is a forward-thinking recessed lighting solution that combines a sleek design with versatile functionalities. Its compatibility with various light sources, insulation contact rating, light-enhancing reflector, and ease of installation make it a popular choice for both residential and commercial applications. With the growing emphasis on energy efficiency and customizable lighting experiences, the Lightolier 1004ICVN effectively meets the demands of modern lighting projects.