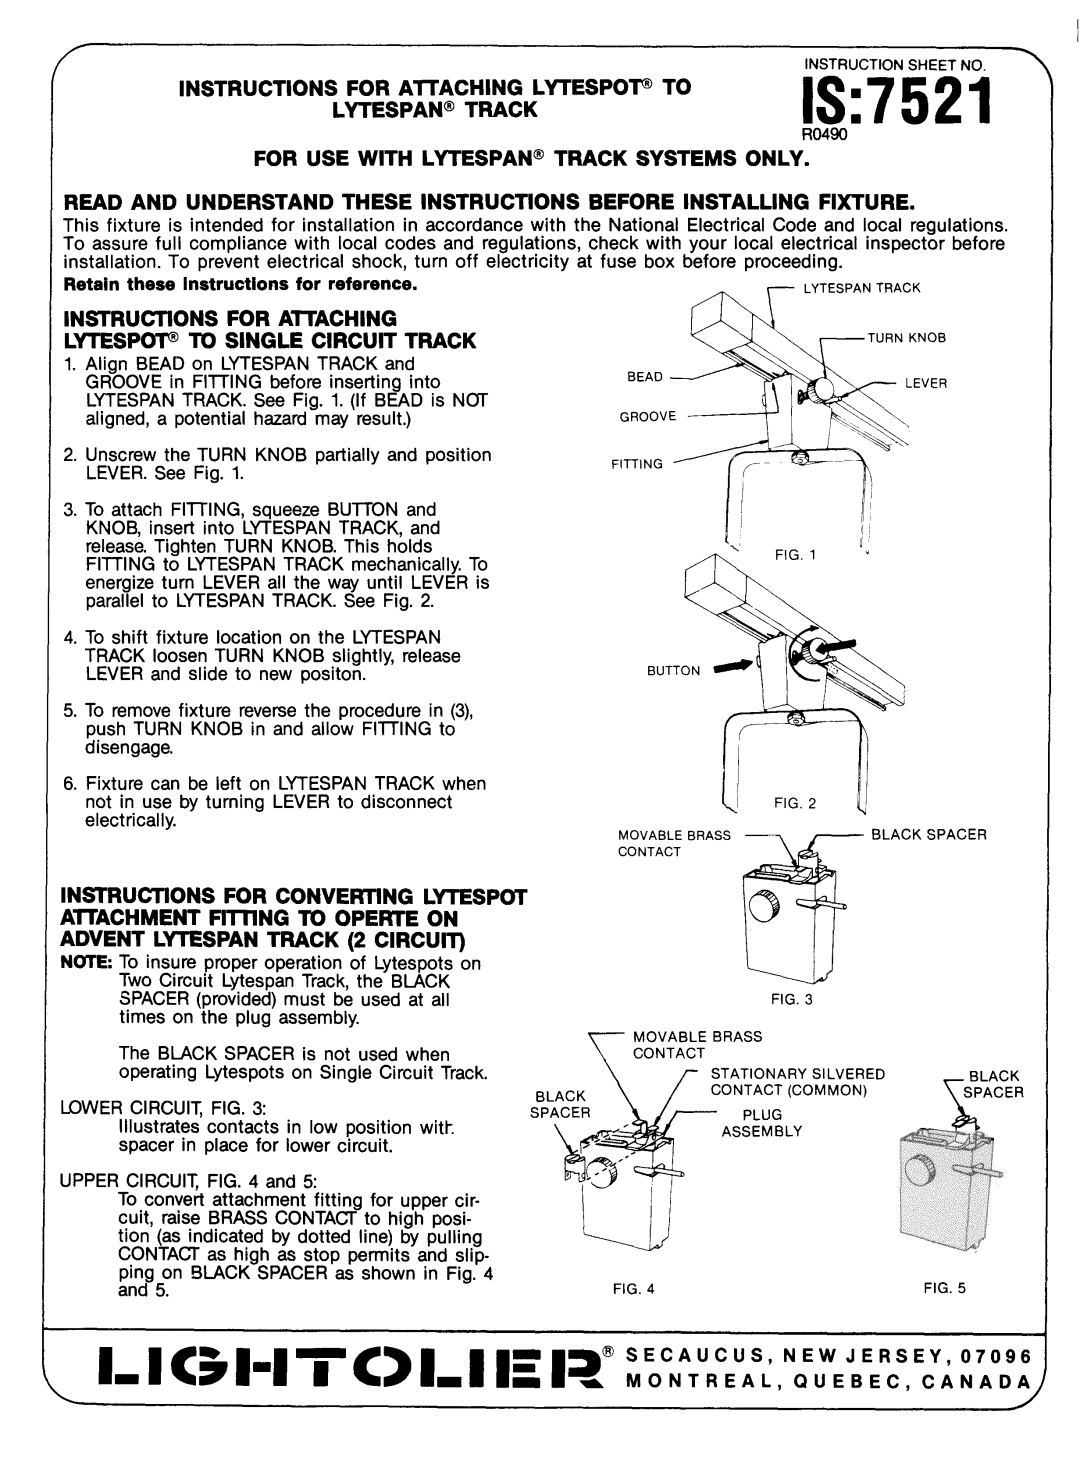
7521 specifications
The Lightolier 7521 is a versatile and efficient lighting fixture that has gained popularity in both residential and commercial environments. This model embodies a blend of innovative design and advanced technology, ensuring it meets the diverse needs of users while offering enhanced illumination solutions.One of the standout features of the Lightolier 7521 is its energy efficiency. Utilizing LED technology, this fixture provides significant power savings compared to traditional incandescent or fluorescent lighting. The LED array not only lowers energy consumption but also offers a longer lifespan, reducing the frequency of replacements and maintenance costs. This makes it an appealing choice for eco-conscious consumers and businesses seeking to minimize their carbon footprint.
The design of the Lightolier 7521 is sleek and modern, allowing it to seamlessly integrate into various decors. It is available in multiple finishes, providing flexibility for diverse interior styles. Whether used in a contemporary office space or a cozy living room, this fixture enhances the aesthetic appeal of the environment while delivering high-performance lighting.
Another notable characteristic of the Lightolier 7521 is its adjustable brightness and color temperature options. With built-in dimming capabilities, users can easily modify the light output to create the desired ambiance for any occasion. Additionally, the ability to switch between warm and cool color temperatures allows for customization according to personal preferences or specific tasks, such as reading or general ambient lighting.
The fixture’s easy installation process is another key advantage. It comes with all necessary mounting hardware, making it straightforward for both professionals and DIY enthusiasts to set up. Its lightweight design facilitates effortless handling and positioning, ensuring optimal placement for effective lighting.
Furthermore, the Lightolier 7521 is designed with durability in mind. Constructed from high-quality materials, it withstands the demands of daily use while maintaining its performance and appearance over time. This robust build quality makes it suitable for high-traffic areas, where reliability is essential.
In conclusion, the Lightolier 7521 stands out in the lighting market due to its energy efficiency, modern design, versatility, and durability. These features, combined with advanced LED technology and adjustable settings, ensure that it meets the needs of a wide range of applications while providing exceptional illumination. Whether for home or office use, the Lightolier 7521 is a smart investment in quality lighting solutions.