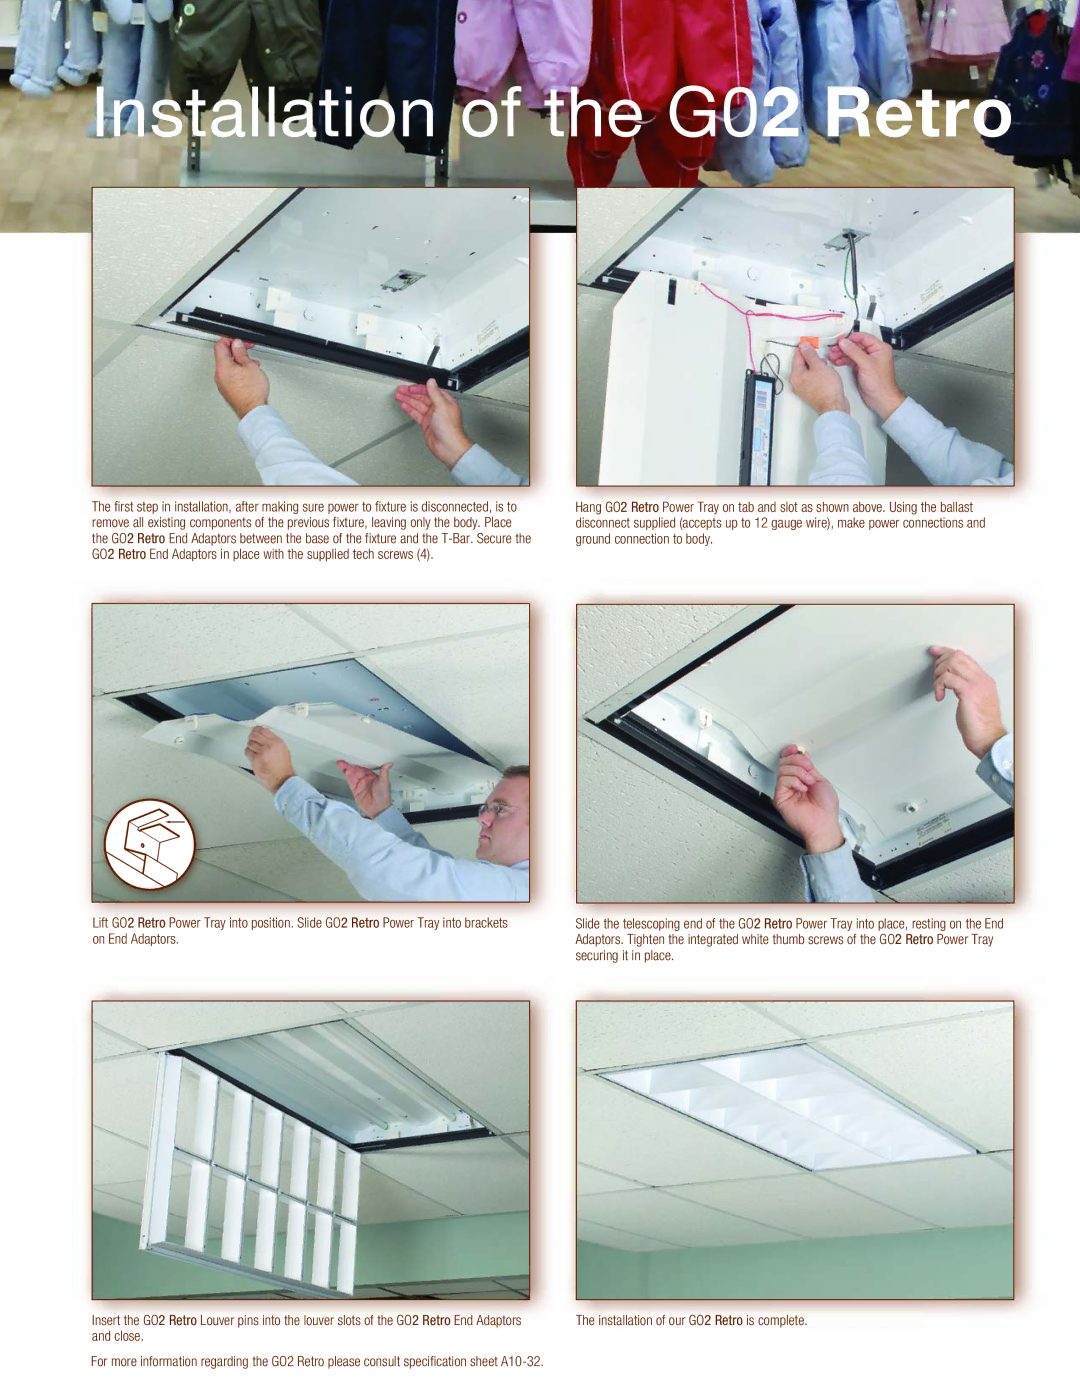
GO2 Retro specifications
The Lightolier GO2 Retro is an innovative lighting solution that combines modern technology with a nostalgic aesthetic, making it a popular choice for both residential and commercial spaces. With its sleek design and versatile functionality, the GO2 Retro offers a fresh take on traditional lighting while maintaining a sense of charm and familiarity.One of the main features of the GO2 Retro is its energy efficiency. Using advanced LED technology, this fixture consumes significantly less power compared to conventional incandescent bulbs, leading to reduced energy bills and a lower carbon footprint. The LEDs also have an impressively long lifespan, often lasting up to 25,000 hours, which means less frequent replacements and maintenance.
The Lightolier GO2 Retro is designed to produce high-quality light output with excellent color rendering. With a color temperature range typically between 2700K and 3000K, it creates a warm, inviting atmosphere that enhances the aesthetic appeal of any space. Its high Color Rendering Index (CRI) ensures that colors appear vibrant and true to life, making it an ideal choice for homes, galleries, and retail environments.
In terms of design, the GO2 Retro takes inspiration from classic light fixtures, featuring a retro look that can seamlessly blend into various interior styles. It is available in multiple finishes, including brushed brass, matte black, and antique bronze, allowing homeowners and designers to choose a finish that complements their decor. Furthermore, the fixture's adjustable design enables users to direct light where it is needed most, providing versatility in illumination.
The GO2 Retro also incorporates smart technology features, making it compatible with various smart home systems. This allows users to control the lighting remotely via a smartphone app or smart home assistant, enhancing convenience and energy management. Features such as dimming capabilities provide additional customization, allowing users to set the perfect ambiance for any occasion.
Overall, the Lightolier GO2 Retro is more than just a lighting fixture; it is a blend of functionality, efficiency, and aesthetic appeal. Its combination of retro design, advanced technology, and adaptability makes it an exceptional choice for anyone looking to upgrade their lighting solutions while maintaining a touch of classic elegance. Whether used in a cozy living room, a trendy café, or an art studio, the GO2 Retro is sure to illuminate any space with style and grace.

