c
INSTRUCTIONSHEETNO. =
INSTRUCTIONS FOR ASSEMBLING AND INSTALLING FIXTURE IS:6580
R1285
READ AND UNDERS14ND THESE INSTRUCTIONS BEFORE INSTALLING FIXTURE.
This fiXtUre is intended for installation in accordance with the National Electrical Code and local or federal
code specifications, To prevent electrical shock, turn off electricity at fuse box before proceeding.
Retain these Instructions for maintenance reference.
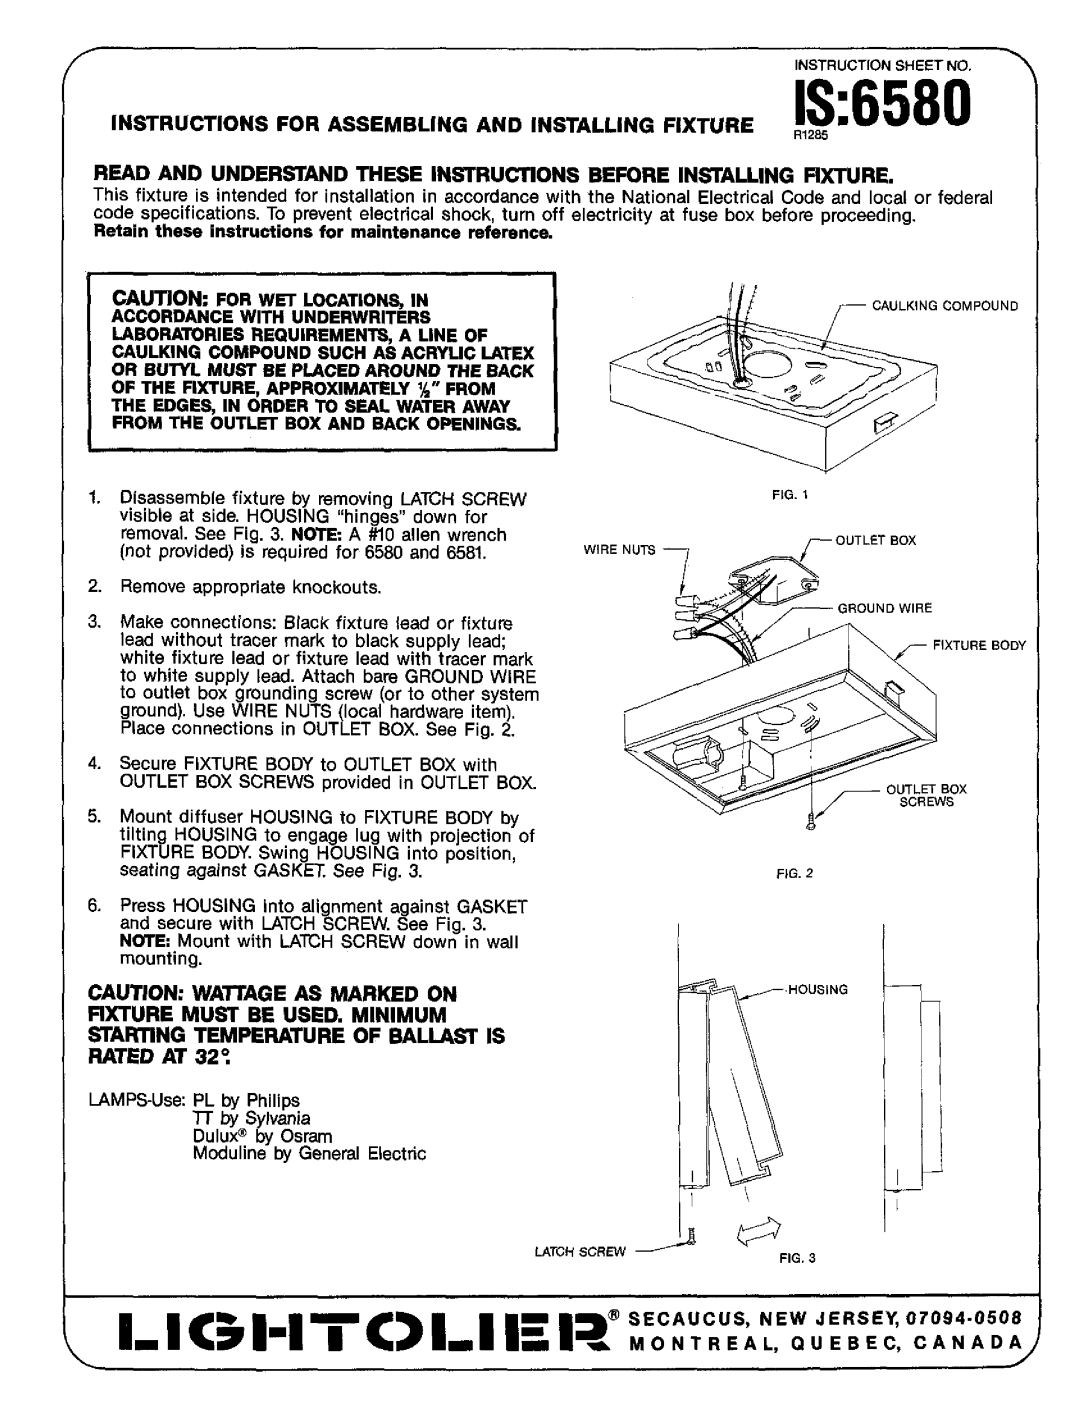
1.Disassemble fixture by removing LATCH SCREW
visible at side, HOUSING “hinges” down for
removal. See Fig. 3. N~E A MO allen wrench (not provided) is required for 6580 and 6561.
CAULKING COMPOUND
*
FIG. 1
WIRE
2. Remove appropriate knockouts,
3. Make connections Black fixture lead or fixture lead without tracer mark to black supply lead; white fixture lead or fixture lead with tracer mark
to white supply lead. Attach bare GROUND WIRE
to outlet box grounding screw (or to other system ground). Use WIRE NUTS (local hardware item),
Place connections in OUTLET BOX. See Fig. 2.
4.Secure FIXTURE BODY to OUTLET BOX with
OUTLET BOX SCREWS provided in OUTLET BOX.
5.Mount diffueer HOUSING to FIXTURE BODY by tilting HOUSING to engage lug with projection of
FIXTURE BODY. Swing HOUSING | into | position, |
seating against GASKET See Fig. | 3. | FIG. 2 |
6. Press HOUSING into alignment against GASKET and secure with LATCH SCREW. See Fig. 3. NU7E Mount with LATCH SCREW down in wall mounting.
CAUTION: WATKAGE AS MARKED ON | HOUSING | |||||
bi@ | ||||||
FIXTURE MUST BE USED. MINIMUM | ||||||
| ||||||
STARTING | TEMPERATURE OF BALLA~ IS |
| ||||
RATED AT 32: |
|
|
|
| ||
PL | by | Philips |
| |||
| T7 | by | Sylvania |
| ||
| DuIuP | by | Osrem |
| ||
| Moduline | by General Electric |
| |||
|
| \ |
LATCHSCREW ~ | FIG.3 | |
|
| |
| @ SECAUCUS, | NEW JERSEY |
MONTREAL, | Q”EBEC, | |
RE BOi3
07094.0508
CANADA
,,