INSTALLATION |
NON-STANDARD SAFETY INFORMATION
![]() WARNING
WARNING
ELECTRIC SHOCK can kill.
•Turn off power at the power source disconnect switch before working inside the equipment.
![]() WARNING
WARNING
INPUT CONNECTIONS
•Only a qualified electrician should connect the Spreadarc. Installation should be made in accor- dance with the appropriate National Electrical
Code, all local codes and the information in this manual.
LOCATION
The Spreadarc will operate in harsh environments. Even so, it is important that simple preventative mea- sures are followed in order to assure long life and reli- able operation.
•The Spreadarc must be located where there is free circulation of clean air such that air movement in the back, sides and bottom will not be restricted.
•Dirt and dust that can be drawn into the Spreadarc should be kept to a minimum. Failure to observe these precautions can result in excessive operating temperatures and nuisance shutdown.
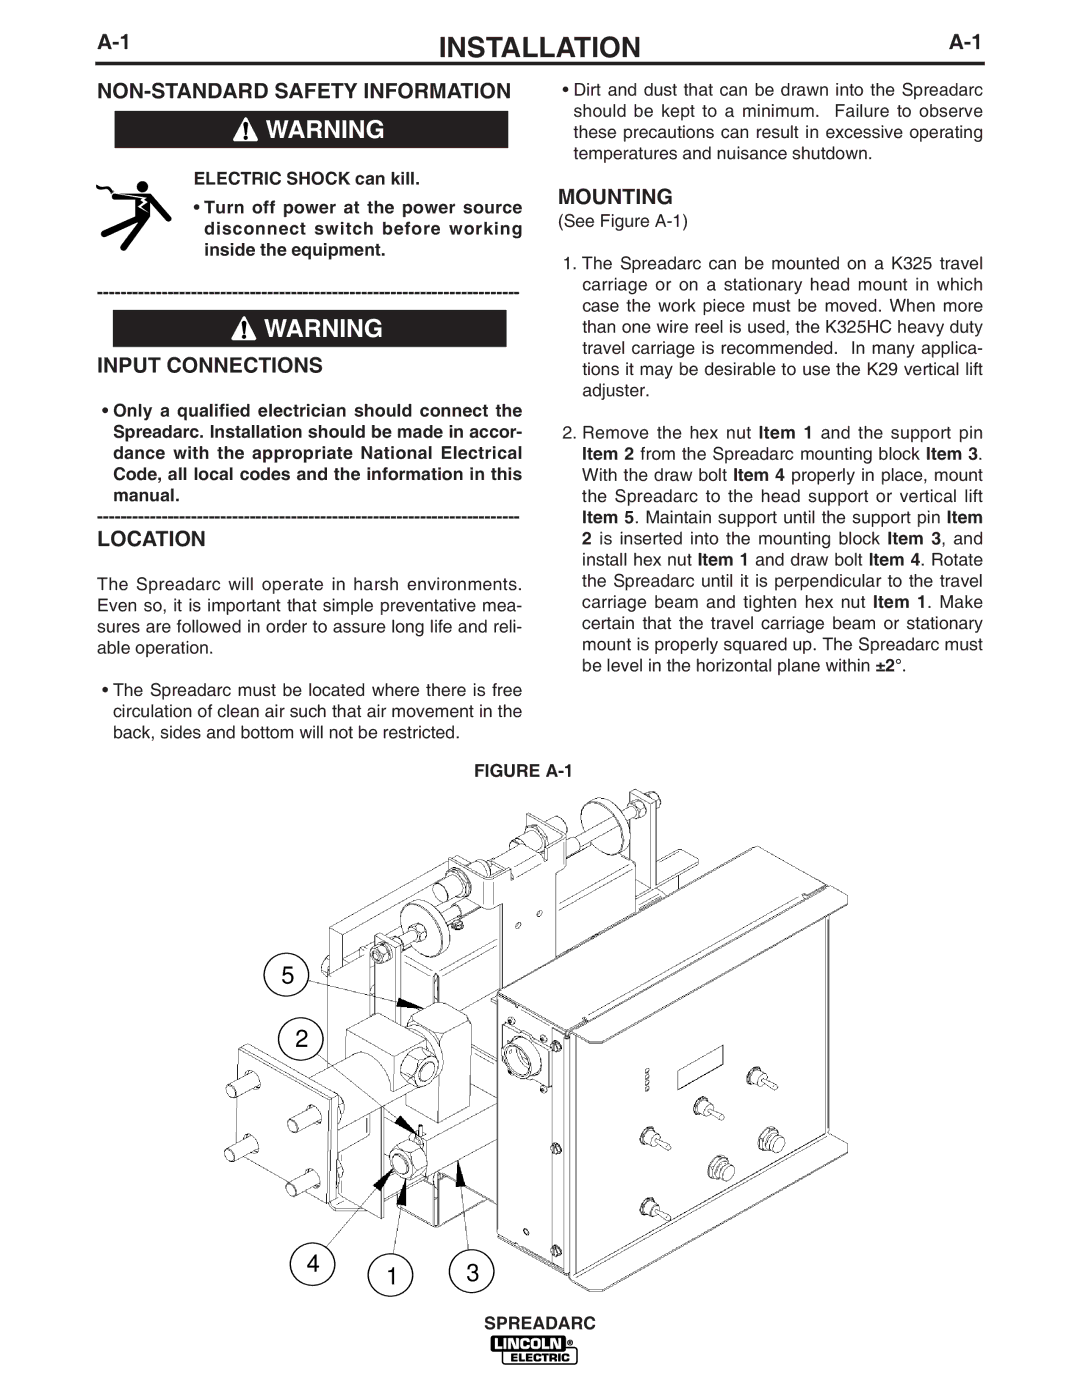
MOUNTING
(See Figure
1.The Spreadarc can be mounted on a K325 travel carriage or on a stationary head mount in which case the work piece must be moved. When more than one wire reel is used, the K325HC heavy duty travel carriage is recommended. In many applica- tions it may be desirable to use the K29 vertical lift adjuster.
2.Remove the hex nut Item 1 and the support pin Item 2 from the Spreadarc mounting block Item 3. With the draw bolt Item 4 properly in place, mount the Spreadarc to the head support or vertical lift Item 5. Maintain support until the support pin Item 2 is inserted into the mounting block Item 3, and install hex nut Item 1 and draw bolt Item 4. Rotate the Spreadarc until it is perpendicular to the travel carriage beam and tighten hex nut Item 1. Make certain that the travel carriage beam or stationary mount is properly squared up. The Spreadarc must be level in the horizontal plane within ±2°.
FIGURE A-1
5
2
4 1 3