Manuals
/
Linksys
/
Computer Equipment
/
Switch
Linksys
EZXS16W
manual
Connecting the Switch, Instructions, Chapter
Models:
EZXS16W
1
5
28
28
Download
28 pages
56.92 Kb
1
2
3
4
5
6
7
8
Troubleshooting
Specifications
Warranty
Safety
Connecting the Switch
Page 5
Image 5
Page 4
Page 6
Page 5
Image 5
Page 4
Page 6
Contents
Models EZXS55W v4.2, EZXS88W v3.4, EZXS16W
EtherFast 10/100 5/8/16-Port Workgroup Switch
USER GUIDE
About This Guide
About This Guide
Icon Descriptions
Online Resources
Chapter 2 Connecting the Switch
Table of Contents
Appendix A Troubleshooting
Appendix B Specifications
Product Overview
Chapter Product Overview
Front Panel
Back Panel
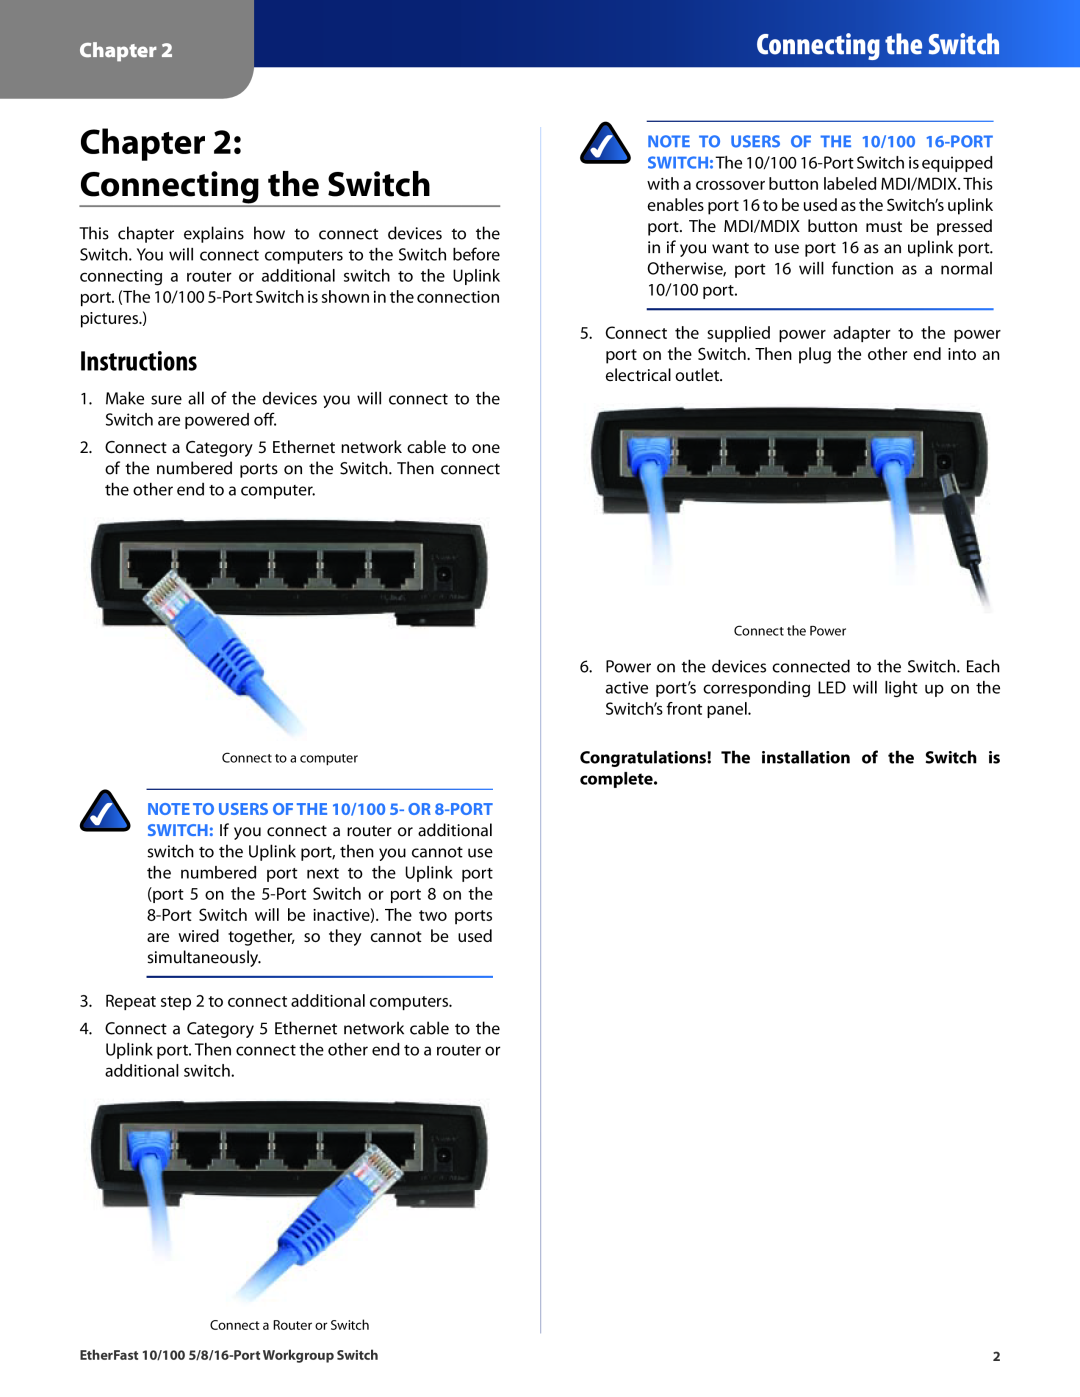
Connecting the Switch
Chapter 2 Connecting the Switch
Instructions
Troubleshooting
Appendix A Troubleshooting
Appendix A
I can’t connect to the Internet
Specifications
Appendix B Specifications
Appendix B
EZXS55W
Warranty Information
Appendix C Warranty Information
Limited Warranty
Obtaining Warranty Service
Please direct all inquiries to Linksys, P.O. Box 18558, Irvine, CA
Technical Support
Appendix D Regulatory Information
Safety Notices
Regulatory Information
FCC Statement
Dansk Danish - Miljøinformation for kunder i EU
La direttiva europea 2002/96/EC richiede che le apparecchiature
Nederlands Dutch - Milieu-informatie voor klanten in de Europese Unie
Svenska Swedish - Miljöinformation för kunder i Europeiska unionen
Suomi Finnish - Ympäristöä koskevia tietoja EU- alueen asiakkaille
Cisco Products
Appendix E Software End User License Agreement
Software Licenses
Software End User License Agreement
ix to the extent permitted under applicable law, assign, sublicense or otherwise transfer the Software unless the prospective assignee, sublicensee or transferee expressly agrees to all the terms and conditions under this Agreement
In addition, Cisco may collect and store detailed information regarding your network configuration and usage for the purpose of providing you technical networking support. The information is associated with you only when you provide a unique ID number to the support representative while you are receiving help. The unique ID is generated randomly on your computer upon installation and is completely under your control
Schedule Open Source and Third Party Licenses
Schedule Network Magic Features
Schedule 3-A
GNU GENERAL PUBLIC LICENSE
TERMS AND CONDITIONS FOR COPYING, DISTRIBUTION AND MODIFICATION
Thus, it is not the intent of this section to claim rights or contest your rights to work written entirely by you rather, the intent is to exercise the right to control the distribution of derivative or collective works based on the Program
END OF SCHEDULE 3-A
NO WARRANTY
Schedule 3-B
The licenses for most software are designed to take away your freedom to share and change it. By contrast, the GNU General Public Licenses are intended to guarantee your freedom to share and change free software-to make sure the software is free for all its users
GNU LESSER GENERAL PUBLIC LICENSE
a The modified work must itself be a software library
Thus, it is not the intent of this section to claim rights or contest your rights to work written entirely by you rather, the intent is to exercise the right to control the distribution of derivative or collective works based on the Library
2 will operate properly with a modified version of the library, if the user installs one, as long as the modified version is interface-compatible with the version that the work was made with
END OF SCHEDULE 3-B
Schedule 3-C OPENSSL LICENSE
Original SSLeay License
OpenSSL License
090206-423423C-AI
END OF SCHEDULE 3-C
Top
Page
Image
Contents