Instruction Manual | SAW FENCE KIT | Model |
|
|
|
Assembly Procedure
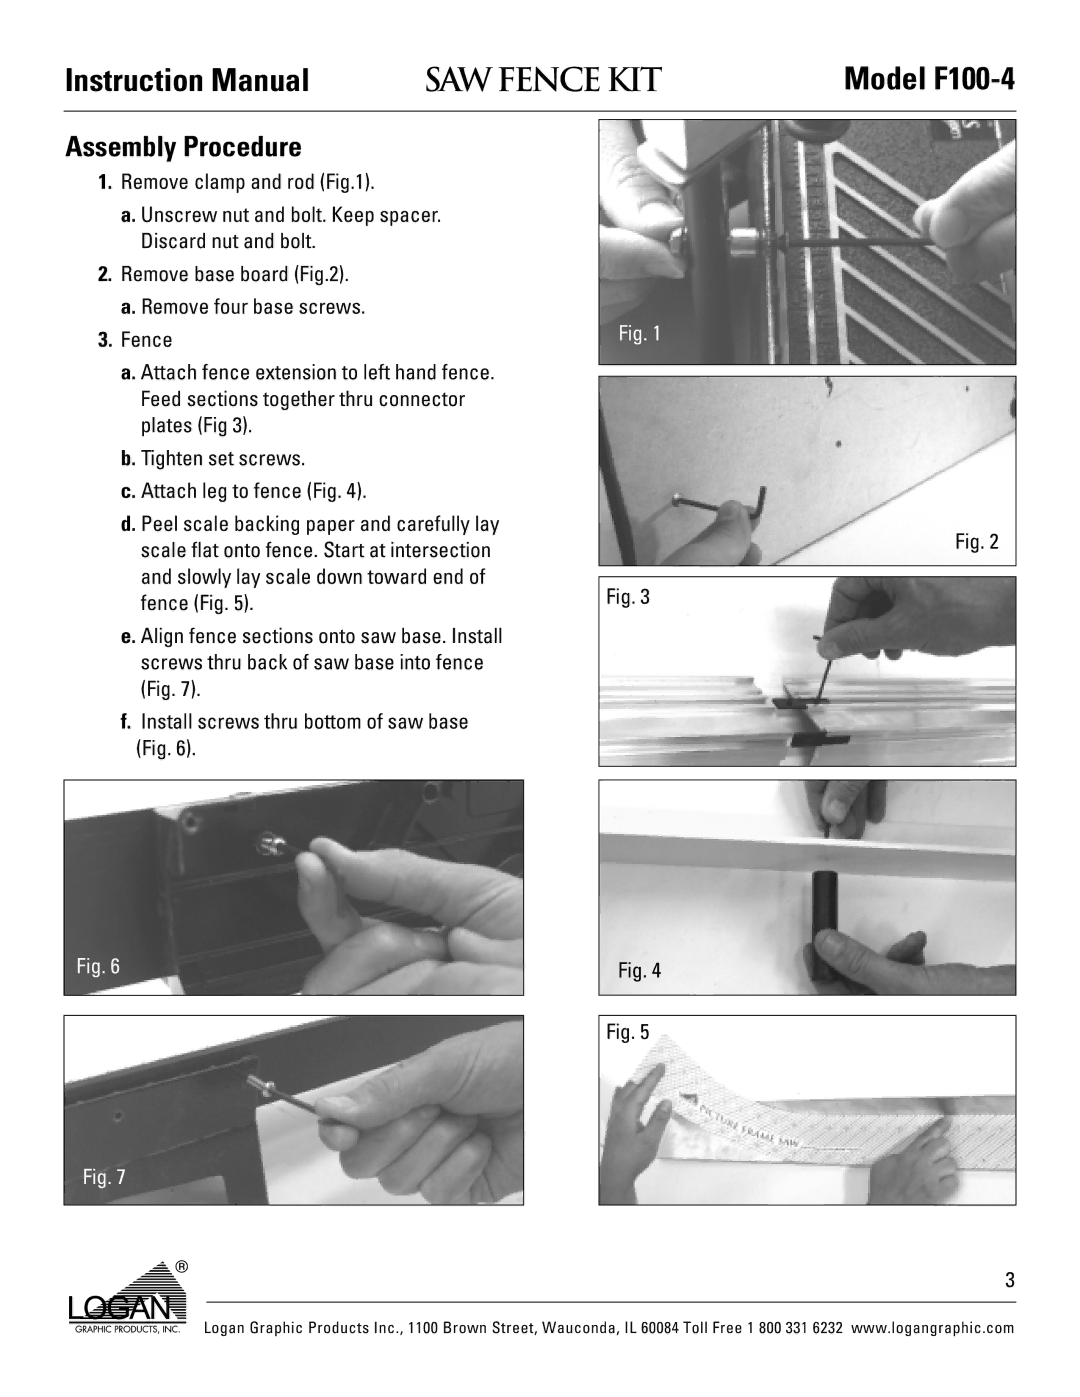
1.Remove clamp and rod (Fig.1).
a.Unscrew nut and bolt. Keep spacer. Discard nut and bolt.
2.Remove base board (Fig.2).
a.Remove four base screws.
3.Fence
a.Attach fence extension to left hand fence. Feed sections together thru connector plates (Fig 3).
b.Tighten set screws.
c.Attach leg to fence (Fig. 4).
d.Peel scale backing paper and carefully lay scale flat onto fence. Start at intersection and slowly lay scale down toward end of fence (Fig. 5).
e.Align fence sections onto saw base. Install screws thru back of saw base into fence (Fig. 7).
f.Install screws thru bottom of saw base (Fig. 6).
Fig. 6
Fig. 7
Fig. 1
Fig. 2
Fig. 3
Fig. 4
Fig. 5
3
Logan Graphic Products Inc., 1100 Brown Street, Wauconda, IL 60084 Toll Free 1 800 331 6232 www.logangraphic.com