Instruction Manual | SAW FENCE KIT | Model |
|
|
|
Operation
A. First Cut
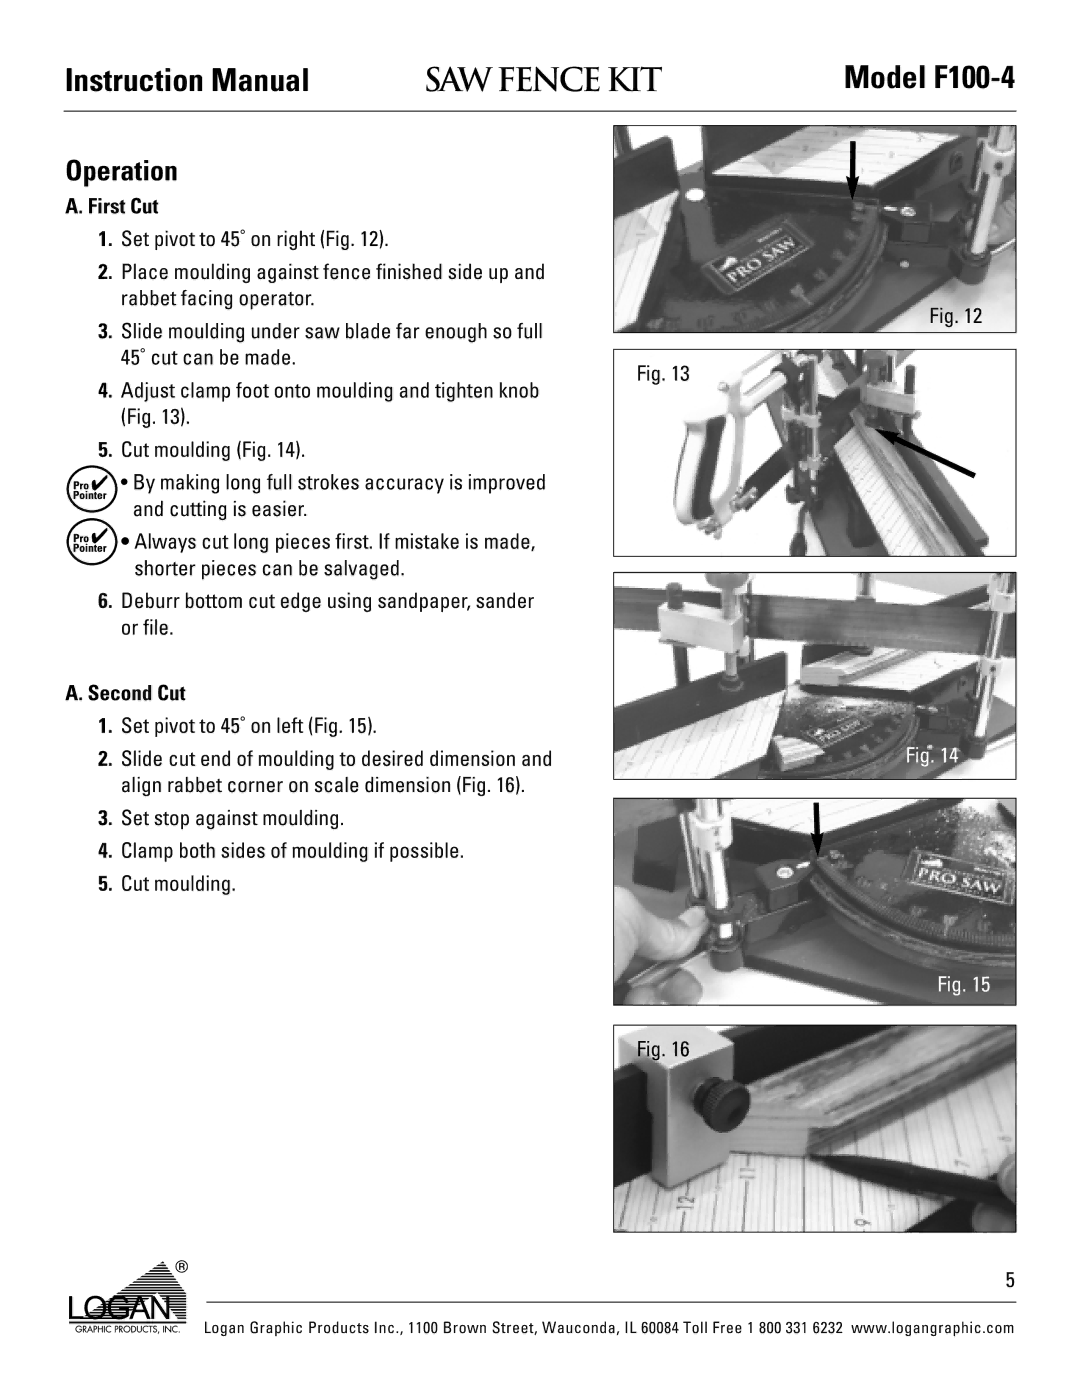
1.Set pivot to 45˚ on right (Fig. 12).
2.Place moulding against fence finished side up and rabbet facing operator.
3.Slide moulding under saw blade far enough so full 45˚ cut can be made.
4.Adjust clamp foot onto moulding and tighten knob (Fig. 13).
5.Cut moulding (Fig. 14).
![]()
![]()
![]() ✔ • By making long full strokes accuracy is improved and cutting is easier.
✔ • By making long full strokes accuracy is improved and cutting is easier.
![]()
![]()
![]() ✔ • Always cut long pieces first. If mistake is made, shorter pieces can be salvaged.
✔ • Always cut long pieces first. If mistake is made, shorter pieces can be salvaged.
6.Deburr bottom cut edge using sandpaper, sander or file.
A. Second Cut
1.Set pivot to 45˚ on left (Fig. 15).
2.Slide cut end of moulding to desired dimension and align rabbet corner on scale dimension (Fig. 16).
3.Set stop against moulding.
4.Clamp both sides of moulding if possible.
5.Cut moulding.
Fig. 12
Fig. 13
Fig. 14
Fig. 15
Fig. 16
5
Logan Graphic Products Inc., 1100 Brown Street, Wauconda, IL 60084 Toll Free 1 800 331 6232 www.logangraphic.com
