1. Package Contents
1 x Color Submersible Night Vision Camera with 100’ Reinforced Video / Power Extension Cable
1 x Mounting Bracket /
Stand
1 x AC Adaptor
1 x BNC to RCA Adaptor
WARNING - REGULATED 12V DC 1000mA power supply is REQUIRED for use with this camera. Use of a
Features:
•IP68 * Rated Weatherproof/Waterproof Camera
•Submersible Up To Depths of 166ft (50m)
•1/3” CCD Image Sensor Ensures Exceptional Picture Quality
•
•IR Night Vision Ensures Vision Even In Zero Light Environments **
•Night Vision Capability - up to 66 ft. (20m) **
*The IP68 Rating ensures complete waterproofing up to 166ft (50m) depth (under pressure). The camera is not designed for use in salt water or water containing chemicals (e.g. swimming pools)
**IR Illumination Range - Not Submersed: 66 ft. (20m) under ideal conditions. Objects at or beyond this range may be partially or completely obscured, depending on the camera application.
IR Illumination Range - Submersed: underwater is approximately 6’ (2m) in clear water not containing particulate, without additional illumination. To extend low light visibility underwater, it is recommended to use a secondary light source (i.e. Floodlighting).
2.Installing the Video Camera
1.Mount the camera stand to the desired mounting surface.
2.Attach the camera to the supplied stand.
3.Run the cable from the Camera to the desired connection device.
BNC (VIDEO) | POWER |
(Yellow Connector) | (Red Connector) |
|
|
|
|
NOTE: CAMERA CONNECTIONS & CABLE - The BNC and Power cable is hardwired into the Camera. Altering this cable (cutting, resizing, etc.) will damage the waterproof rating and will invalidate the camera warranty.
If an additional extension cable is to be used, the connection between the camera cable and extension cable must be waterproofed (if the connection between the cables is under water).
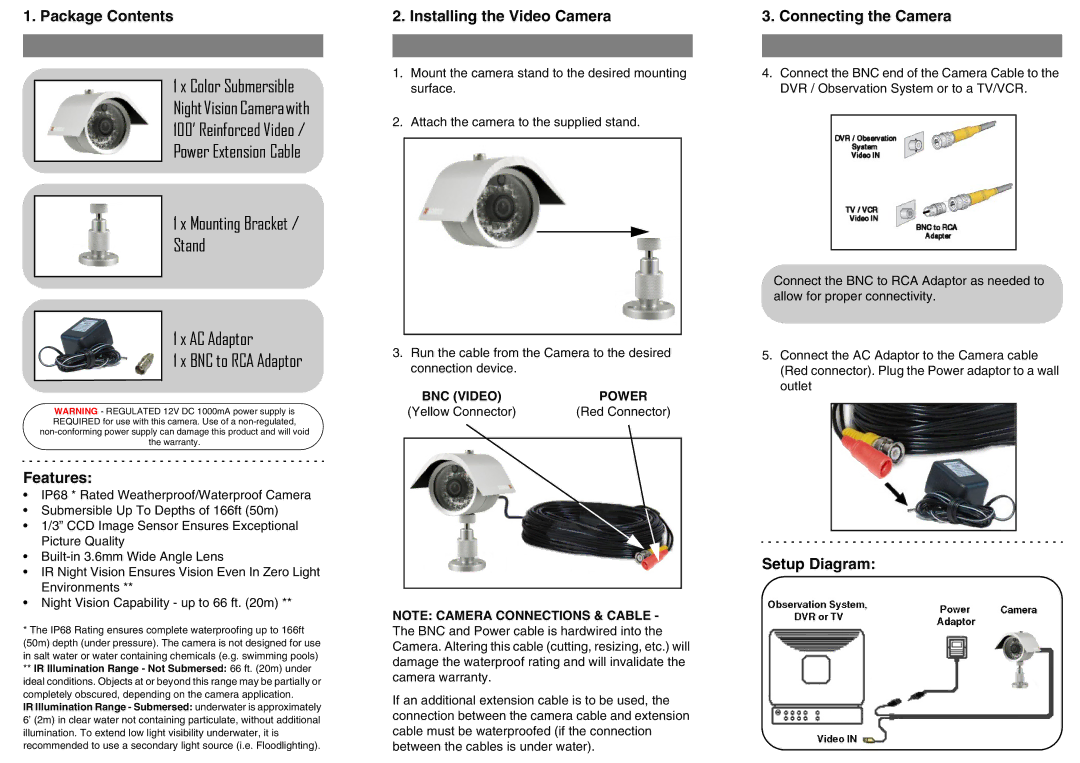
3.Connecting the Camera
4.Connect the BNC end of the Camera Cable to the
DVR / Observation System or to a TV/VCR.
Connect the BNC to RCA Adaptor as needed to allow for proper connectivity.
5.Connect the AC Adaptor to the Camera cable (Red connector). Plug the Power adaptor to a wall outlet