INSTALLATION
Ensure electrical power is not connected to the dome camera and PC system during installation.
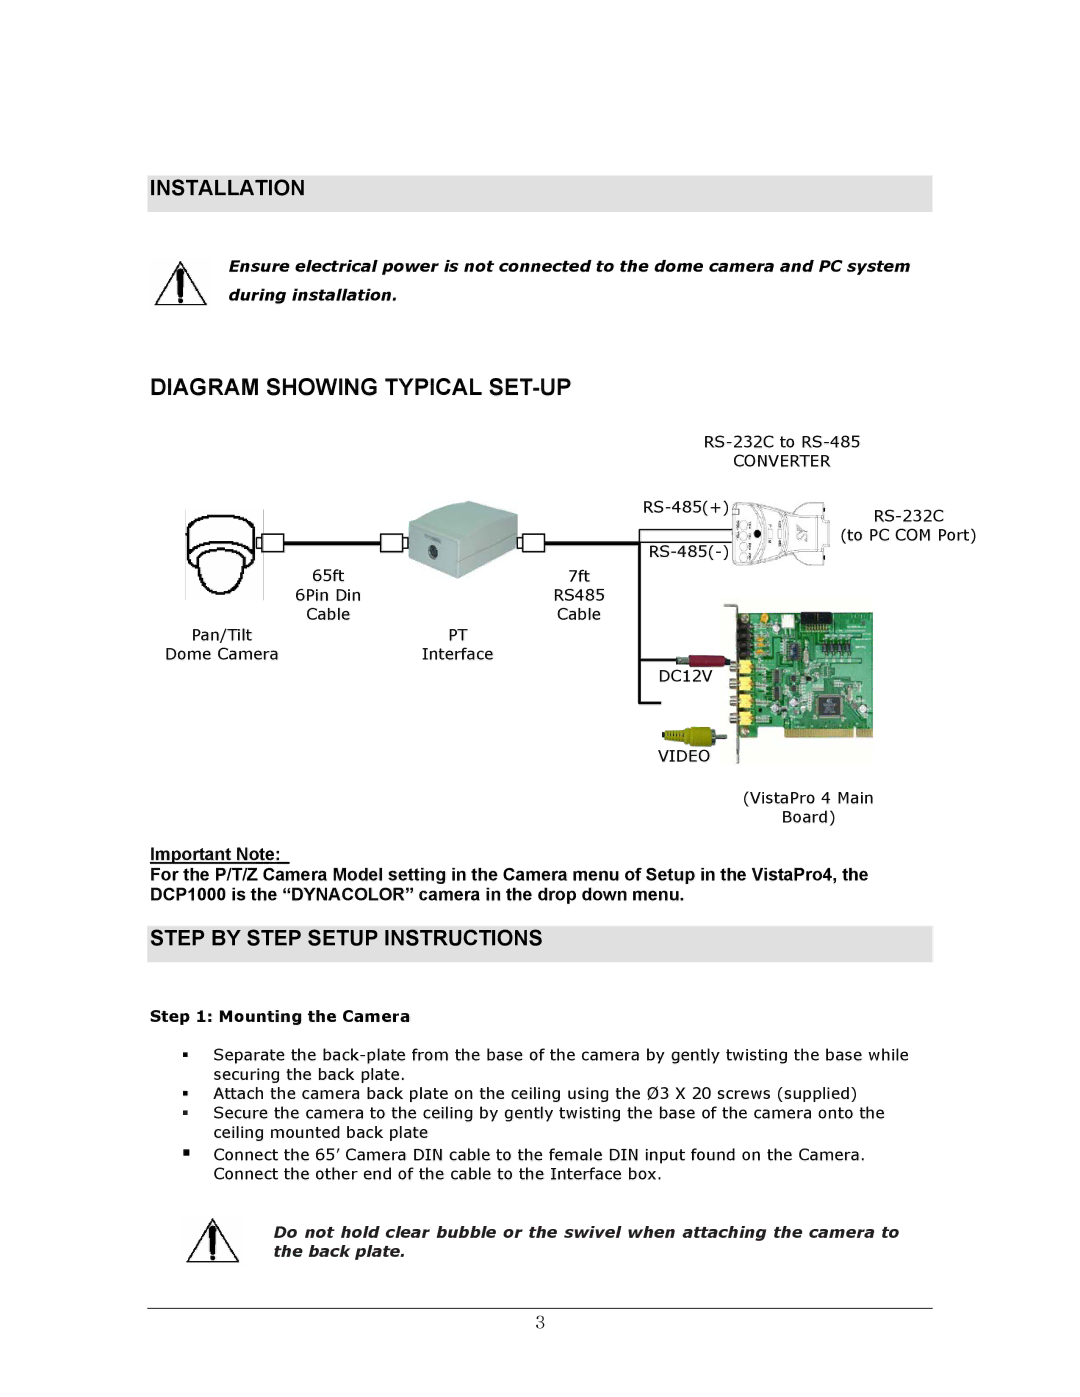
DIAGRAM SHOWING TYPICAL SET-UP
CONVERTER
|
|
|
|
|
|
|
|
|
|
|
|
|
|
|
|
|
|
|
| 65ft |
|
| 7ft |
|
|
|
| 6Pin Din |
|
| RS485 |
|
|
| |||||
|
|
|
| Cable |
|
| Cable |
| Pan/Tilt |
|
| PT | |||
Dome Camera |
|
| Interface | ||||
|
| |
|
| (to PC COM Port) |
|
| |
|
| |
DC12V
VIDEO
(VistaPro 4 Main
Board)
Important Note:
For the P/T/Z Camera Model setting in the Camera menu of Setup in the VistaPro4, the DCP1000 is the “DYNACOLOR” camera in the drop down menu.
STEP BY STEP SETUP INSTRUCTIONS
Step 1: Mounting the Camera
Separate the
Attach the camera back plate on the ceiling using the Ø3 X 20 screws (supplied)
Secure the camera to the ceiling by gently twisting the base of the camera onto the ceiling mounted back plate
Connect the 65’ Camera DIN cable to the female DIN input found on the Camera. Connect the other end of the cable to the Interface box.
Do not hold clear bubble or the swivel when attaching the camera to the back plate.
3