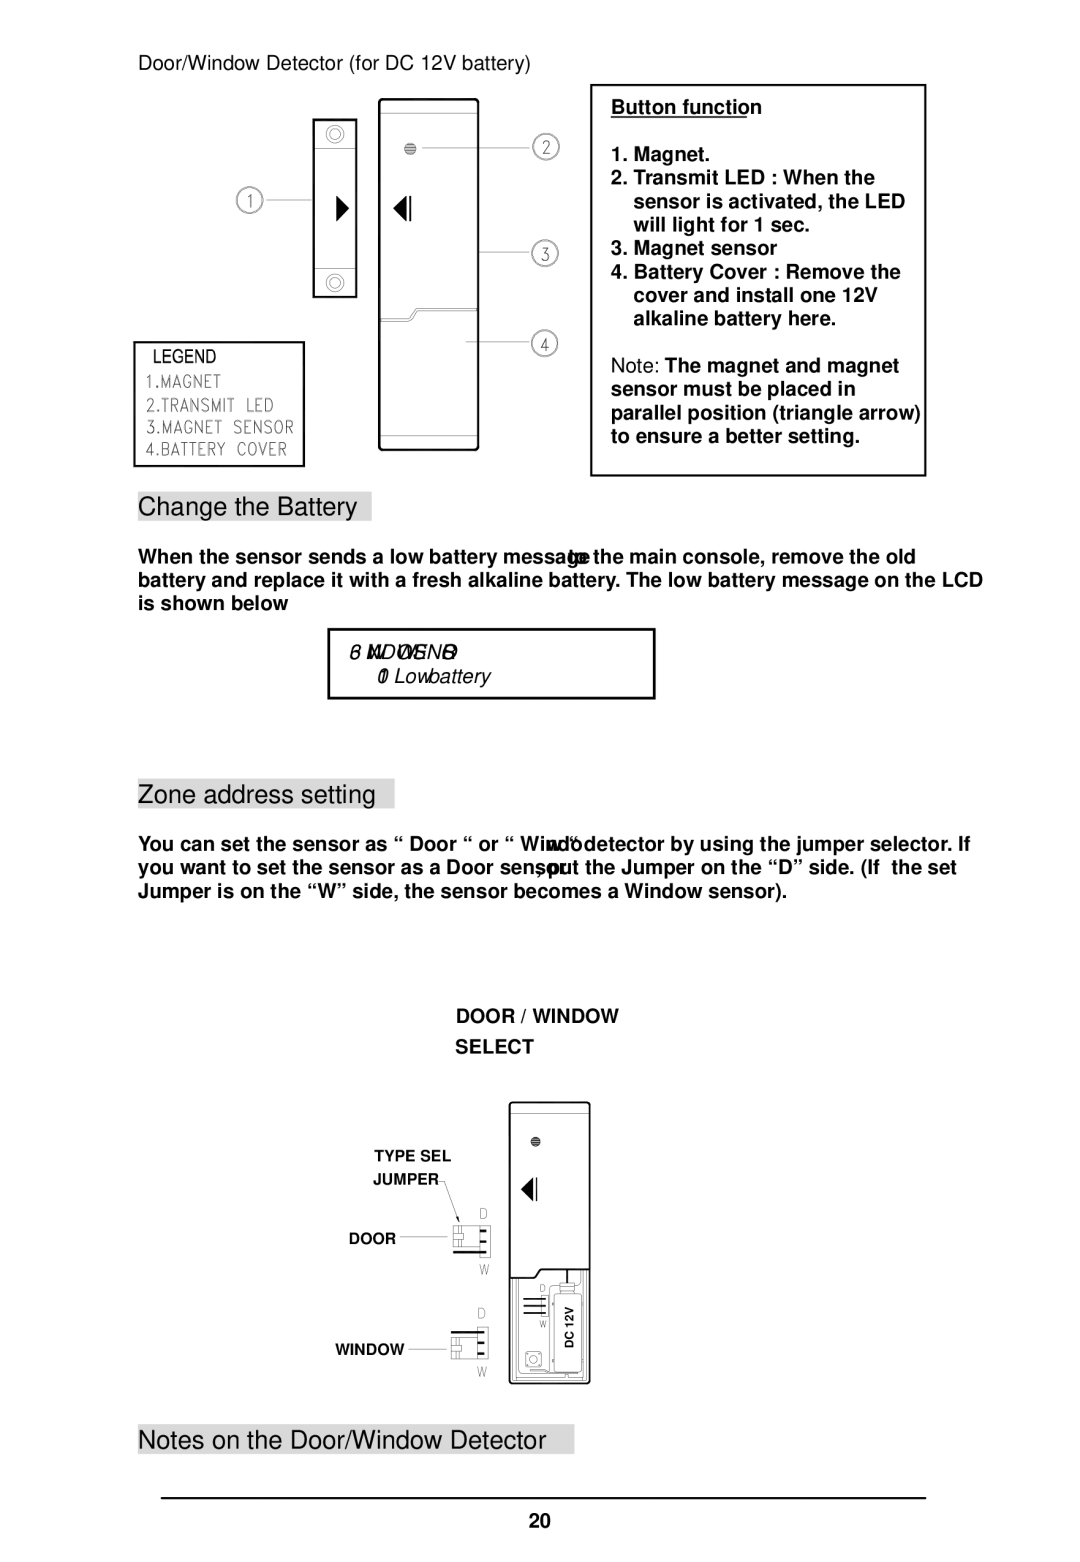
Door/Window Detector (for DC 12V battery)
Button function
1. Magnet.
2. Transmit LED : When the sensor is activated, the LED will light for 1 sec.
3. Magnet sensor
4. Battery Cover : Remove the
cover and install one 12V alkaline battery here.
Note: The magnet and magnet sensor must be placed in parallel position (triangle arrow) to ensure a better setting.
Change the Battery
When the sensor sends a low battery message to the main console, remove the old battery and replace it with a fresh alkaline battery. The low battery message on the LCD is shown below
63 WINDOW SENSOR
01 Low battery
Zone address setting
You can set the sensor as “ Door “ or “ Window “ detector by using the jumper selector. If you want to set the sensor as a Door sensor, put the Jumper on the “D” side. (If the set Jumper is on the “W” side, the sensor becomes a Window sensor).
DOOR / WINDOW SELECT
DOOR / WINDOW SELECT
TYPE S
TYPE SEL
JUMPER
DOOR
WINDOW
DC 12V |
JUMPE
DC 9V | W |
|
Notes on the Door/Window Detector
20
