™
CO2 and
Optical-to-Coaxial
Converter
Ver: CO2 073102
Introduction
Thank you for your purchase of the
Operation
Plug one end of the included power adapter into the CO2's power jack and the other end into a live wall socket or power strip. The power indicator LED on the side of the CO2 will light. Next, choose the CO2's mode of operation by setting the slide switch in the side of the CO2.
NOTE: The CO2's mode switch has been intentionally recessed in order to prevent accidental mode switching. Use a pen or similar object to set the switch position.
The CO2 has three different modes of operation:
●OPTICAL
●
●COAX
After the switch has been set to the desired mode, connect the external S/PDIF devices.
NOTE: While it is usually desirable to set the CO2's mode switch before connecting external equipment, the switch setting may also be changed while external equipment is connected to the CO2. You might, however, hear small bursts of noise while switching - this is normal as it takes a small amount of time for external devices to "lock on" to the S/PDIF data stream after the switching takes place.
Features
●Converts S/PDIF
●"Thru" ports may be used to extend the length of coaxial or optical runs.
●Three selectable modes of operation.
●Optical (Toslink) and RCA (coaxial) inputs and outputs.
●Power indicator LED.
Specifications
●Inputs: 1 Toslink optical and 1 RCA coaxial jack.
●Outputs: 1 Toslink optical and 1 RCA coaxial jack
●Power supply: 9 Volts DC, center pin positive, 300 milliamps.
●Dimensions: 3.5" x 2.3" x 1.2".
●Approximate weight: 7 ounces.
For best results, when using the CO2 RCA jacks, use a
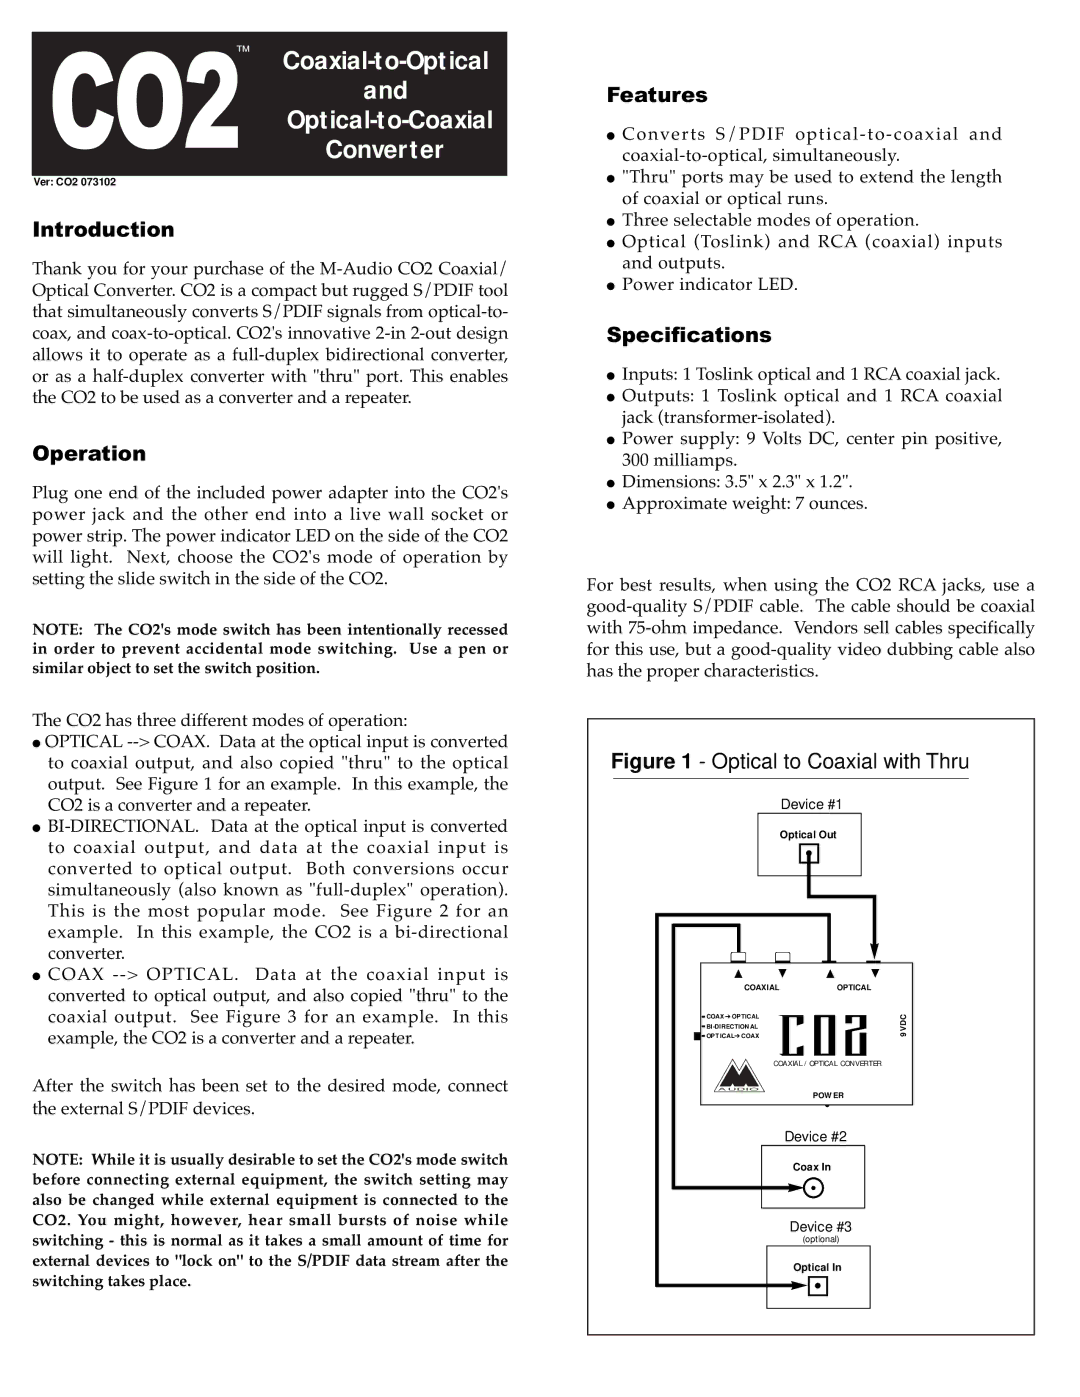
Figure 1 - Optical to Coaxial with Thru | ||||
| Device #1 |
| ||
| Optical Out |
| ||
▲ | ▲ | ▲ | ▲ | |
COAXIAL |
| OPTICAL |
| |
COAX ➔ OPTICAL |
|
| 9VDC | |
|
| |||
OPT ICAL➔ COAX CO2 | ||||
| ||||
COAXIAL /OPTICAL CONVERTER | ||||
AUDIO |
| POWER |
| |
|
|
| ||
| Device #2 |
| ||
|
| Coax In |
| |
|
| Device #3 |
| |
|
| (optional) |
| |
|
| Optical In |
| |