CCZ196comb.QX33 4/6/99 7:05 PM Page 34
34 Rerecording (Tape Duplication)
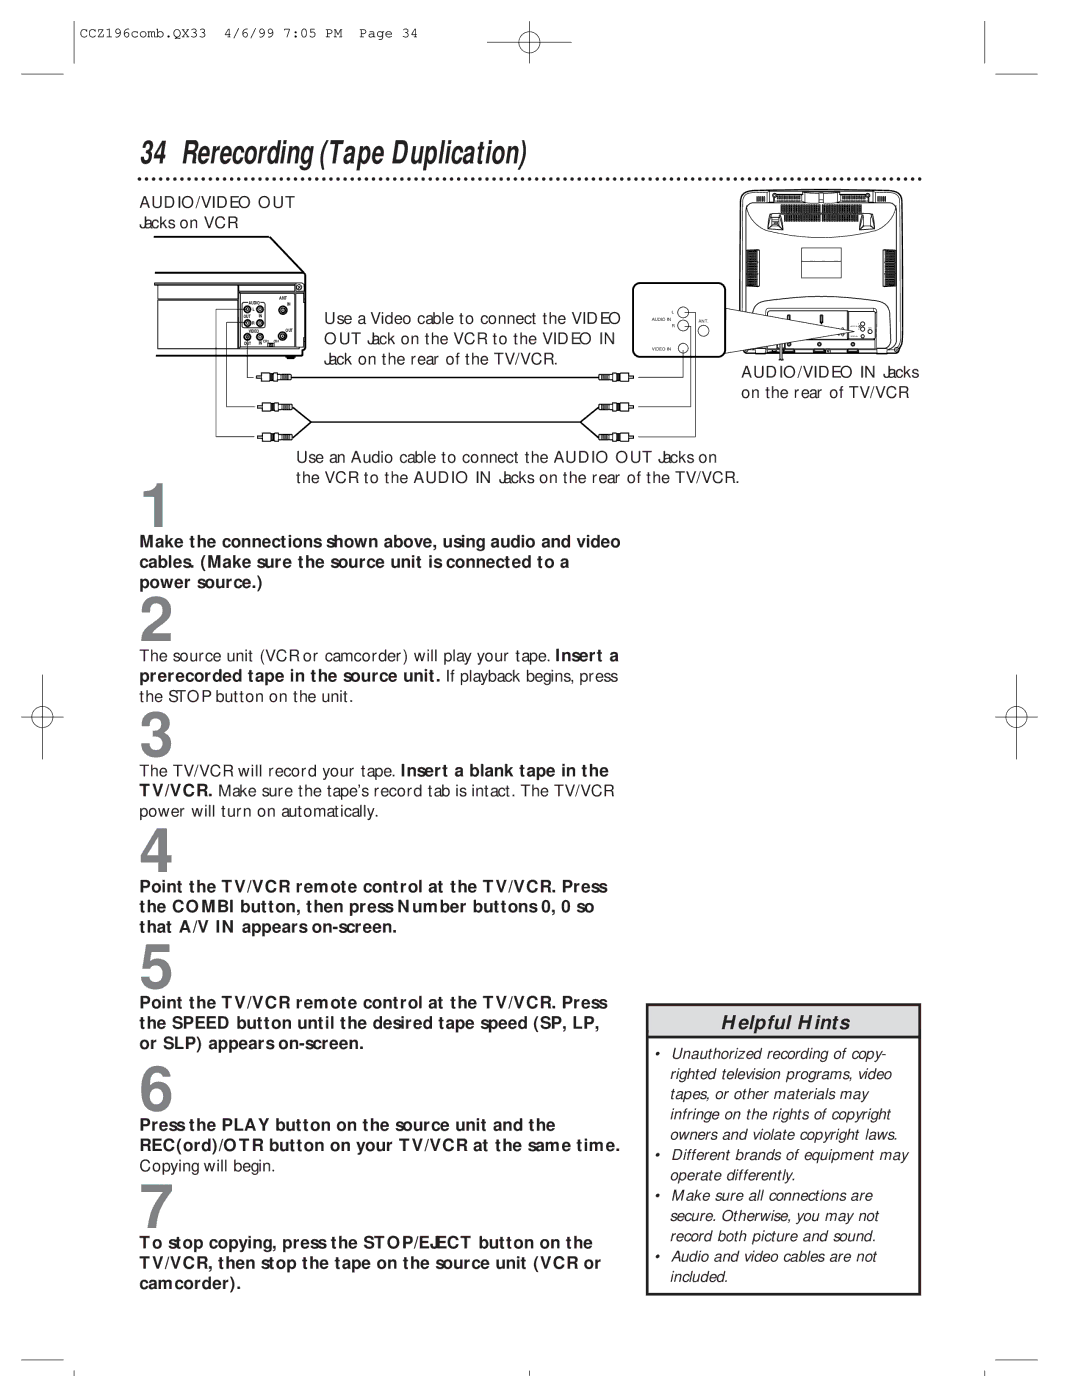
AUDIO/VIDEO OUT
Jacks on VCR
AUDIO |
| ANT | |
| IN | ||
L |
|
| Use a Video cable to connect the VIDEO |
R | IN |
| |
OUT |
|
| |
VIDEO |
| OUT | |
OUT | IN CH3 | CH4 | OUT Jack on the VCR to the VIDEO IN |
|
|
| Jack on the rear of the TV/VCR. |
| L |
AUDIO IN | ANT. |
| R |
VIDEO IN |
|
AUDIO/VIDEO IN Jacks on the rear of TV/VCR
Use an Audio cable to connect the AUDIO OUT Jacks on the VCR to the AUDIO IN Jacks on the rear of the TV/VCR.
1
Make the connections shown above, using audio and video cables. (Make sure the source unit is connected to a power source.)
2
The source unit (VCR or camcorder) will play your tape. Insert a prerecorded tape in the source unit. If playback begins, press the STOP button on the unit.
3
The TV/VCR will record your tape. Insert a blank tape in the TV/VCR. Make sure the tape’s record tab is intact. The TV/VCR power will turn on automatically.
4
Point the TV/VCR remote control at the TV/VCR. Press the COMBI button, then press Number buttons 0, 0 so that A/V IN appears
5
Point the TV/VCR remote control at the TV/VCR. Press the SPEED button until the desired tape speed (SP, LP, or SLP) appears
6
Press the PLAY button on the source unit and the REC(ord)/OTR button on your TV/VCR at the same time. Copying will begin.
7
To stop copying, press the STOP/EJECT button on the TV/VCR, then stop the tape on the source unit (VCR or camcorder).
Helpful Hints
•Unauthorized recording of copy- righted television programs, video tapes, or other materials may infringe on the rights of copyright owners and violate copyright laws.
•Different brands of equipment may operate differently.
•Make sure all connections are secure. Otherwise, you may not record both picture and sound.
