Function Overview
Rear Terminals
1 | 2 |
|
|
| 3 |
L | Y |
| CR/PR COMPONENT VIDEO OUT |
| |
|
|
| COAXIAL |
|
|
R |
|
|
|
|
|
AUDIO | VIDEO | CB/PB | DIGITAL | HDMI OUT | |
| OUT | AUDIO OUT | OUT | ||
|
|
| |||
6 |
| 5 |
| 4 |
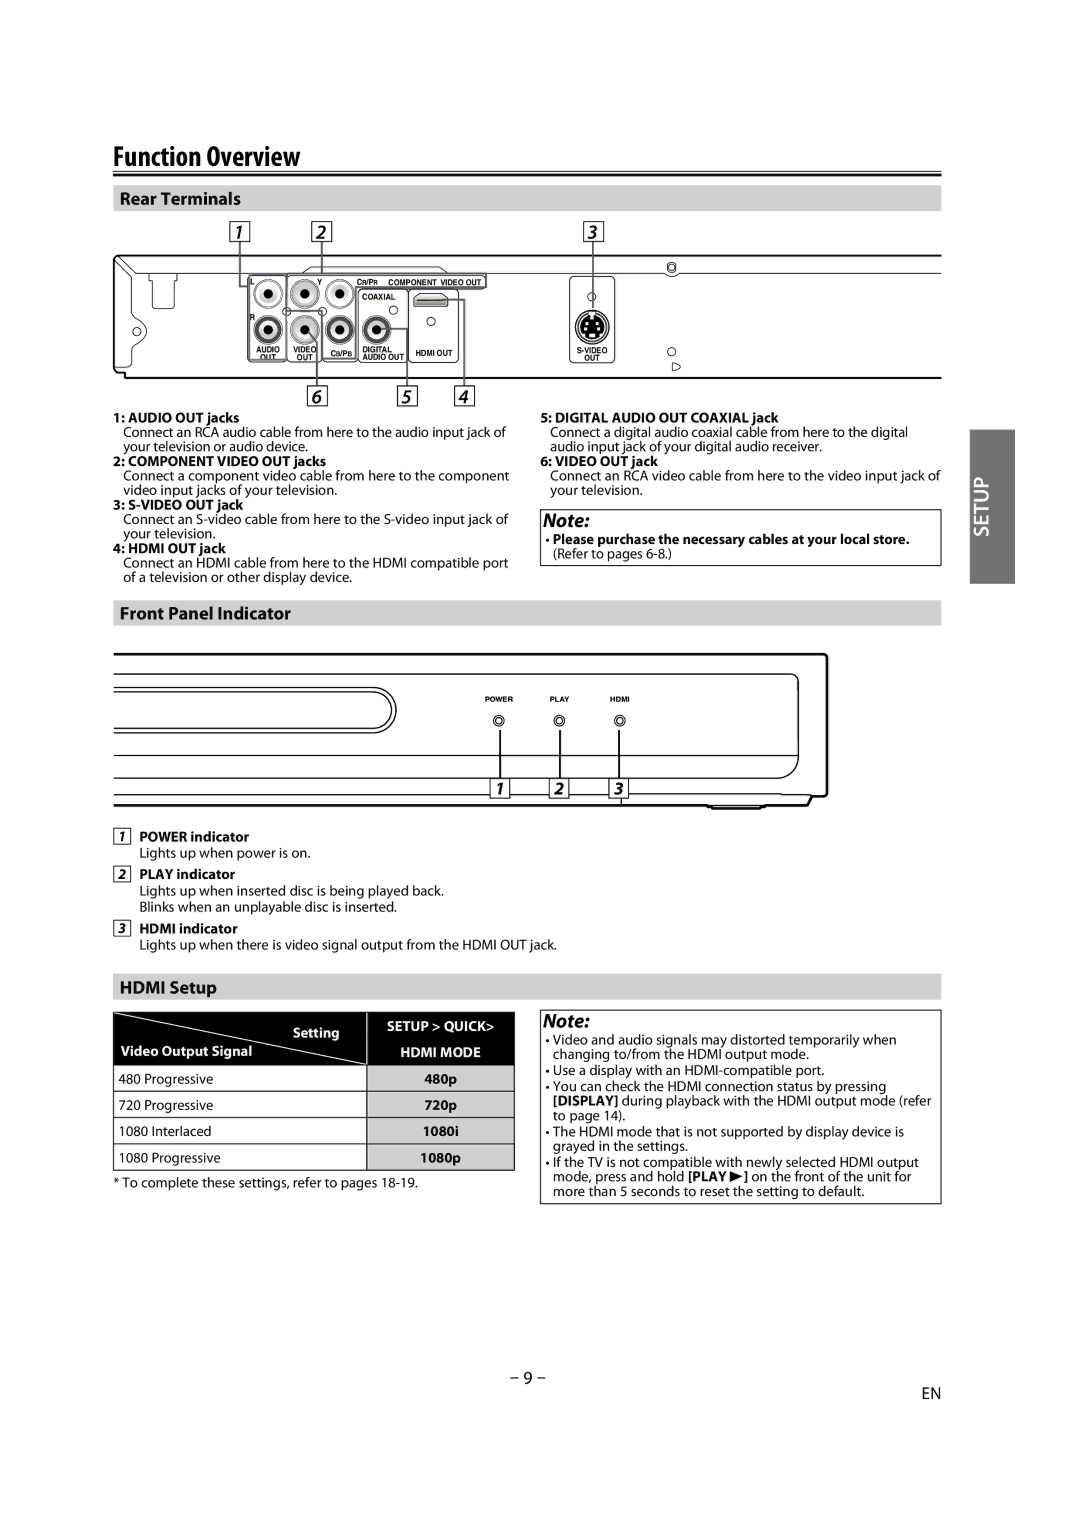
1: AUDIO OUT jacks
Connect an RCA audio cable from here to the audio input jack of your television or audio device.
2: COMPONENT VIDEO OUT jacks
Connect a component video cable from here to the component video input jacks of your television.
3:
Connect an
4: HDMI OUT jack
Connect an HDMI cable from here to the HDMI compatible port of a television or other display device.
5: DIGITAL AUDIO OUT COAXIAL jack
Connect a digital audio coaxial cable from here to the digital audio input jack of your digital audio receiver.
6: VIDEO OUT jack
Connect an RCA video cable from here to the video input jack of your television.
Note:
•Please purchase the necessary cables at your local store. (Refer to pages
SETUP
Front Panel Indicator
POWER PLAY HDMI
1 2 3
1POWER indicator
Lights up when power is on.
2PLAY indicator
Lights up when inserted disc is being played back. Blinks when an unplayable disc is inserted.
3HDMI indicator
Lights up when there is video signal output from the HDMI OUT jack.
HDMI Setup
| Setting | SETUP > QUICK> |
|
| |
Video Output Signal |
| HDMI MODE |
480 Progressive |
| 480p |
720 Progressive | 720p | |
1080 | Interlaced | 1080i |
|
|
|
1080 | Progressive | 1080p |
* To complete these settings, refer to pages
Note:
•Video and audio signals may distorted temporarily when changing to/from the HDMI output mode.
•Use a display with an
•You can check the HDMI connection status by pressing [DISPLAY] during playback with the HDMI output mode (refer to page 14).
•The HDMI mode that is not supported by display device is grayed in the settings.
•If the TV is not compatible with newly selected HDMI output mode, press and hold [PLAY B] on the front of the unit for more than 5 seconds to reset the setting to default.
– 9 –
EN
