Timer Recording (cont’d) 29

4

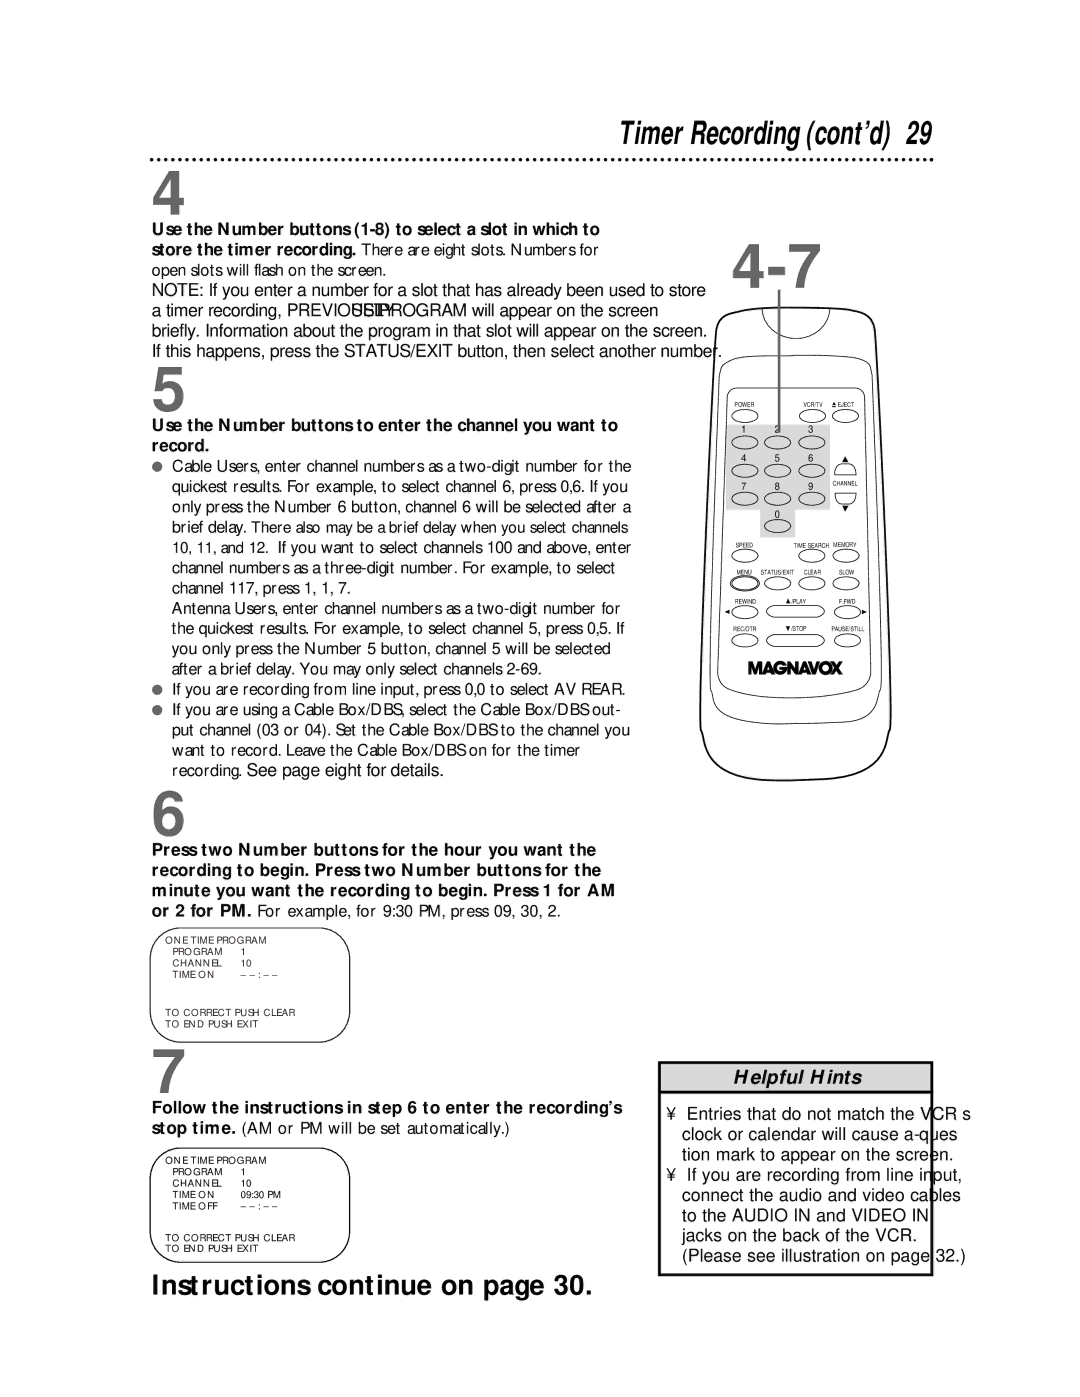
Use the Number buttons (1-8) to select a slot in which to store the timer recording. There are eight slots. Numbers for open slots will flash on the screen.

NOTE: If you enter a number for a slot that has already been used to store a timer recording, PREVIOUSLY SET PROGRAM will appear on the screen briefly. Information about the program in that slot will appear on the screen. If this happens, press the STATUS/EXIT button, then select another number.

5

Use the Number buttons to enter the channel you want to record.

Cable Users, enter channel numbers as a two-digit number for the quickest results. For example, to select channel 6, press 0,6. If you only press the Number 6 button, channel 6 will be selected after a brief delay. There also may be a brief delay when you select channels 10, 11, and 12. If you want to select channels 100 and above, enter channel numbers as a three-digit number. For example, to select channel 117, press 1, 1, 7.

Antenna Users, enter channel numbers as a two-digit number for the quickest results. For example, to select channel 5, press 0,5. If you only press the Number 5 button, channel 5 will be selected after a brief delay. You may only select channels 2-69.

If you are recording from line input, press 0,0 to select AV REAR.

If you are using a Cable Box/DBS, select the Cable Box/DBS out- put channel (03 or 04). Set the Cable Box/DBS to the channel you want to record. Leave the Cable Box/DBS on for the timer recording. See page eight for details.

4-7

POWER


VCR/TV

EJECT

1

2

3


4

5

6


7

8

9

CHANNEL


0


SPEED

TIME SEARCH

MEMORY

MENU

STATUS/EXIT

CLEAR

SLOW

REWIND

/PLAY

F.FWD

REC/OTR

/STOP

PAUSE/STILL

6

Press two Number buttons for the hour you want the recording to begin. Press two Number buttons for the minute you want the recording to begin. Press 1 for AM or 2 for PM. For example, for 9:30 PM, press 09, 30, 2.

ONE TIME PROGRAM

PROGRAM

1

CHANNEL

10

TIME ON

– : – –

TO CORRECT PUSH CLEAR

TO END PUSH EXIT

7

Follow the instructions in step 6 to enter the recording’s stop time. (AM or PM will be set automatically.)

ONE TIME PROGRAM

PROGRAM

1

CHANNEL

10

TIME ON

09:30 PM

TIME OFF

– : – –

TO CORRECT PUSH CLEAR

TO END PUSH EXIT

Instructions continue on page 30.

Helpful Hints

Entries that do not match the VCR’s clock or calendar will cause a ques- tion mark to appear on the screen.

If you are recording from line input, connect the audio and video cables to the AUDIO IN and VIDEO IN jacks on the back of the VCR. (Please see illustration on page 32.)

Page 29
Image 29
Magnavox VR601BMX, VR401BMX owner manual Timer Recording cont’d

VR601BMX, VR401BMX specifications

The Magnavox VR601BMX and VR401BMX are two notable models from the renowned electronics brand Magnavox, catering to enthusiasts looking for quality and performance in the realm of VHS playback and recording. These devices blend classic functionality with modern features, appealing to both retro aficionados and those in need of reliable video playback solutions.

The VR601BMX stands out with its advanced capabilities, including a built-in VCR and DVD player combination. This allows users to enjoy a variety of media formats, transitioning smoothly between VHS tapes and DVDs. The device supports a wide range of playback options, ensuring compatibility with old tapes and newer disc formats alike. One of its most appreciated features is the S-VHS (Super VHS) playback, which offers superior picture quality compared to standard VHS. This makes it an excellent choice for individuals looking to relive cherished memories stored on S-VHS tapes.

Meanwhile, the VR401BMX focuses primarily on VHS playback, delivering dependable performance without the complications of multiple formats. This model emphasizes simplicity and ease of use, making it ideal for those who primarily own VHS collections. The VR401BMX also provides reliable recording features, allowing users to transfer shows from cable or satellite directly onto tapes. This functionality is a boon for those who wish to preserve live broadcasts or favorite programs.

Both models incorporate advanced technologies such as features for noise reduction, which significantly enhances audio and video quality, resulting in a more enjoyable viewing experience. They are designed with user-friendly interfaces, featuring intuitive remote controls and on-screen menus that simplify navigation.

In terms of connectivity, these Magnavox models come equipped with standard AV outputs, making it easy to connect to televisions and audio systems. They also support various recording speeds, giving users the flexibility to choose between extended play for longer recordings or standard play for regular viewing.

Overall, the Magnavox VR601BMX and VR401BMX exemplify a blend of reliability, versatility, and user-centered design. With their impressive features and high-quality performance, these models are perfect for anyone looking to explore the nostalgia of VHS while ensuring compatibility with contemporary media formats. Whether you're archiving old tapes or enjoying classic films, these Magnavox devices deliver a satisfying and seamless experience.