P 2 / 5
 Repair
[1] Removal/Installation of Drill Chuck
When replacing Gear assembly, remove drill chuck beforehand as described below. (It is not necessary to remove Drill chuck when disassembling Housing only.)
REMOVAL
1)After fully opening Chuck jaws, remove the chuck screw (M6x22
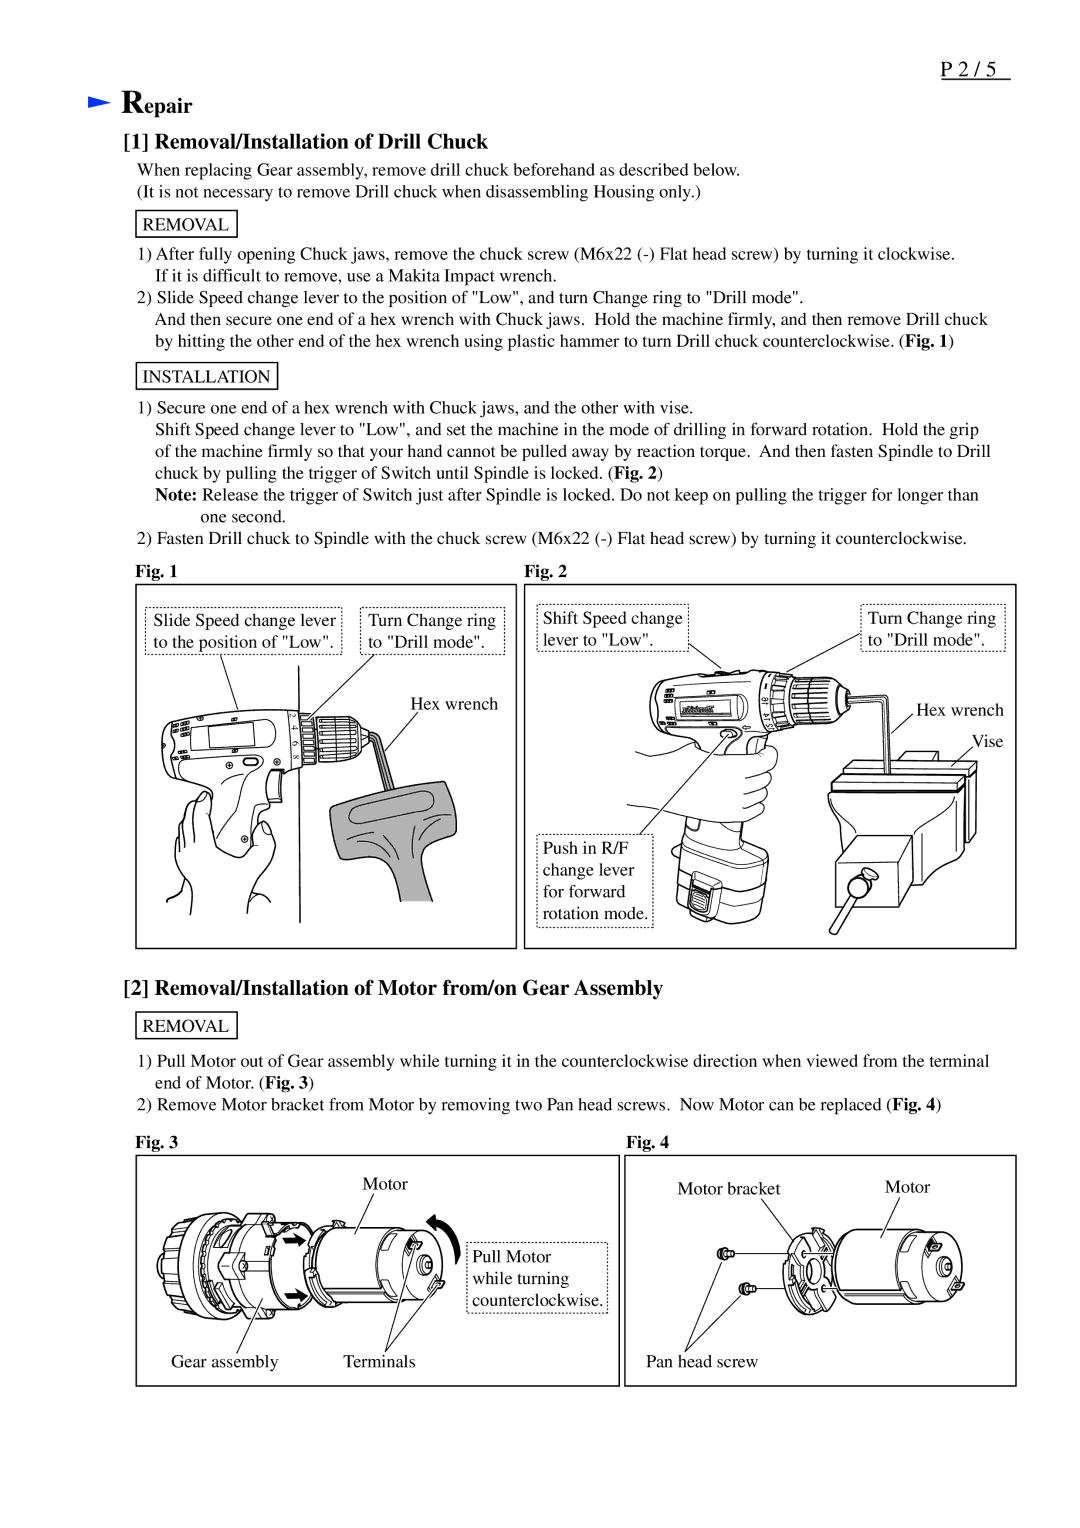
2)Slide Speed change lever to the position of "Low", and turn Change ring to "Drill mode".
And then secure one end of a hex wrench with Chuck jaws. Hold the machine firmly, and then remove Drill chuck by hitting the other end of the hex wrench using plastic hammer to turn Drill chuck counterclockwise. (Fig. 1)
INSTALLATION
1)Secure one end of a hex wrench with Chuck jaws, and the other with vise.
Shift Speed change lever to "Low", and set the machine in the mode of drilling in forward rotation. Hold the grip of the machine firmly so that your hand cannot be pulled away by reaction torque. And then fasten Spindle to Drill chuck by pulling the trigger of Switch until Spindle is locked. (Fig. 2)
Note: Release the trigger of Switch just after Spindle is locked. Do not keep on pulling the trigger for longer than one second.
2)Fasten Drill chuck to Spindle with the chuck screw (M6x22
Fig. 1
Slide Speed change lever | Turn Change ring |
to the position of "Low". | to "Drill mode". |
2 | Hex wrench |
| |
4 |
|
6 |
|
8 |
|
Fig. 2
Shift Speed change | Turn Change ring |
lever to "Low". | to "Drill mode". |
| Hex wrench |
| Vise |
Push in R/F |
|
change lever |
|
for forward |
|
rotation mode. |
|
[2] Removal/Installation of Motor from/on Gear Assembly
REMOVAL
1)Pull Motor out of Gear assembly while turning it in the counterclockwise direction when viewed from the terminal end of Motor. (Fig. 3)
2)Remove Motor bracket from Motor by removing two Pan head screws. Now Motor can be replaced (Fig. 4)
Fig. 3 | Fig. 4 |
| Motor |
| Pull Motor |
| while turning |
| counterclockwise. |
Gear assembly | Terminals |
Motor bracket |
|
|
|
|
| Motor | ||||||||
|
|
|
|
|
|
|
|
|
|
|
|
|
|
|
|
|
|
|
|
|
|
|
|
|
|
|
|
|
|
|
|
|
|
|
|
|
|
|
|
|
|
|
|
|
|
|
|
|
|
|
|
|
|
|
|
|
|
|
|
Pan head screw