P 4/ 5
 Repair
[1] DISASSEMBLING / ASSEMBLING
[1]-3 Wiring of Power supply cord and Lead wires of Scirocco fan
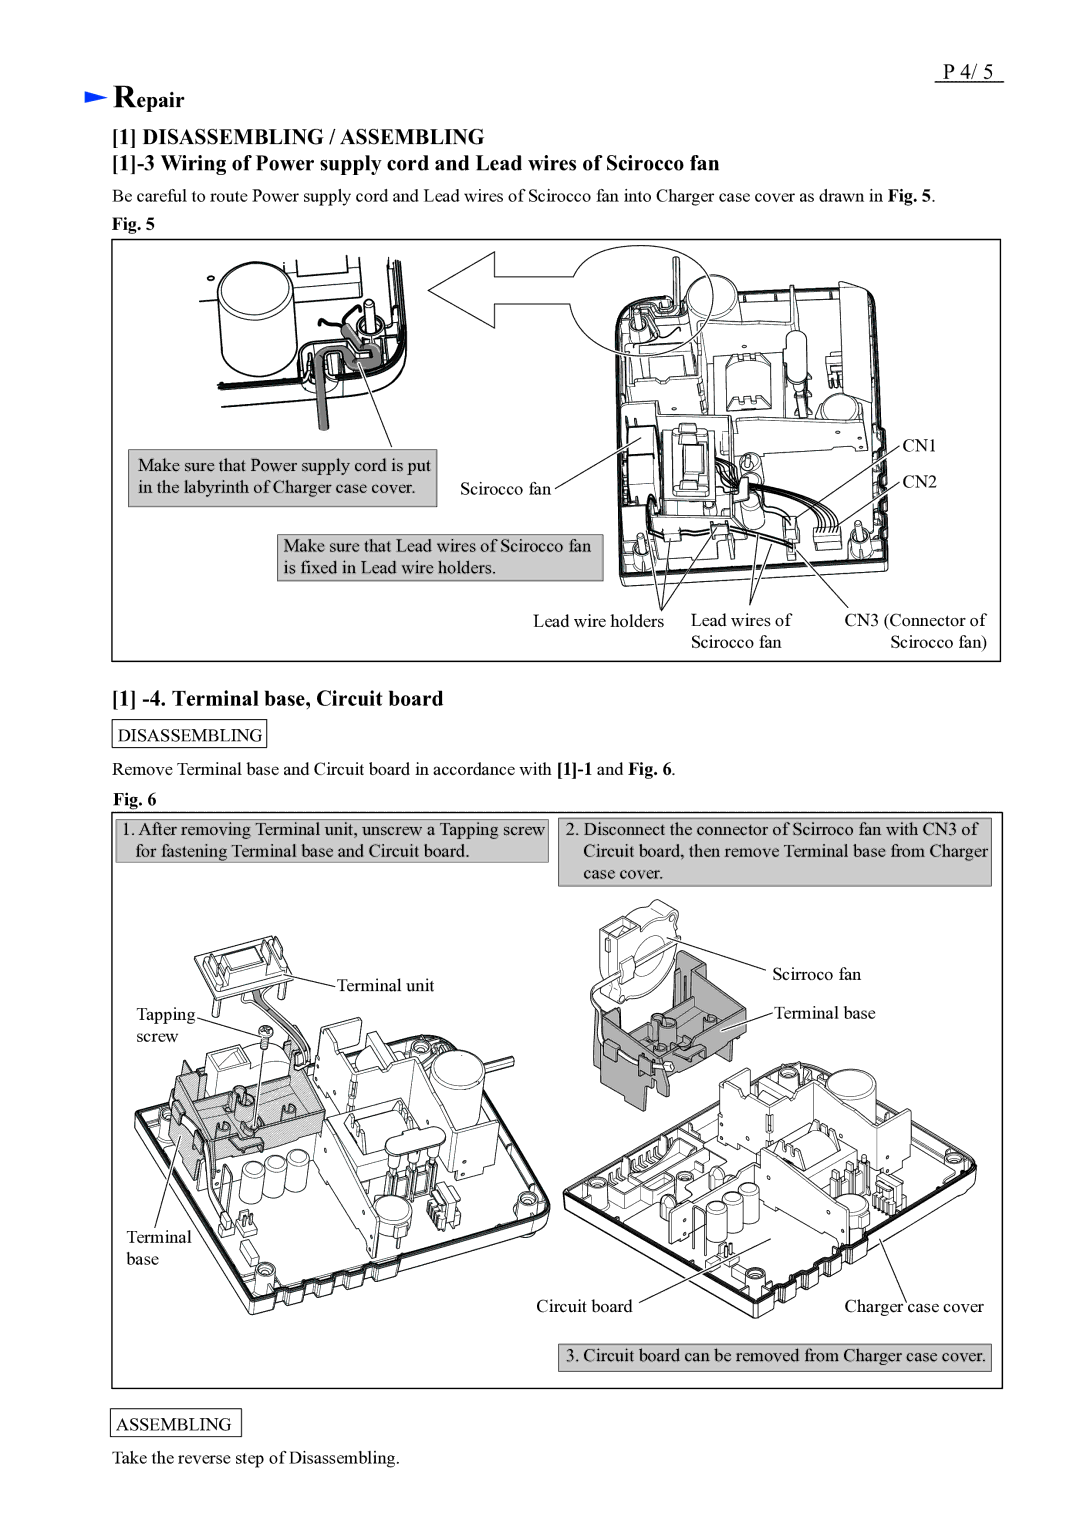
Be careful to route Power supply cord and Lead wires of Scirocco fan into Charger case cover as drawn in Fig. 5.
Fig. 5
Make sure that Power supply cord is put |
|
in the labyrinth of Charger case cover. | Scirocco fan |
Make sure that Lead wires of Scirocco fan is fixed in Lead wire holders.
CN1
CN2
Lead wire holders Lead wires of | CN3 (Connector of |
Scirocco fan | Scirocco fan) |
[1] -4. Terminal base, Circuit board
DISASSEMBLING
Remove Terminal base and Circuit board in accordance with
Fig. 6
1.After removing Terminal unit, unscrew a Tapping screw for fastening Terminal base and Circuit board.
2.Disconnect the connector of Scirroco fan with CN3 of Circuit board, then remove Terminal base from Charger case cover.
![]() Terminal unit
Terminal unit
Tapping screw
![]()
![]()
 Scirroco fan
 ![]()
![]()
![]()
![]()
![]()
![]()
![]() Terminal base
Terminal base
Terminal base
Circuit board
Charger case cover
3. Circuit board can be removed from Charger case cover.
ASSEMBLING
Take the reverse step of Disassembling.