RX8001 User Guide
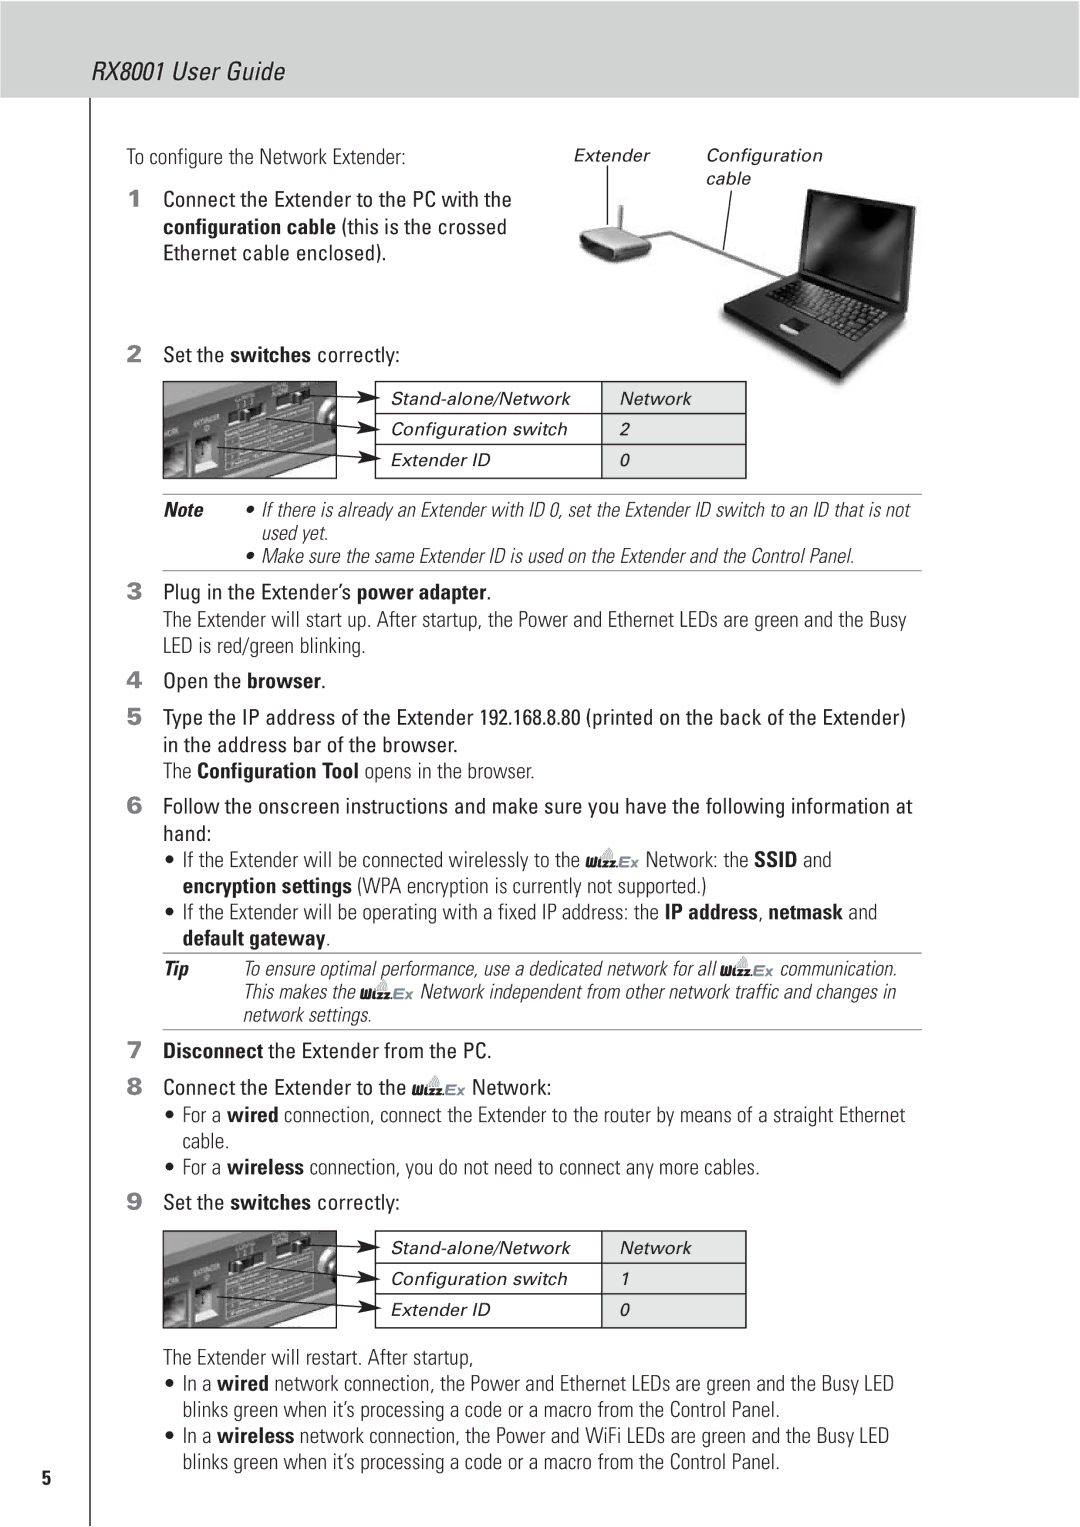
To configure the Network Extender: | Extender | Configuration |
cable
1Connect the Extender to the PC with the configuration cable (this is the crossed Ethernet cable enclosed).
2 Set the switches correctly:
|
| Network |
| |
|
| Configuration switch | 2 |
|
|
| Extender ID | 0 |
|
|
|
|
|
|
|
|
|
|
|
Note • If there is already an Extender with ID 0, set the Extender ID switch to an ID that is not used yet.
• Make sure the same Extender ID is used on the Extender and the Control Panel.
3Plug in the Extender’s power adapter.
The Extender will start up. After startup, the Power and Ethernet LEDs are green and the Busy LED is red/green blinking.
4Open the browser.
5Type the IP address of the Extender 192.168.8.80 (printed on the back of the Extender) in the address bar of the browser.
The Configuration Tool opens in the browser.
6Follow the onscreen instructions and make sure you have the following information at hand:
•If the Extender will be connected wirelessly to the ![]()
![]()
![]()
![]()
![]() Network: the SSID and encryption settings (WPA encryption is currently not supported.)
Network: the SSID and encryption settings (WPA encryption is currently not supported.)
•If the Extender will be operating with a fixed IP address: the IP address, netmask and default gateway.
Tip | To ensure optimal performance, use a dedicated network for all | communication. | |
| This makes the | Network independent from other network traffic and changes in | |
| network settings. |
|
|
|
|
|
|
7Disconnect the Extender from the PC.
8Connect the Extender to the ![]()
![]()
![]()
![]()
![]() Network:
Network:
•For a wired connection, connect the Extender to the router by means of a straight Ethernet cable.
•For a wireless connection, you do not need to connect any more cables.
9Set the switches correctly:
Network | |
Configuration switch | 1 |
Extender ID | 0 |
|
|
The Extender will restart. After startup,
•In a wired network connection, the Power and Ethernet LEDs are green and the Busy LED blinks green when it’s processing a code or a macro from the Control Panel.
•In a wireless network connection, the Power and WiFi LEDs are green and the Busy LED blinks green when it’s processing a code or a macro from the Control Panel.
5
