Manuals
/
Marshall electronic
/
Photography
/
Digital Photo Frame
Marshall electronic
CV340, CV500
manual
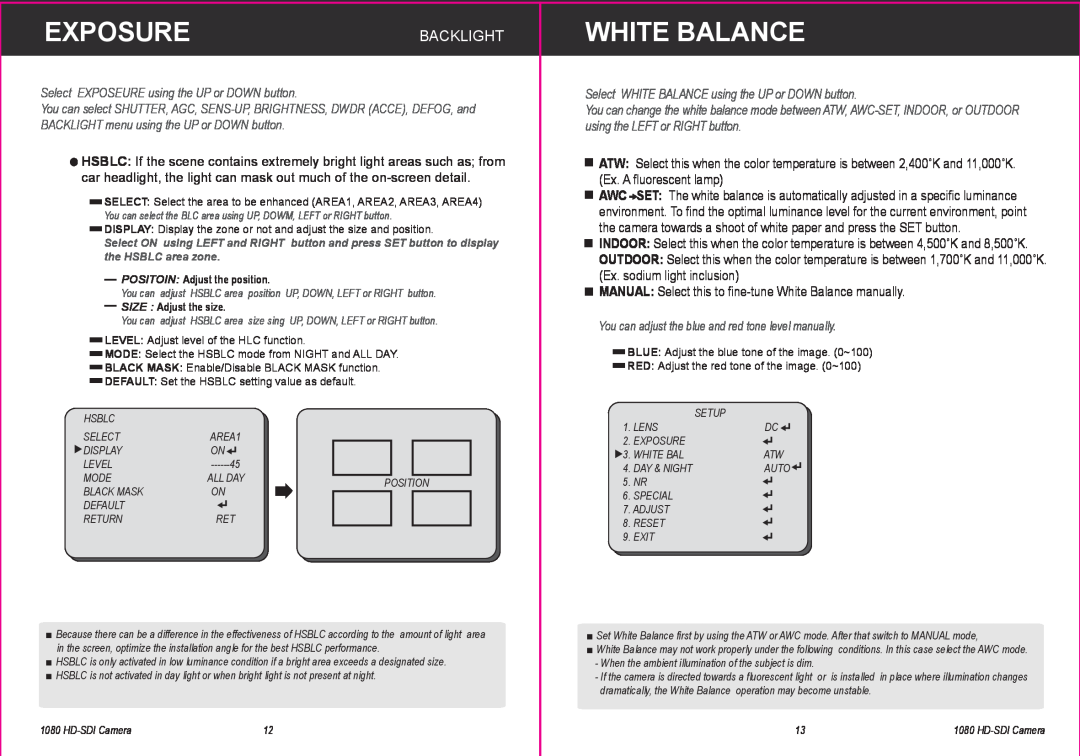
Exposurebacklight, White Balance
Models:
CV340
1
7
14
14
Download
14 pages
0 b
4
5
6
7
8
9
10
11
Troubleshooting
POSITOIN Adjust the position
OFF Disable BACKLIGHT mode
Page 7
Image 7
Page 6
Page 8
Page 7
Image 7
Page 6
Page 8
Contents
CV340 Series CV500 Series
OPERATION GUIDE Models
INFORMATIONMENUFOR USERSTRUCTURE
MENU STRUCTURE
INDOOR Select for indoor installation
LENS
OSD Joystick and Button
MANUAL, VIDEO, DC
LOW Allows automatic gain control from 5.3dB to 20dB
EXPOSURESHUTTER
EXPOSUREAGC
SHUTTER You can adjust the shutter speed of the lens
OFF Deactivates the SENS-UP function
EXPOSURESENS-UP
EXPOSUREBRIGHTNESS
BRIGHTNESS Adjust the screen brightness
BACKLIGHT
EXPOSURE DWDRACCE, DEFOG
OFF Disable BACKLIGHT mode
WHITE BALANCE
EXPOSUREBACKLIGHT
MANUAL Select this to fine-tune White Balance manually
BURST Determines whether to transmit the burst signal or not
DAY & NIGHTCOLOR, B/W
DAY & NIGHTAUTO, EXT
DELAY You can select day/night switching delay time from. 0s ~ 60s
CAM TITLE If you enter a title, the title will appear on the monitor
NR Noise Reduction 2DNR, 3DNR
SPECIALCAM TITLE
LEVEL Adjust noise reduction level
POSITOIN Adjust the position
SPECIALD-EFFECT
SPECIALMOTION
DISPLAY Adjust the size and position of the selected area
PRIVACY Task an area you want to hide on the screen
SPECIALPRIVACY
SPECIALLANGUAGE
DEFAULT Set the PRIVACY setting value as default
LEVEL Level of Auto Dead pixel correction
ADJUSTSHARPNESS
SPECIALDEFECT
LIVE DPC Auto Dead pixel correction
OSD You can adjust style of font
ADJUSTMONITOR
MONITOR Choose the appropriate setting for your monitor
LCD Select this menu item when using an LCD monitor
TROUBLE SHOOTING
RESET
Select RESET using the UP or DOWN button
Top
Page
Image
Contents