
40, 20 specifications
MartinLogan has long been recognized as a leader in the world of high-end audio, and their speakers, particularly the MartinLogan 20 and 40 models, embody the pinnacle of their innovative approach to sound reproduction. These speakers integrate cutting-edge technology with stunning design, ensuring that audio enthusiasts receive an unparalleled listening experience.The MartinLogan 20 is a testament to the brand's commitment to electrostatic speaker technology. One of its standout features is the proprietary, high-performance, foldable electrostatic transducer. This design allows for an extremely fast response time and remarkable clarity in sound reproduction, capturing every nuance of the audio. The speaker also boasts a frequency response that extends from 34 Hz to 20 kHz, ensuring rich, deep bass and crystal-clear highs.
On the other hand, the MartinLogan 40 model enhances this experience with additional features geared toward an even wider sound stage. It incorporates a unique Active Bass Control system, which allows users to adjust low-frequency performance to match their room's acoustics. This adaptability is complemented by a dynamic woofer designed to deliver powerful bass without distortion, even at high volumes.
Both models utilize advanced materials, such as the lightweight and rigid aluminum frame construction, which contributes to a more focused and accurate soundstage. Additionally, they feature advanced crossover networks that seamlessly blend the electrostatic and dynamic drivers, ensuring a cohesive sound that immerses the listener.
The aesthetic appeal of MartinLogan speakers cannot be overlooked. The 20 and 40 models feature elegantly curved cabinets with a striking finish that complements any décor. Beyond their beauty, the speakers are engineered for optimal placement in various environments, including home theaters and dedicated listening spaces.
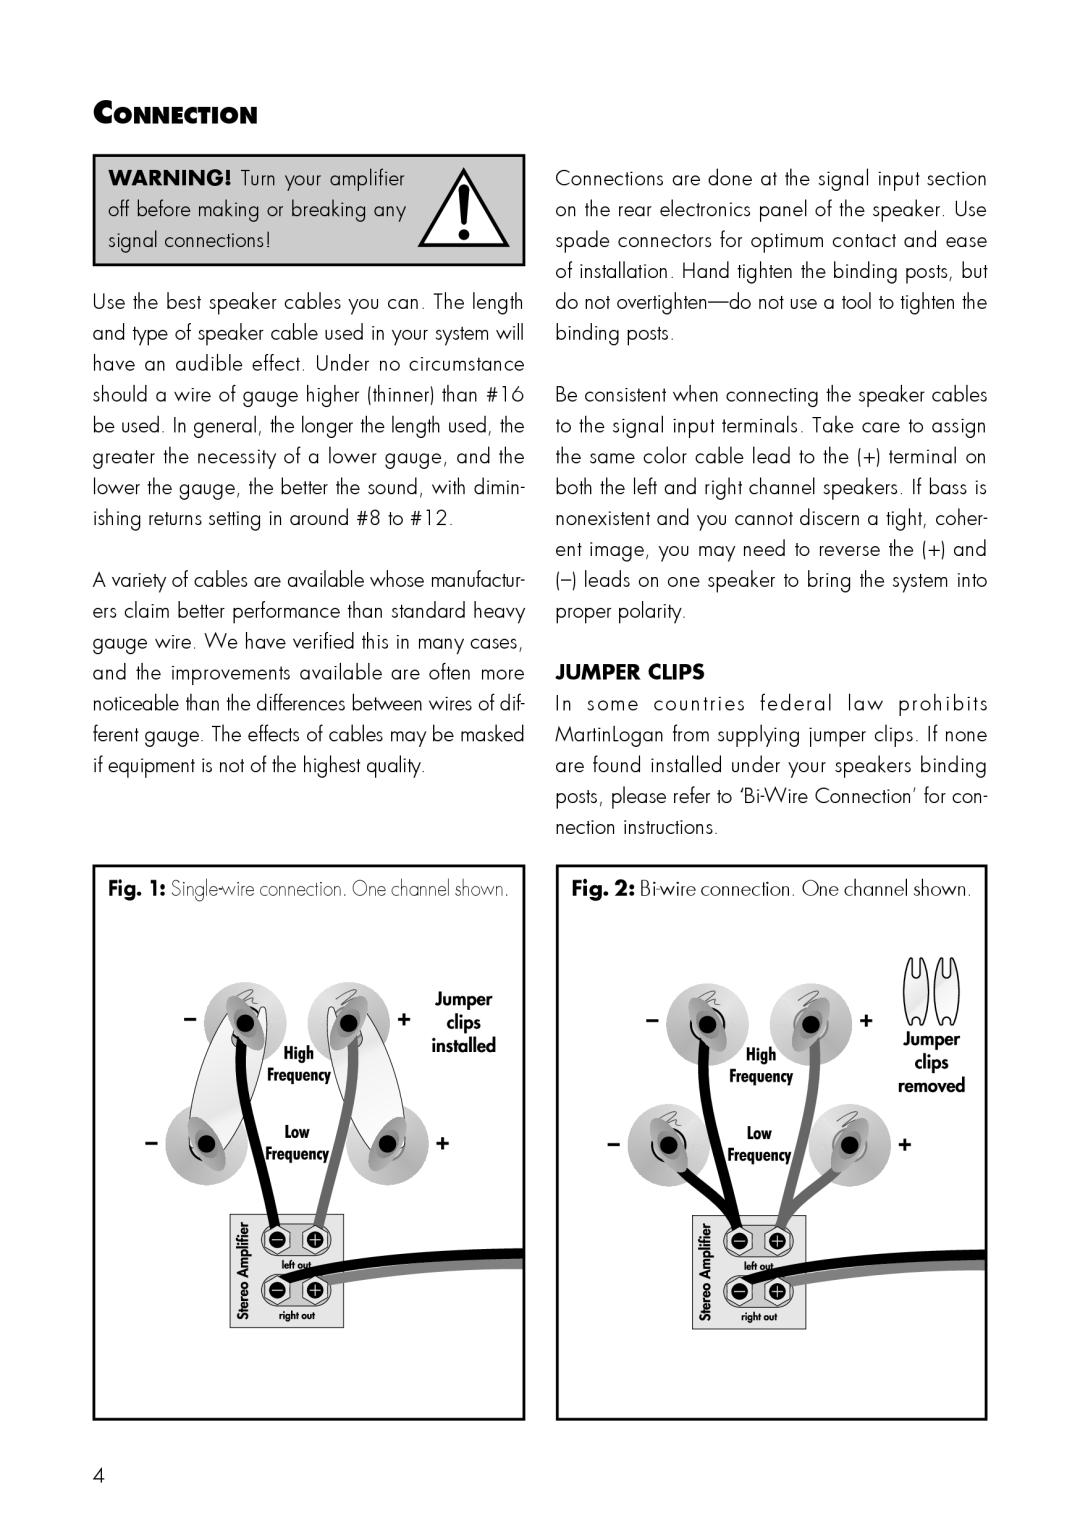
Moreover, the models are equipped with bi-wire capability, allowing audiophiles to use separate cables for the high and low frequencies. This feature enhances the overall performance and offers a level of customization for advanced users.
In conclusion, MartinLogan's 20 and 40 models represent a harmonious fusion of groundbreaking technology and artistic design. With their exceptional sound quality, innovative features, and elegant aesthetics, these speakers are well-suited for discerning audiophiles who demand the best from their audio equipment. Whether for a casual listening session or an immersive cinematic experience, these speakers elevate the auditory journey to new heights.