the motor. It is recommended to have an electrician check the voltage at the saw motor to ensure proper voltage to run the saw efficiently and safely.
SPECIFIC OPERATION GUIDE
1.Ensure that the directional arrow marked on the blade corresponds with the rotational direction of the motor.
2.With the saw disconnected from the power supply, rotate the blade by hand to ensure it is free from obstruction.
3.Always keep the
4.Ensure that the
5.Never try to cut freehand. Always ensure that the tile to be cut is pressed firmly against the rip fence.
6.Ensure that the workpiece that will be cut off has sufficient room to move sideways. Failure to do so may result in the
7.Never cut more than one tile at a time.
8.Never cut pieces too small that are not held securely against the rip fence, and provide enough space for the hand to be a safe distance from the blade.
9.Ensure that the table and surrounding area are clear with the exception of the tile to be cut.
10.Before cutting a tile piece, let the saw blade run freely for a few seconds. If it makes an unfamiliar sound or vibrates excessively, switch it off immediately and disconnect it from the power supply.
11.Let the blade reach full speed before commencing the cut.
12.Let the blade come to a complete stop before removing any jammed material from around the blade area.
13.Never allow the blade to run dry. Failure to keep the water tray at the recommended level will result in possible
SET UP AND OPERATION
![]()
![]() CAUTION
CAUTION
Follow all of the Assembly & Installation Instructions completely before connecting the saw to a power source or turning the motor on.
Carefully open the container and remove all saw components and packing materials. Ensure that you have checked each item with the
exploded view before discarding the container or packing materials. FIGURE 3 The contents of the container are as follows:
• Water Tank | • Blade Guard Support |
• Spanner A | • Blade Guard |
• Spanner B | • Parallel Guide |
• 7 in. (180 mm) | • Angle Gauge |
Continuous Rim |
|
Diamond Blade |
|
The following pages illustrate the
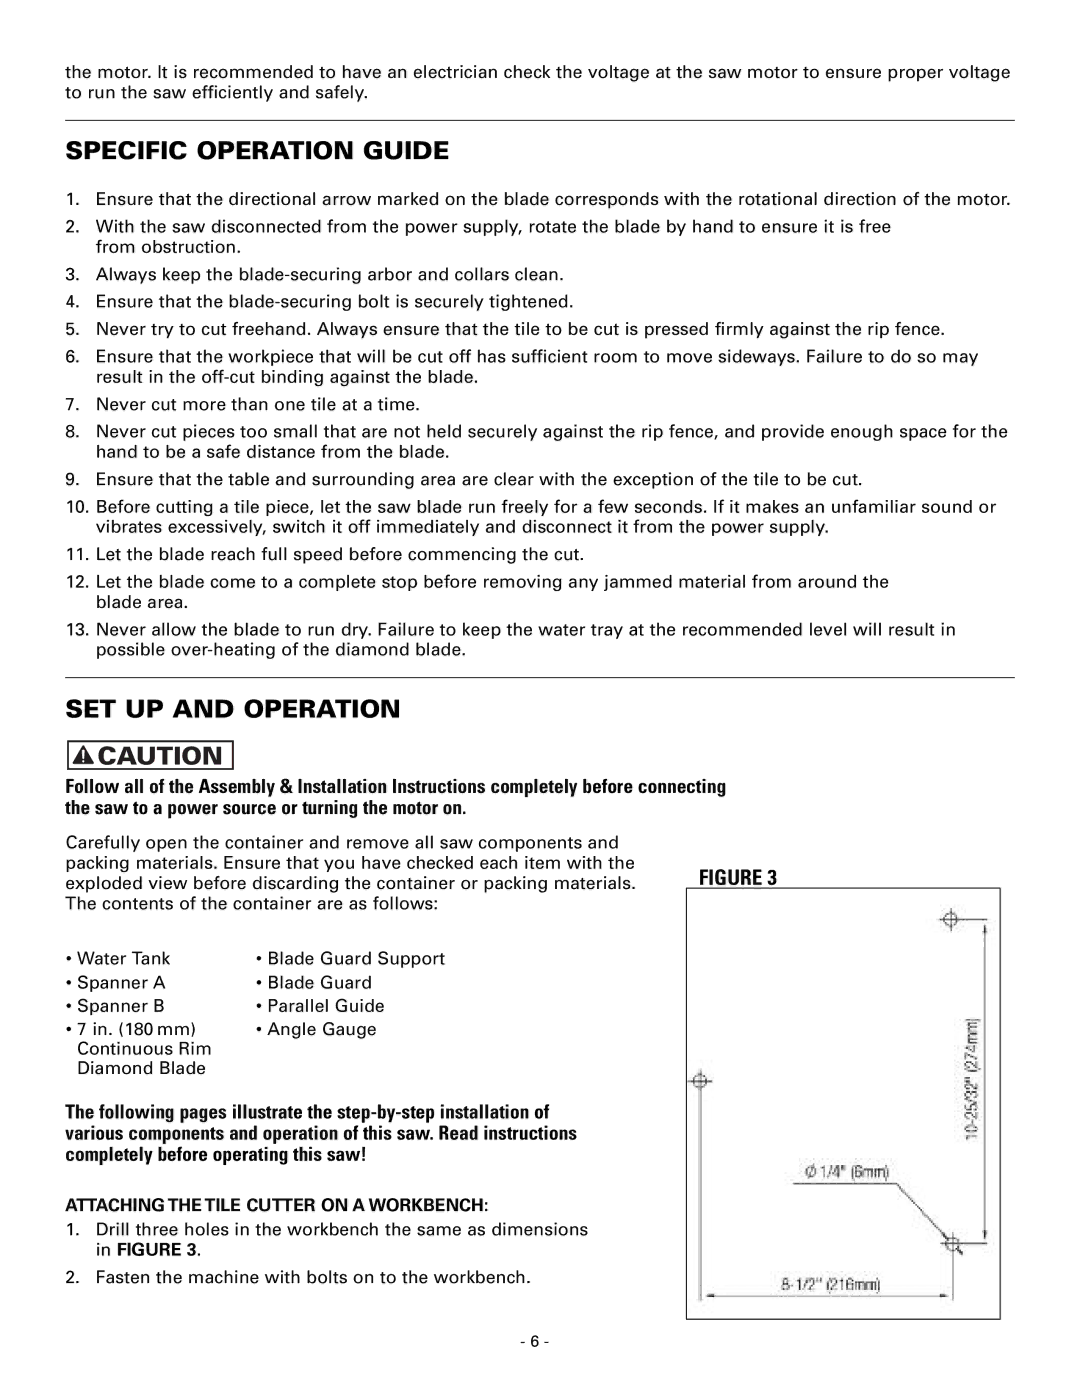
ATTACHING THE TILE CUTTER ON A WORKBENCH:
1.Drill three holes in the workbench the same as dimensions in FIGURE 3.
2.Fasten the machine with bolts on to the workbench.
- 6 -