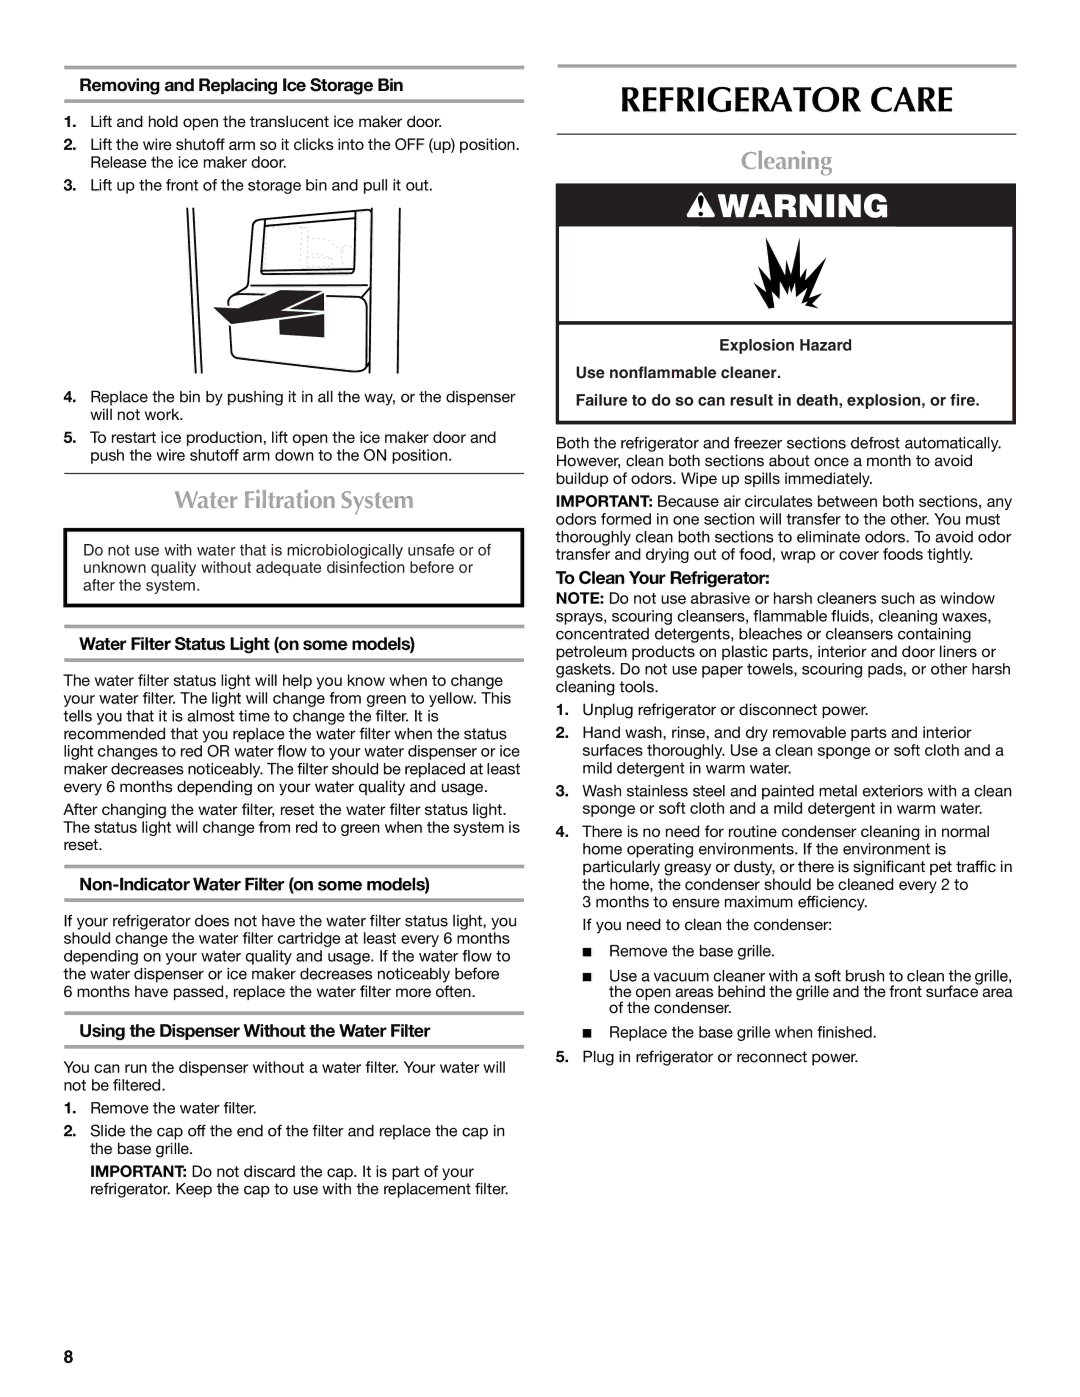
Removing and Replacing Ice Storage Bin

1.Lift and hold open the translucent ice maker door.

2.Lift the wire shutoff arm so it clicks into the OFF (up) position. Release the ice maker door.

3.Lift up the front of the storage bin and pull it out.

4.Replace the bin by pushing it in all the way, or the dispenser will not work.

5.To restart ice production, lift open the ice maker door and push the wire shutoff arm down to the ON position.

Water Filtration System

Do not use with water that is microbiologically unsafe or of unknown quality without adequate disinfection before or after the system.

Water Filter Status Light (on some models)

The water filter status light will help you know when to change your water filter. The light will change from green to yellow. This tells you that it is almost time to change the filter. It is recommended that you replace the water filter when the status light changes to red OR water flow to your water dispenser or ice maker decreases noticeably. The filter should be replaced at least every 6 months depending on your water quality and usage.

After changing the water filter, reset the water filter status light. The status light will change from red to green when the system is reset.

Non-Indicator Water Filter (on some models)

If your refrigerator does not have the water filter status light, you should change the water filter cartridge at least every 6 months depending on your water quality and usage. If the water flow to the water dispenser or ice maker decreases noticeably before 6 months have passed, replace the water filter more often.

Using the Dispenser Without the Water Filter

You can run the dispenser without a water filter. Your water will not be filtered.

1.Remove the water filter.

2.Slide the cap off the end of the filter and replace the cap in the base grille.

IMPORTANT: Do not discard the cap. It is part of your refrigerator. Keep the cap to use with the replacement filter.

REFRIGERATOR CARE

Cleaning

WARNING

Explosion Hazard

Use nonflammable cleaner.

Failure to do so can result in death, explosion, or fire.

Both the refrigerator and freezer sections defrost automatically. However, clean both sections about once a month to avoid buildup of odors. Wipe up spills immediately.

IMPORTANT: Because air circulates between both sections, any odors formed in one section will transfer to the other. You must thoroughly clean both sections to eliminate odors. To avoid odor transfer and drying out of food, wrap or cover foods tightly.

To Clean Your Refrigerator:

NOTE: Do not use abrasive or harsh cleaners such as window sprays, scouring cleansers, flammable fluids, cleaning waxes, concentrated detergents, bleaches or cleansers containing petroleum products on plastic parts, interior and door liners or gaskets. Do not use paper towels, scouring pads, or other harsh cleaning tools.

1.Unplug refrigerator or disconnect power.

2.Hand wash, rinse, and dry removable parts and interior surfaces thoroughly. Use a clean sponge or soft cloth and a mild detergent in warm water.

3.Wash stainless steel and painted metal exteriors with a clean sponge or soft cloth and a mild detergent in warm water.

4.There is no need for routine condenser cleaning in normal home operating environments. If the environment is particularly greasy or dusty, or there is significant pet traffic in the home, the condenser should be cleaned every 2 to

3 months to ensure maximum efficiency. If you need to clean the condenser:

Remove the base grille.

Use a vacuum cleaner with a soft brush to clean the grille, the open areas behind the grille and the front surface area of the condenser.

Replace the base grille when finished.

5.Plug in refrigerator or reconnect power.

8

Page 8
Image 8
Maytag W10214491A, W10214490A installation instructions Refrigerator Care, Water Filtration System, Cleaning

W10214490A, W10214491A specifications

The Maytag W10214491A and W10214490A are pivotal components designed to enhance the functionality and efficiency of various Maytag appliances. These parts, which primarily serve as replacement components for dishwashers, are engineered for durability, performance, and ease of installation, making them essential for maintaining the optimal operation of your home appliance.

The W10214491A is a high-quality dishwasher door latch. This essential part ensures the dishwasher door securely closes, preventing leaks and ensuring safe operation during cycles. Its robust construction stands up to the rigors of daily use, while the exact fit and design help maintain the dishwasher's overall performance. The door latch is crafted from premium materials resistant to wear and tear, providing long-lasting reliability.

On the other hand, the W10214490A is a compatible replacement part for the door latch assembly. It integrates seamlessly with various Maytag dishwasher models, ensuring a secure and proper fit that facilitates optimal door function. This unit is designed with user-friendly installation in mind, often requiring just a few tools and minimal technical skills. By using this part, homeowners can avoid the costs associated with professional repairs while enjoying the satisfaction of performing their repair work.

Both models reinforce Maytag's commitment to superior engineering. These products embody the brand's focus on quality, ensuring that every appliance part is built to last. An important characteristic of these parts is their compatibility with a range of Maytag dishwashers, allowing for versatility in repair options. This adaptability is crucial for appliance owners looking to maintain reliability without investing in a new unit.

In addition to their functional benefits, these parts reflect Maytag's dedication to energy efficiency and sustainable practices. By prolonging the life of existing appliances through high-quality replacements, you contribute to reducing waste and energy consumption, promoting an eco-friendly approach to home maintenance.

In conclusion, the Maytag W10214491A and W10214490A represent quality and reliability in appliance repair. With features designed for durability, easy installation, and compatibility with various models, these components are vital for homeowners seeking to maintain their dishwashers efficiently. Investing in these parts not only ensures appliances run smoothly but also promotes a sustainable approach to appliance ownership.